Users and Catchments
Guide for creating Users and Catchments
How to guide: Creating Users and Catchments from the Avni web-app
To access the features of the Avni app, users need to have a unique username and password to log in to the app and perform the activities as and when required. These login credentials can be created through Avni web-app where certain permission can be provided to each unique user as per the area of work and authority to access the data generated in the app.
Prerequisites before creating the users:
The following items must be configured in the web app before proceeding with the user creation process.
- Location Hierarchy, Locations (Refer to this guide [TO BE ADDED])
- Languages
- User Groups (Refer to this guide)
- Catchments
Creating Catchments:
A catchment is a group of locations that are serviced by a user i.e. the locations that a user works in. Only data captured against the locations within the catchments assigned to the user are synced to the android app of the user. The following steps can be followed to create catchments in the web app:
- Navigate to the admin console

- Click on the catchments and create a catchment
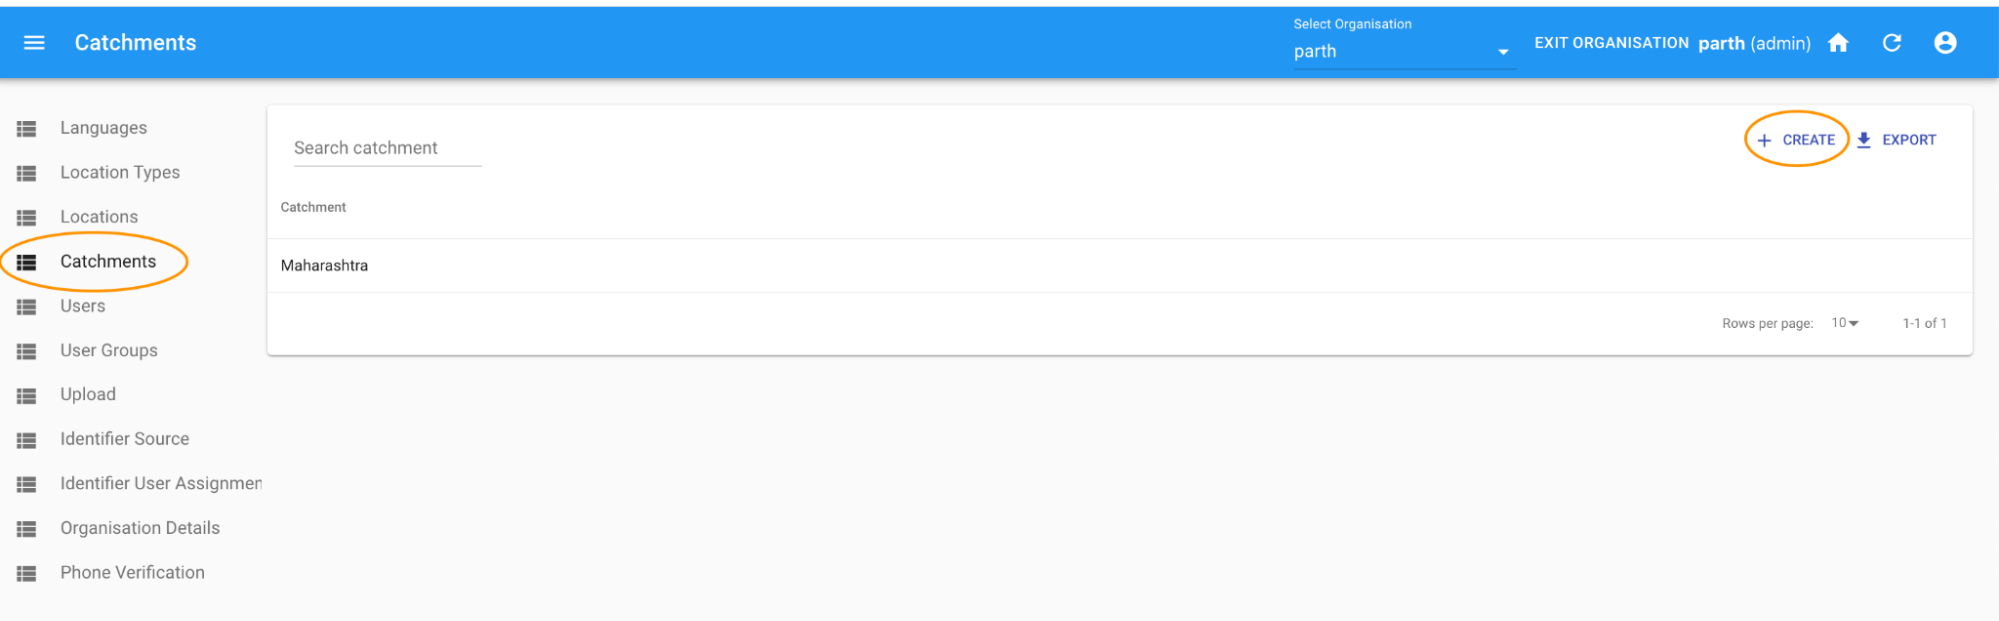
- Provide a unique name for the catchment in the field given below.
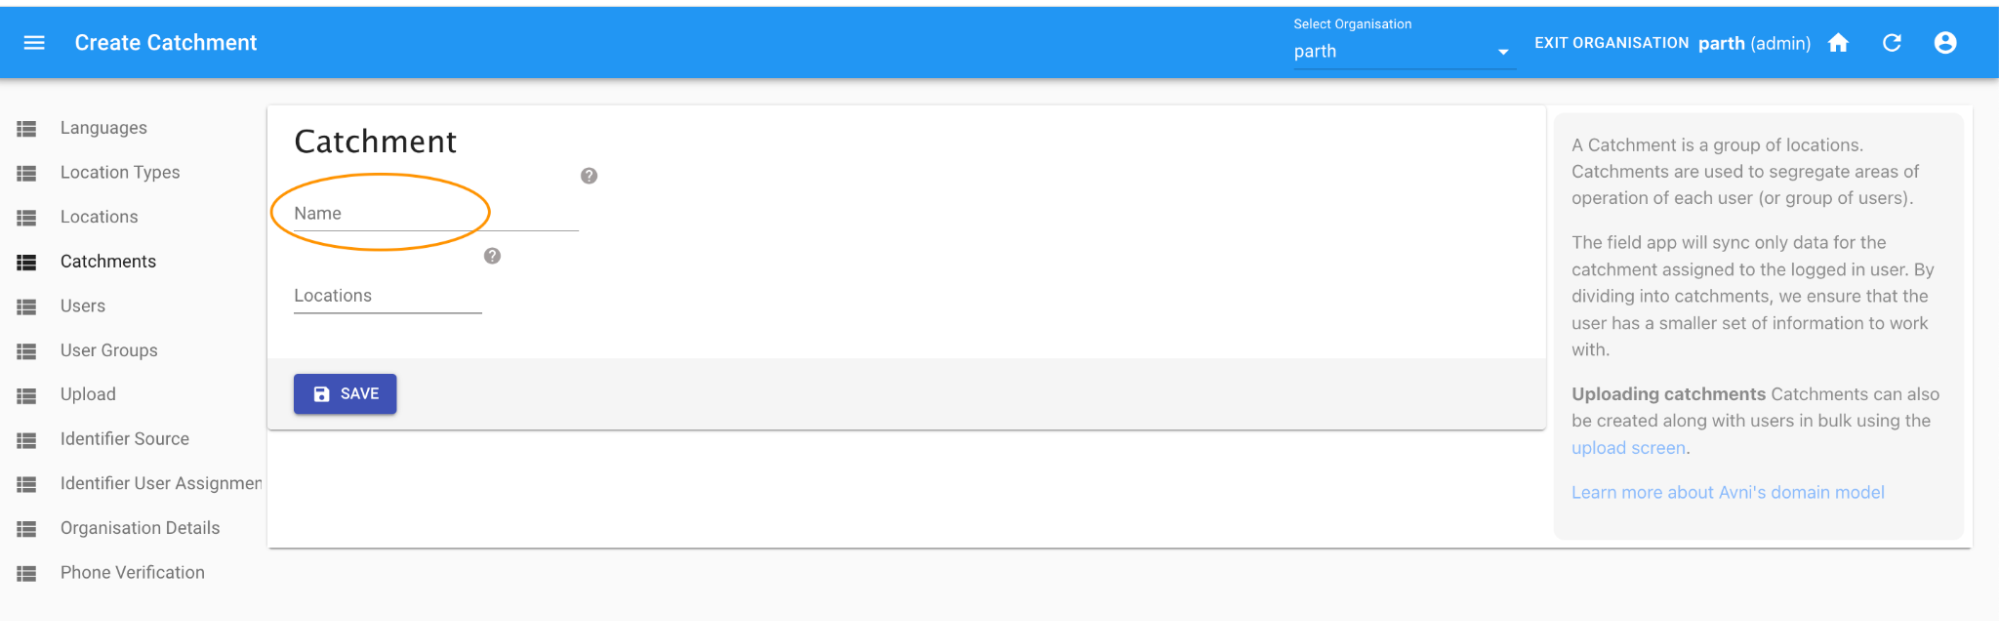
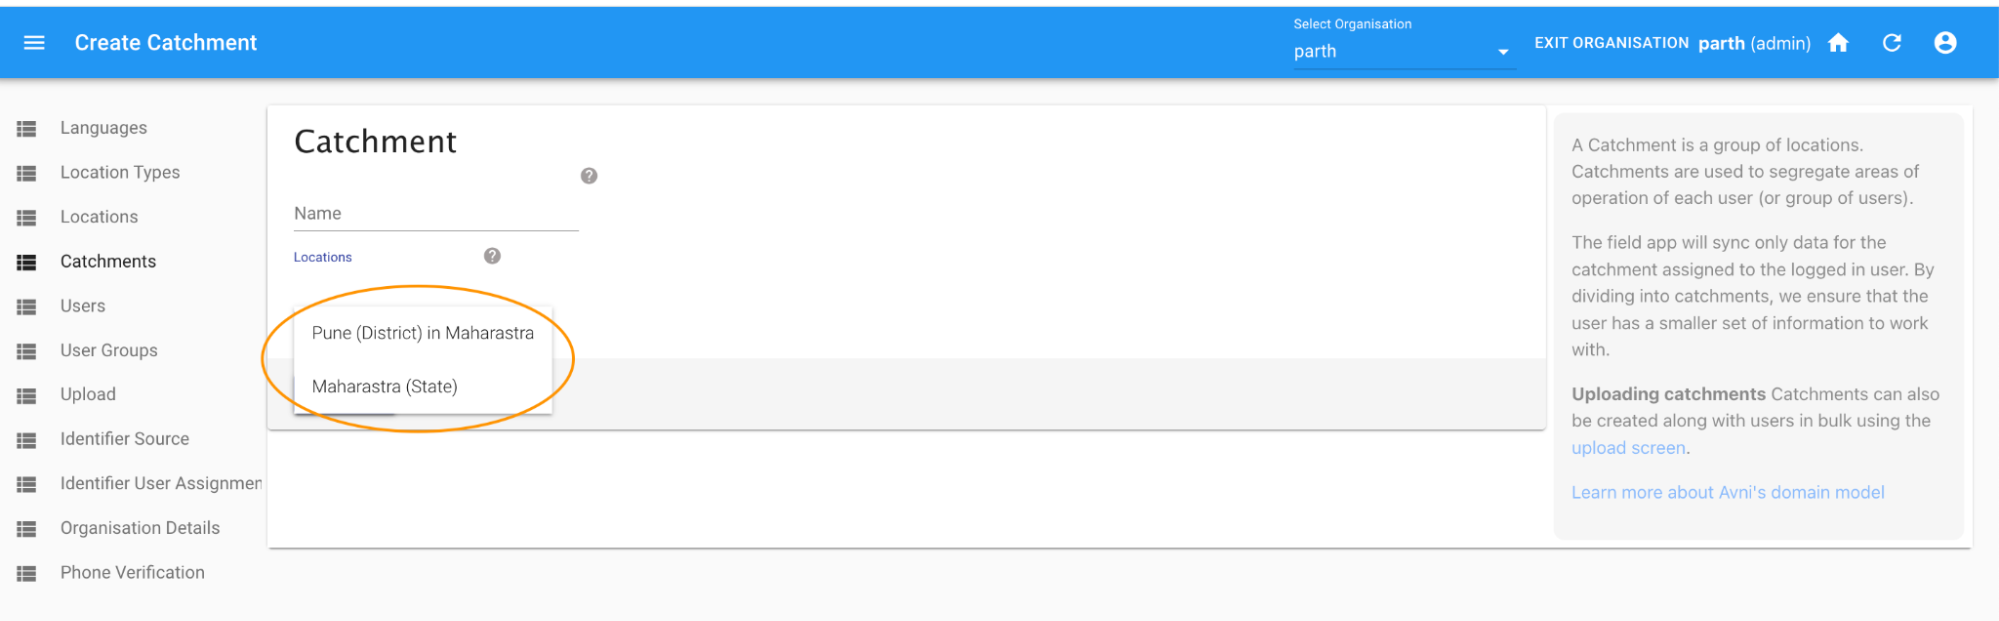
- Add the locations which are to be part of the catchment.
Updating Catchments:
Updating Catchments are not encouraged, especially, when it involves removal of location or replacing one set of locations with another set of locations. Ideally, create a new catchment with required locations and assign the same to the user, keeping the old catchment as is.
This is also the best practice regardless of whether the catchment is linked to a single user or multiple of them.
Creating Users:
Once the above-provided prerequisites have been created successfully, we can proceed with the user creation process.
- Navigate to the admin console in the Avni web app.
- Click on the Users section and Create button as given below.
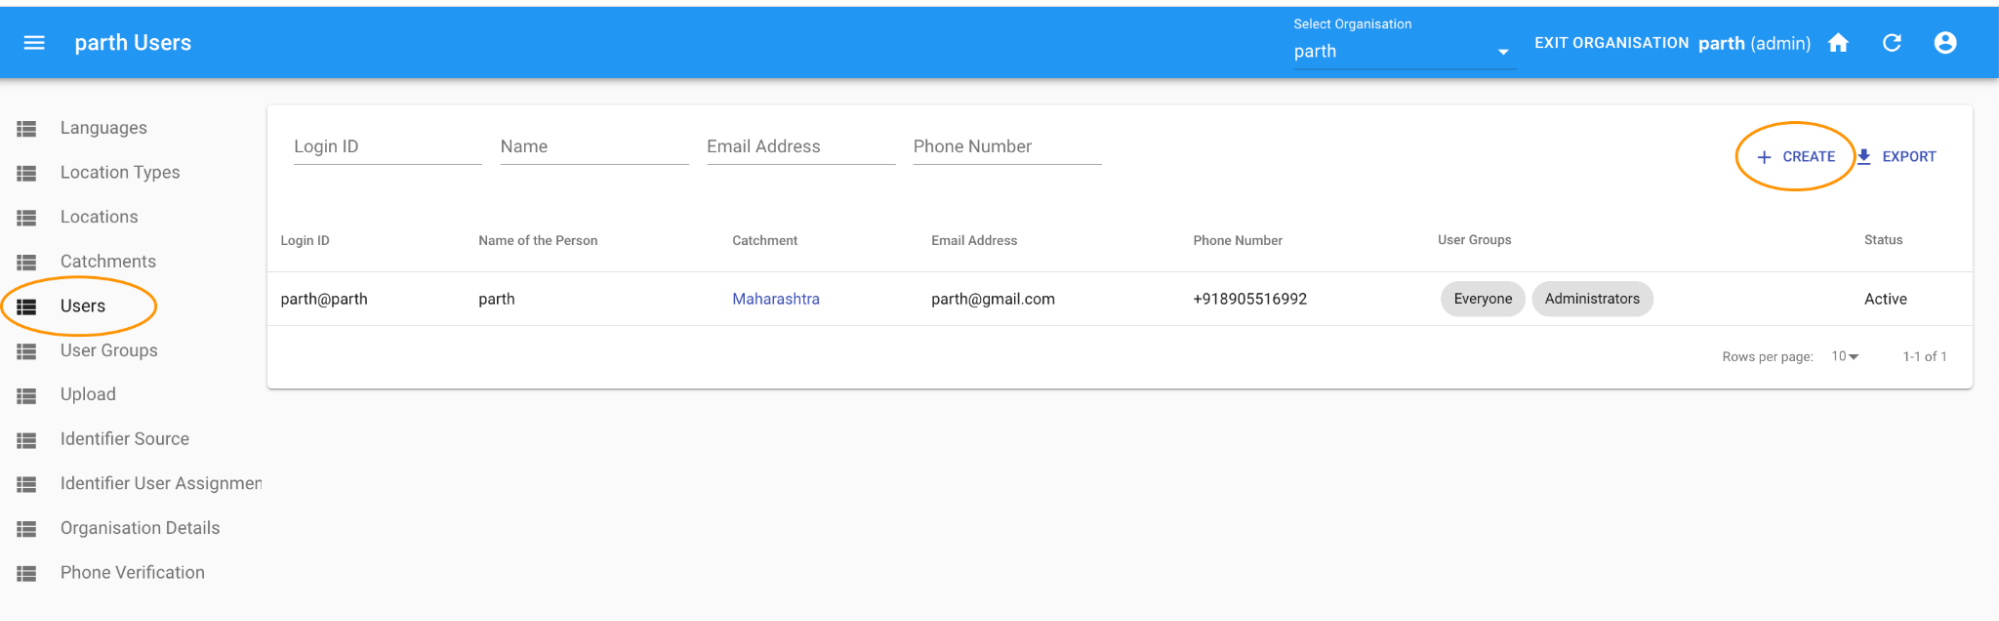
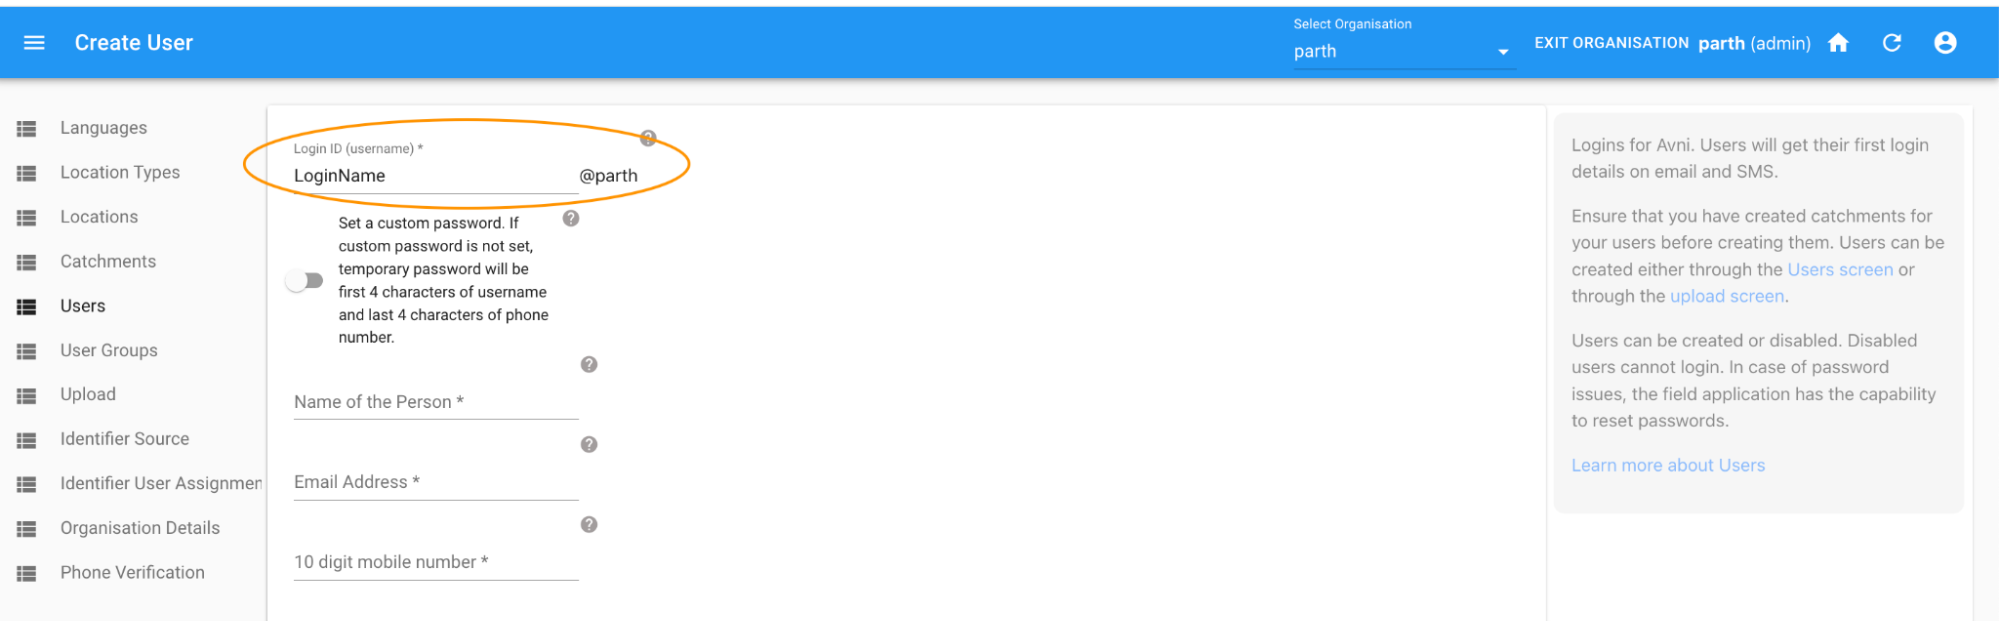
- Provide a unique Login ID for each user. Login ID allows to have alphanumeric values which will be followed by @ProjectName. A Login ID that is already in use cannot be re-used to create another user. Note: The login name is a case-sensitive field. The user needs to provide the same login ID while logging in to the Avni app.
- While creating a user, the administrator can provide a custom password by clicking on the toggle button highlighted below. This would populate two additional fields to enter a custom password and verify it by giving the same password again.
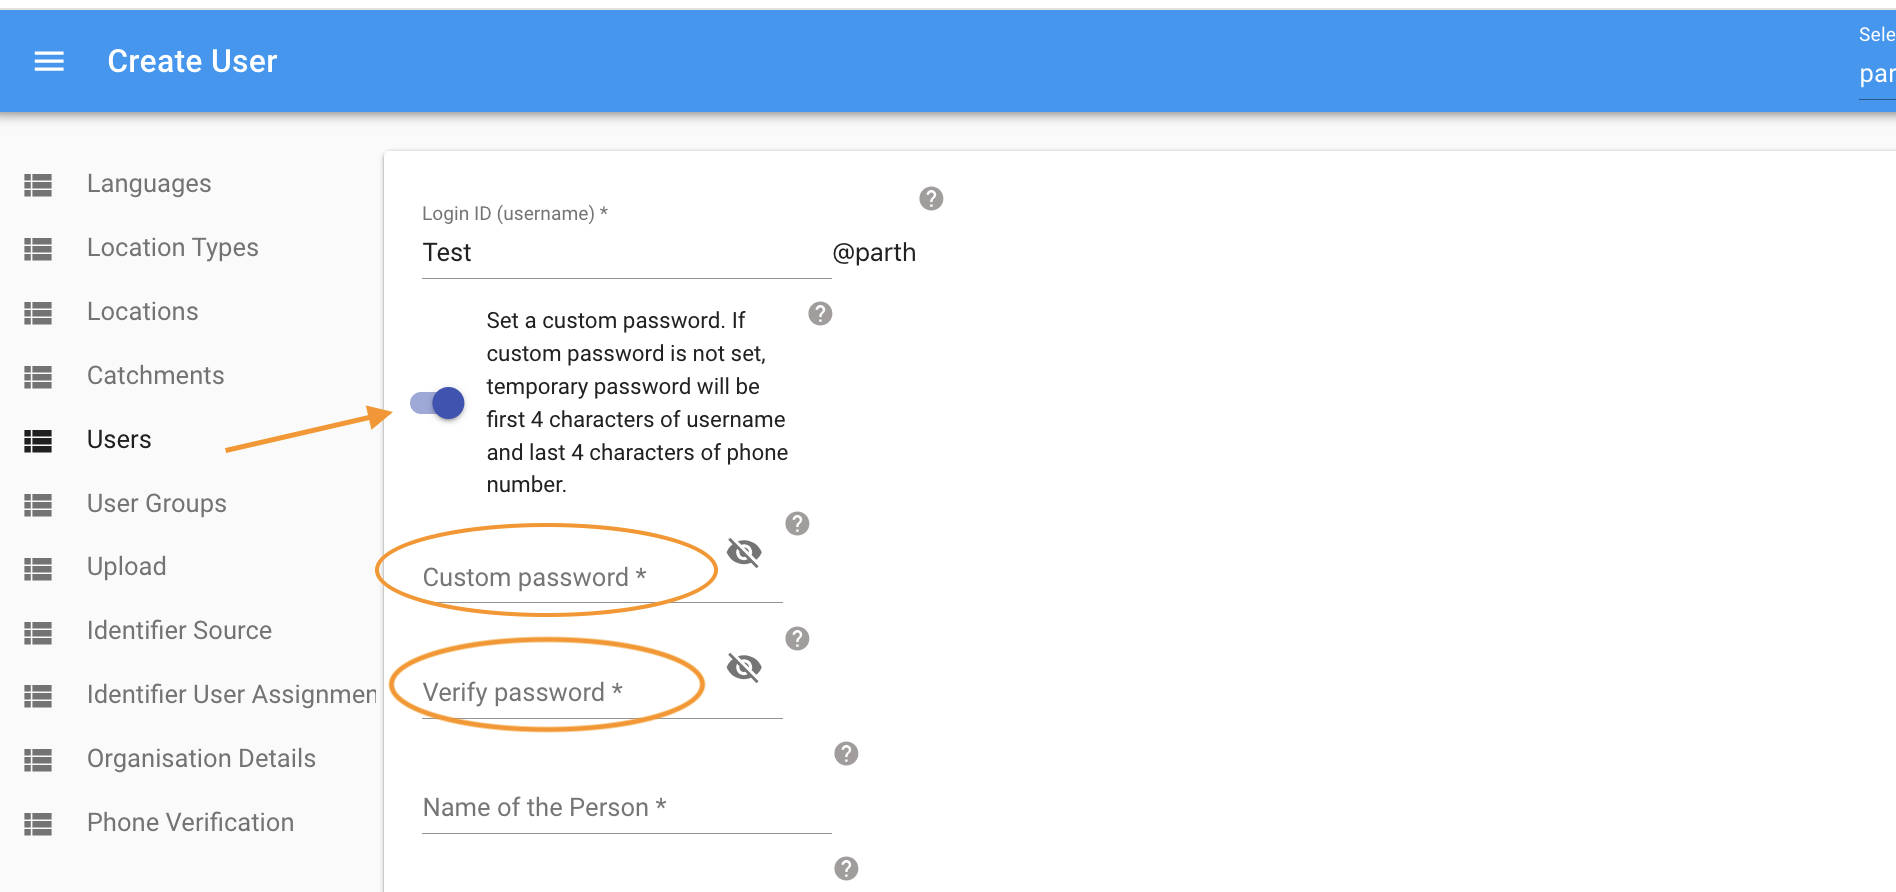
- In case the custom password toggle button is not on, the system will continue with creating the default password. The default password would have the first four letters of the username followed by the last four digits of the mobile number provided while creating the user.
- Provide the full name of the user along with mobile number and email address. The same mobile number and email can be used multiple times to create different users.

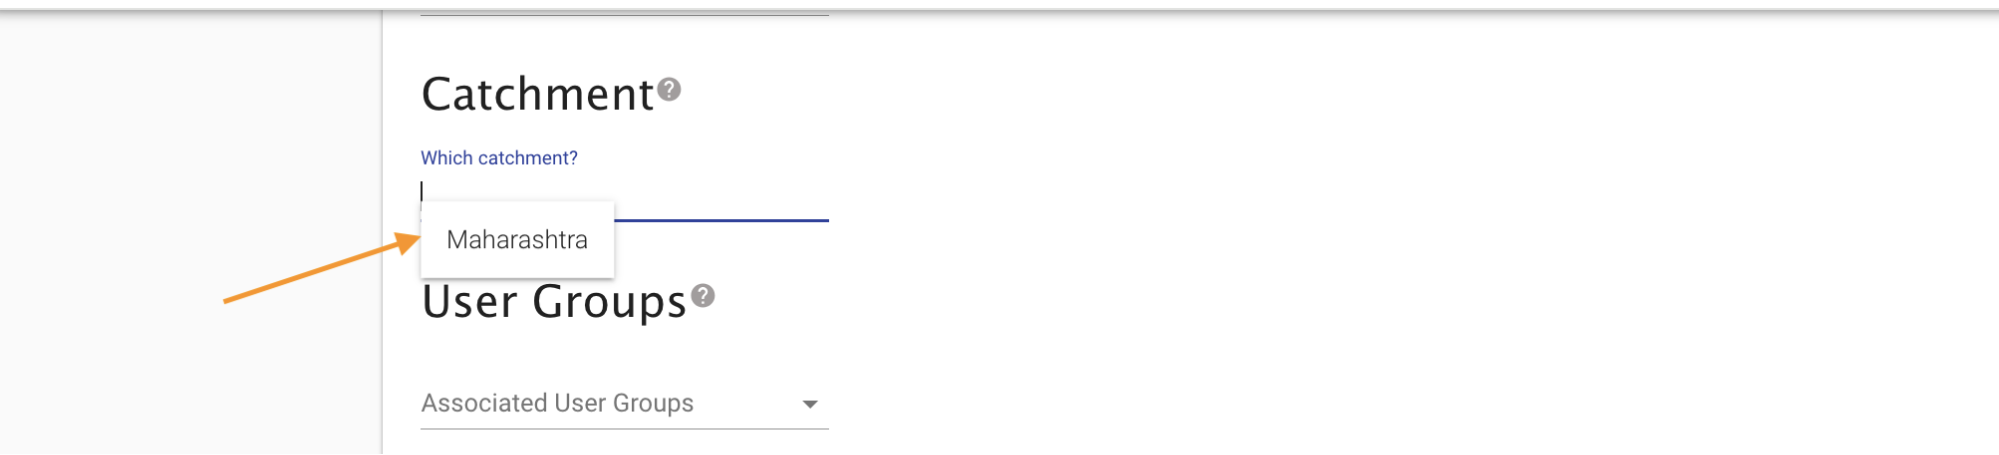
- Catchment created as given in this guide can be set here while creating the user. The system doesn’t allow to assign more than one catchment per user.
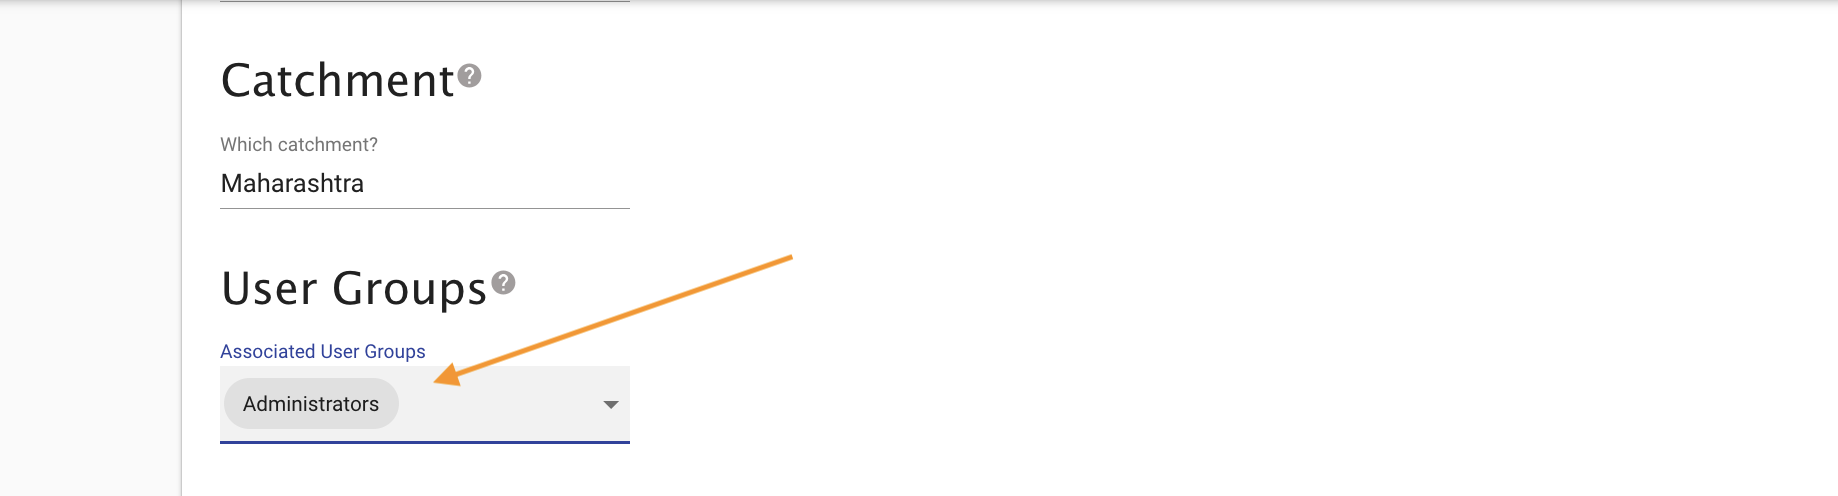
- Set user groups as per the operational roles of the user. Multiple user groups can be assigned to a user.
-
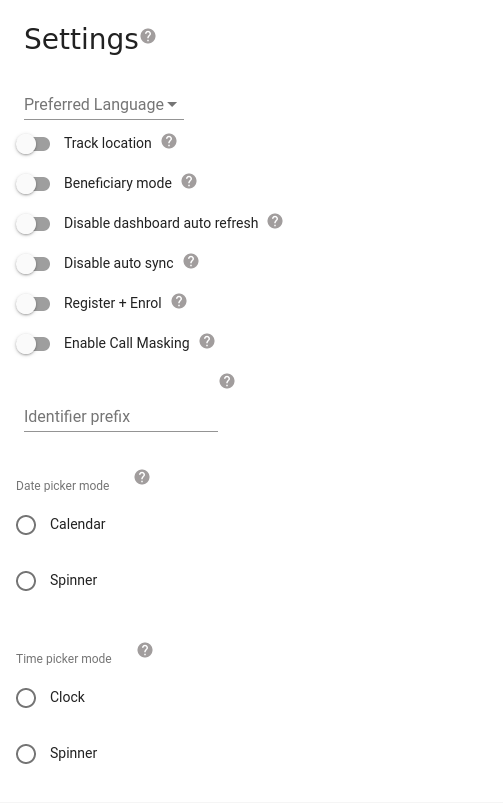
Further settings specific to the user can be setup to customise the user experience
- Preferred Language
- Track location - Switches on visit location tracking on the Field App
- Beneficiary mode - Enables the Beneficiary mode - a limited mode that allows beneficiaries to use the Field App
- Disable dashboard auto refresh - Disables Auto-refresh of MyDashboard of the Field App. Use if the dashboard is slow to refresh
- Disable auto sync - Disables automatic background sync. Use it if you want to trigger sync only manually
- Register + Enrol - Adds extra quick menu items on the Register tab to register and enrol to programs in a single flow
- Enable Call Masking - Enables Exotel call masking for the user
- Identifier Prefix - Identifier prefix for ids generated for this user. See documentation for more information
- Date Picker Mode - Set default date picker for the Field App
- Time Picker Mode - Set default time picker for the Field App
Updated about 1 month ago