

Approvals
Avni gives you the ability to review data filled by the field users using approval workflow. Data of each form can be reviewed by the supervisor and comments can be provided to correct the data. Even field users can track what all data filled by them was approved or rejected.
Approval can be configured separately for following Avni entities:
- Individual
- Encounter
- Program Enrolment
- Program Encounter
- Checklists
Enabling approval workflow
You can enable approval workflow for your organization using the "App Designer" app. Simply go to "Forms" tab and search for the relevant form corresponding to the Entity of interest. Ex: To enable workflow for Subject Type "Demand", we would be clicking on the Gear icon for "Subject Registration" row for Subject "Demand".
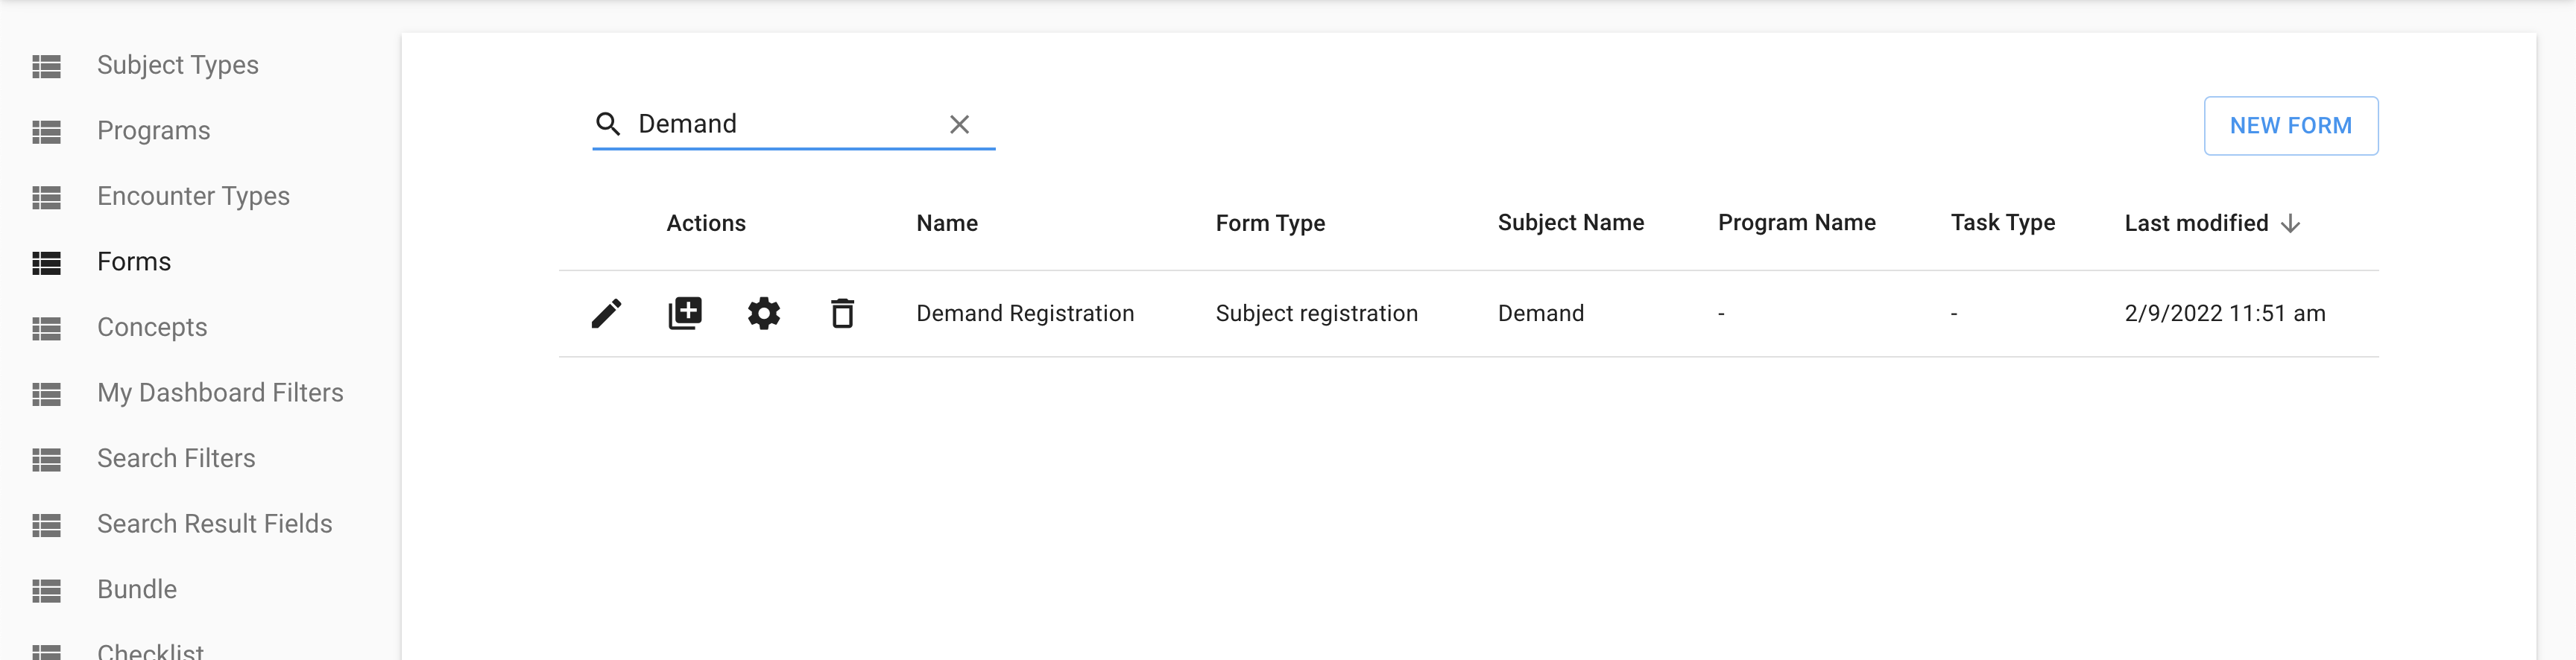
Click on the "Gear Icon" of the "Subject Registration" Form
After that toggle the "Enable Approval" button to enable / disable the Approval workflow specific to the Entity. Avni gives you the ability to enable this feature at each form level. So if you want you can enable it for some forms and disable it for others.

Toggle the "Enable Approval" button
Apart from enabling the feature we also need to create a custom dashboard so that we can track which all forms are pending, approved, and rejected. You can also mark this dashboard as the primary dashboard from the admin app -> "user groups" -> "dashboard".
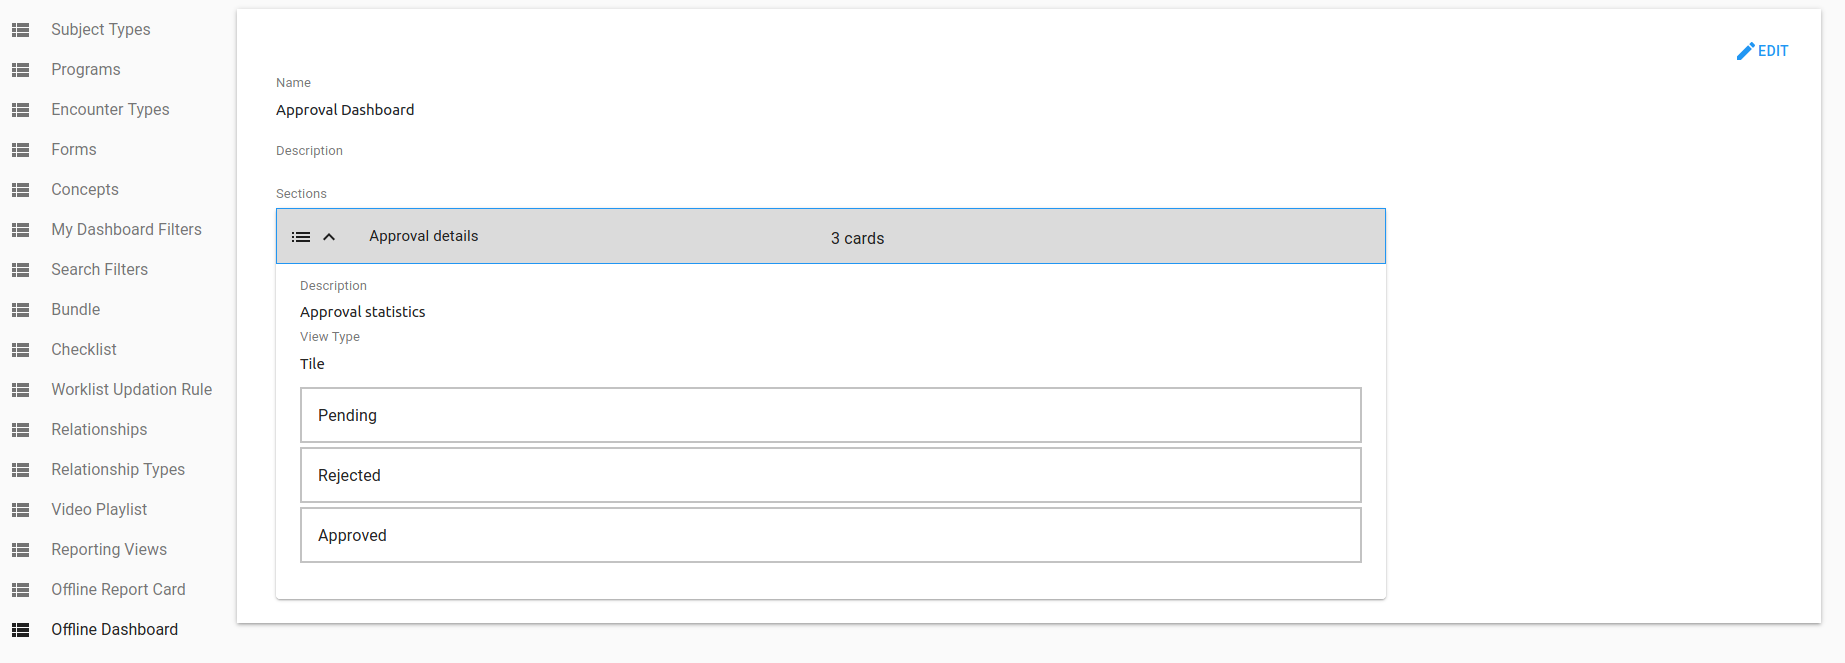
Approval dashboard to track the forms filled by the field users. All these are standard cards and no custom query is required.
Once the approval dashboard is ready and approval workflow is active, every time user fills a form it'll be visible under pending items in the dashboard. The supervisor/reviewing person can review these pending forms and can either approve or reject them. If rejected, the field user will see the rejected form under rejected items and can correct the entries in the form based on the rejection comment provided by the supervisor. After correction, the form will again go for approval and once it is approved it'll start showing under approved items.
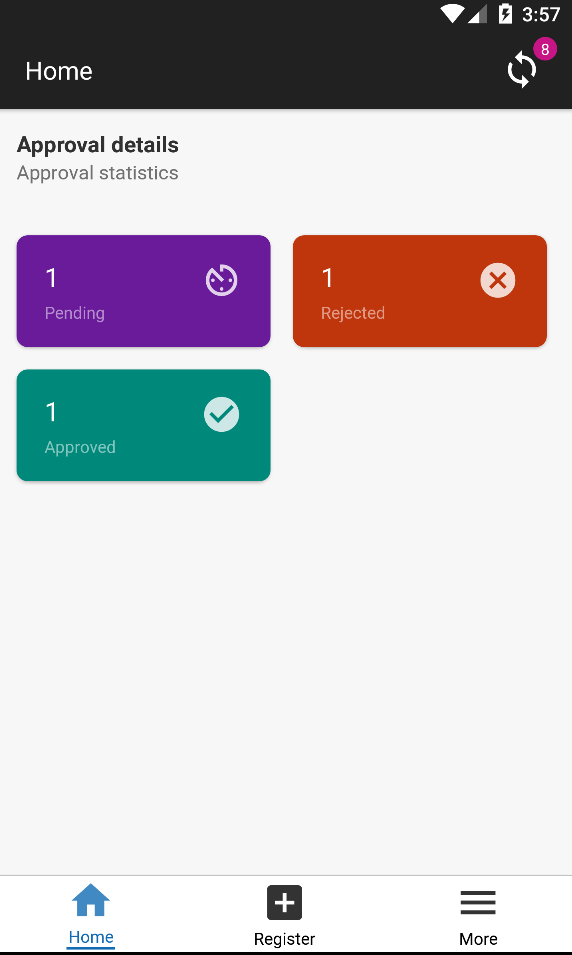
Approval dashboard showing pending, approved, and rejected forms.
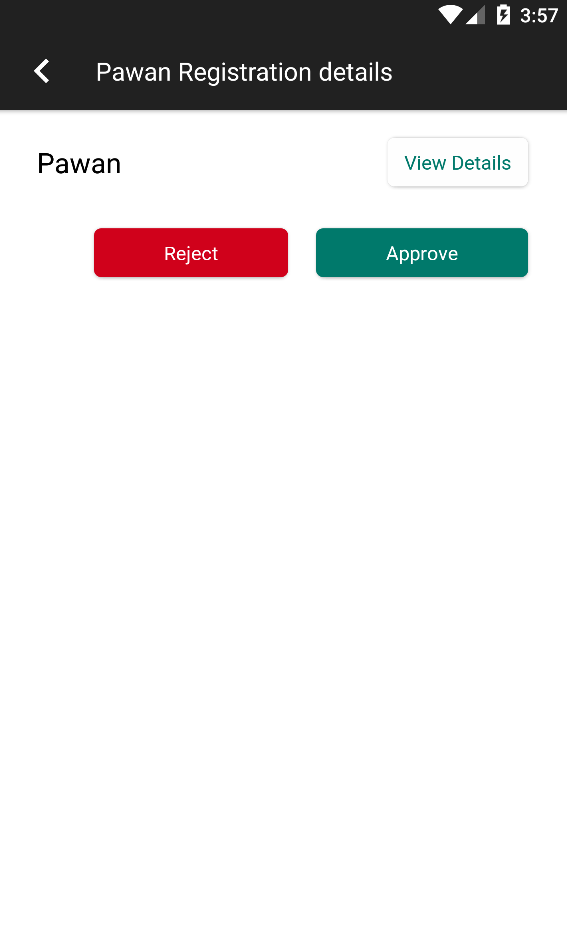
The supervisor can approve or reject a form after reviewing the details.
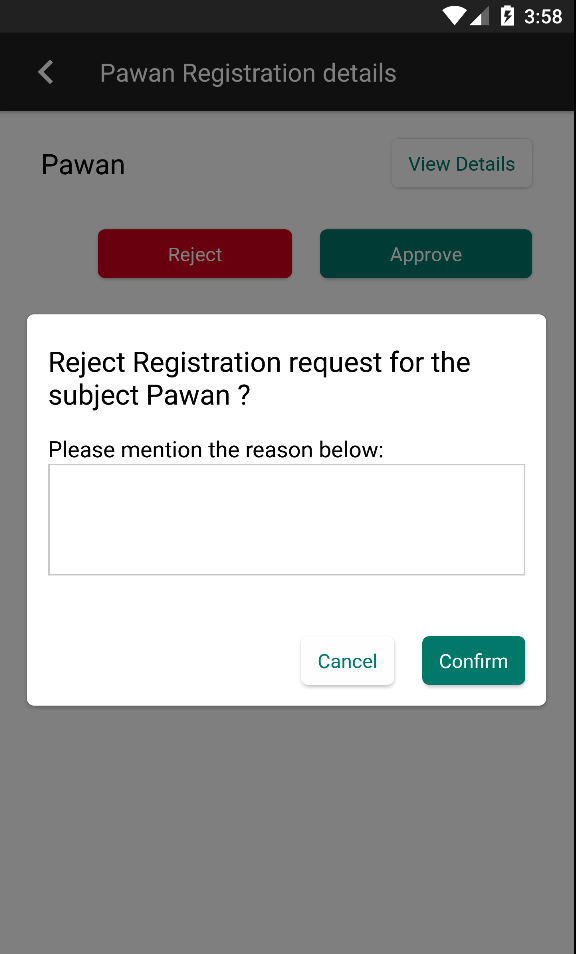
A rejection comment can be provided to the field user using which they can correct the information.
Please note that you can tract the forms only when the approval workflow feature is turned on. If you turn off this feature in between then all the forms filled after that will not get tracked.
Approval and rejection forms
From release 17.3, a supervisor can answer a form when approving or rejecting, instead of typing a comment.
A typed rejection comment is one sentence that nobody can count. A rejection form asks set questions, for example a list of reasons to pick from, so you can see how often each reason comes up.
Setting up a form
- In App Designer, create a new form and choose the form type Rejection. Choose Approval for a form shown when approving.
2. Add questions as you would on any other form.
3. In the form's settings, pick the subject type, and the program and encounter type if needed, of the form whose approval it applies to. Approval must already be switched on for that form.
You can attach a rejection form without an approval form, and the other way round.
What the supervisor and the field user see
- When a rejection form is attached, pressing Reject opens it instead of the comment box. When an approval form is attached, pressing Approve opens it.
- The field user whose record was rejected sees the supervisor's answers where the rejection comment used to appear.
- Where no form is attached, approving and rejecting work as before.
Things to know before you attach a form
- Rejections made before you attached the form keep their typed comment.
- A rejection form has no free-text box of its own. Add a notes question if supervisors still need to write a remark.
- The comment box does not let a supervisor reject without a reason. A form does, unless a question on it is mandatory. Make at least one question mandatory if every rejection must carry a reason.
- The Data Entry App has no approve or reject action, so these forms are used only in the mobile app.
Updates to the Approval Status UI (in development)
Approval items will be grouped by Subjects and arranged in alphabetical order.
Updated 7 days ago