Translation Management
Overview
Since Avni is widely used for Data-collection by field workers, it is most likely to have a need for the Forms to be read and filled-up in their native language. For example, field workers providing health-care services in the remote villages of Gujarat would be most comfortable performing data-collection in Gujarathi, as opposed to English or Hindi.
For this reason, Avni supports translation of data-collections forms to native language of the user(field worker) in the Avni "client" mobile application and "Data-Entry" Web application.
Supported Languages
Avni currently supports Translation capabilities from English to following languages:
- Hindi
- Marathi
- Gujarathi
- Tamil
- Kannada
- Bengali
- Telugu
- Odia
- Malayalam
- Punjabi
- Sanskrit
- Urdu
- Assamese
We additionally have some default translations already available for a few of the above languages, that would make it easier for an organisation to get started on its “Translations” journey. The languages that have some baked-in translations in Avni are as follows:
- Hindi
- Marathi
- Gujarathi
- Tamil
- Kannada
Prerequisites
In-order to set up translation for any of the aforementioned languages, the organisation should have enabled the language in the Languages section of the Organisation config.
Steps to enable Languages for the Organisation
-
Navigate to the “Admin” application
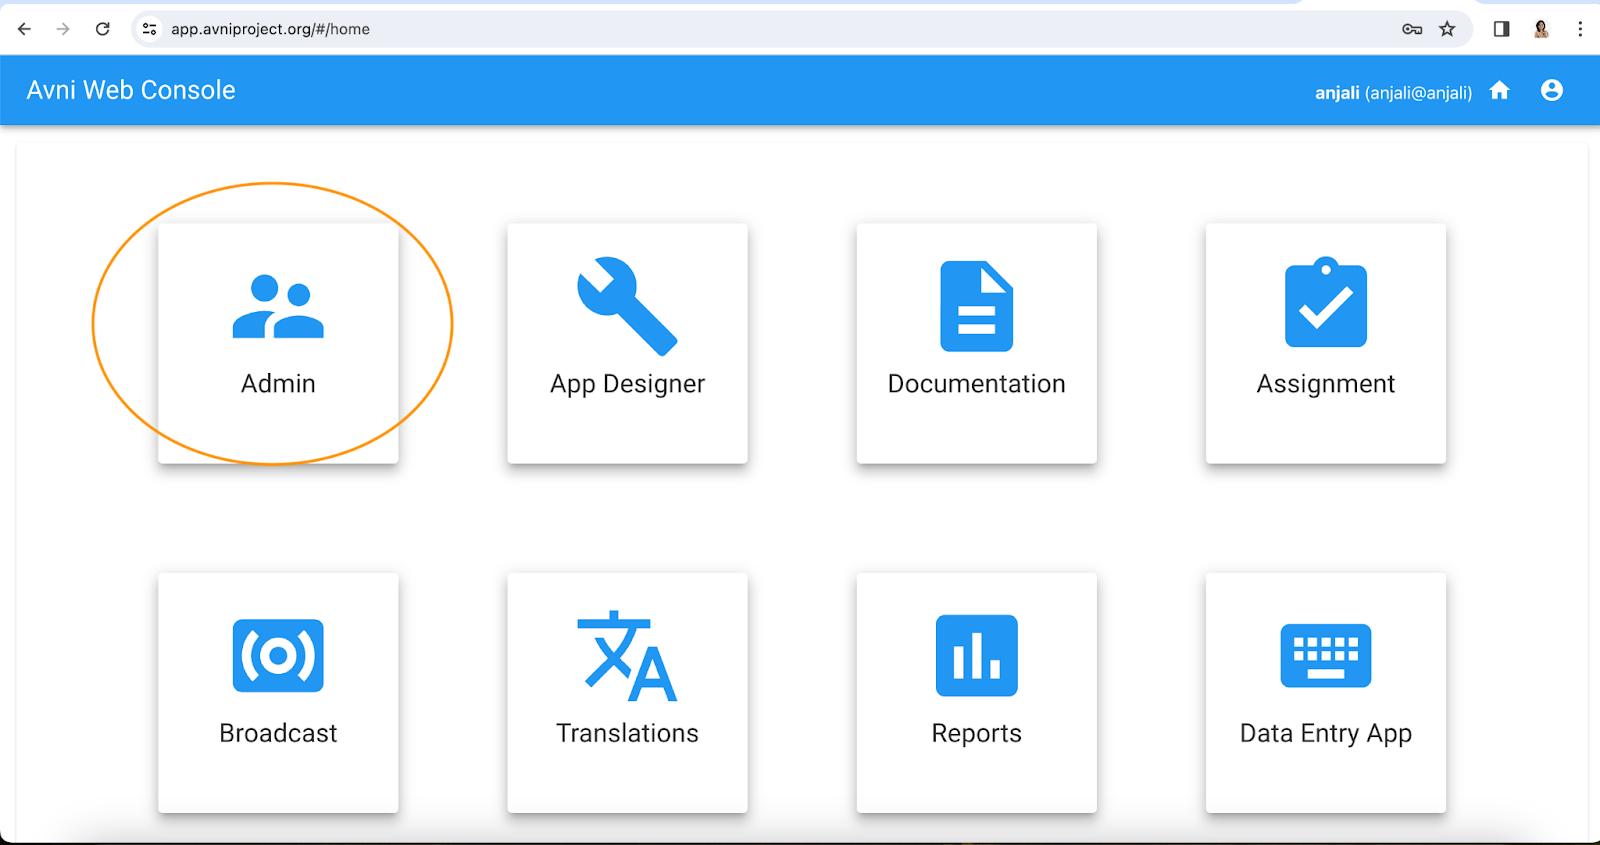
-
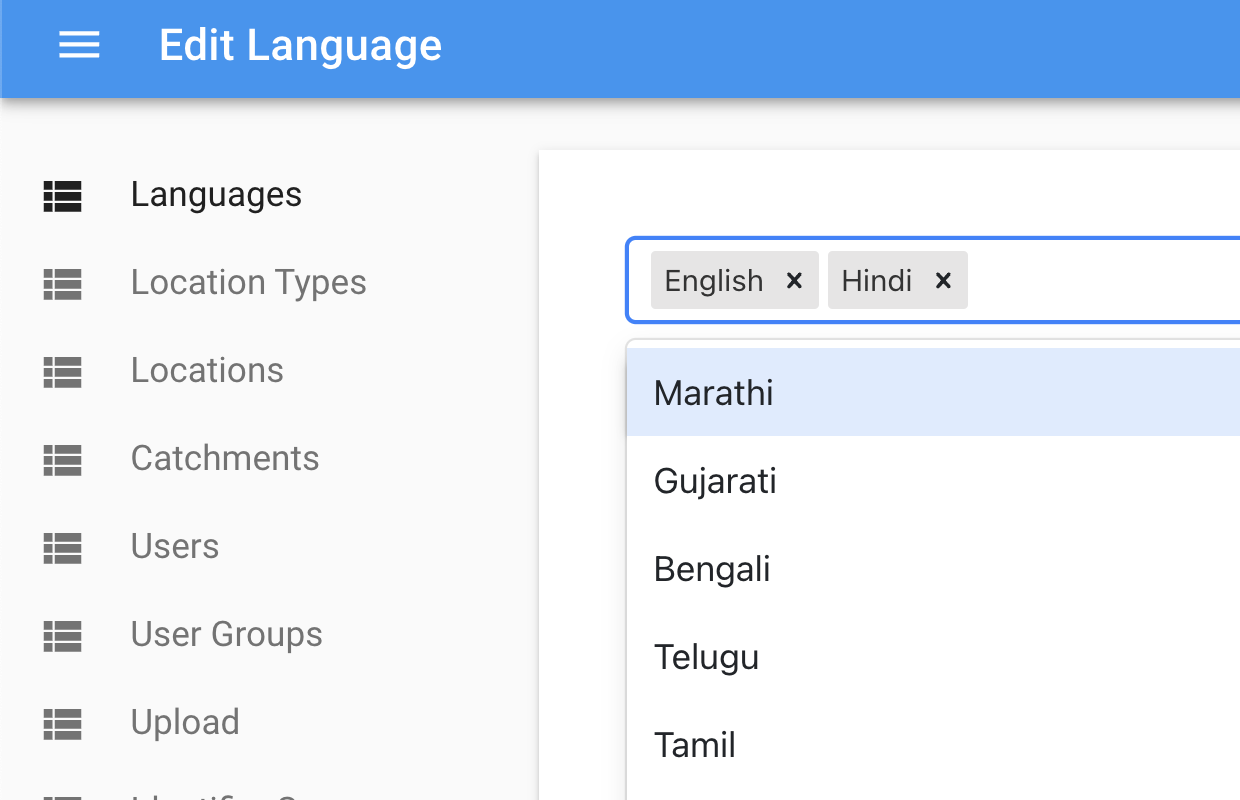
Select the “Languages” section in the left-tab
-
Add all the languages that are to be made available to the translation framework, using the drop-down and then click on “Save” button
Steps involved in the translation process
Avni allows the management of translations using the Admin web interface. Below are the steps to translate the content of the app from English to the preferred language
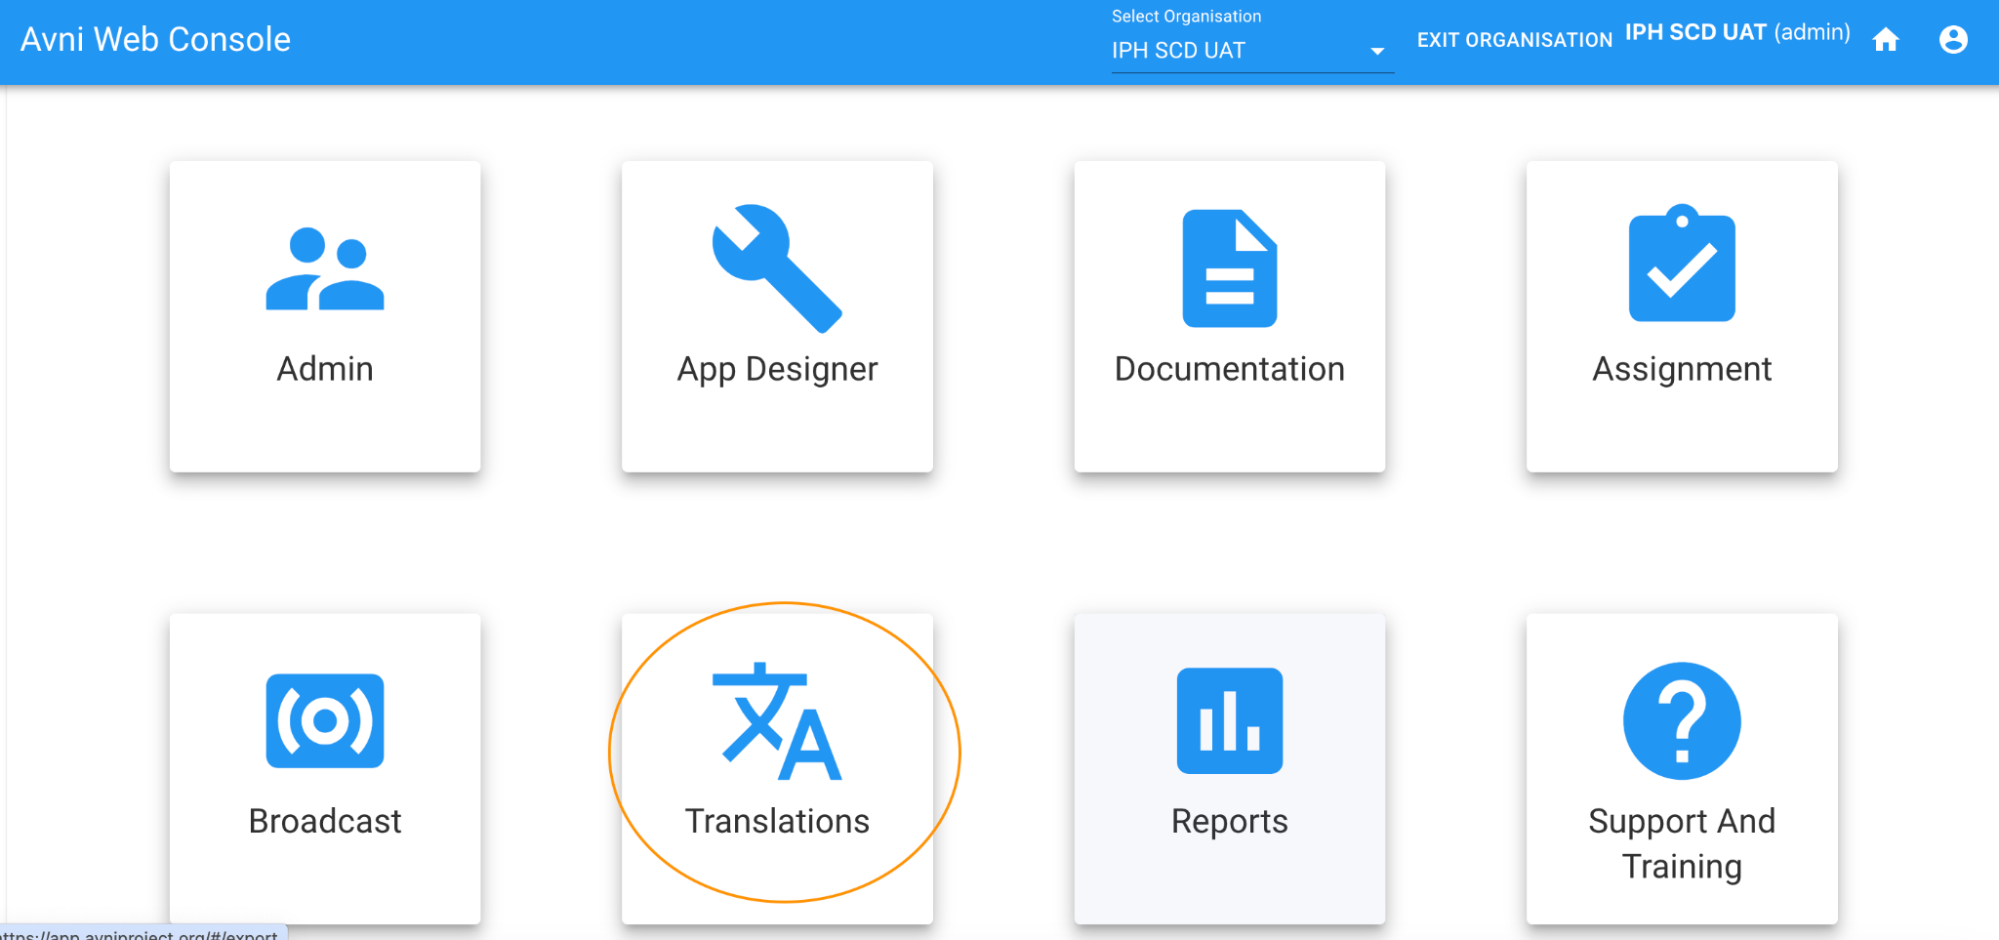
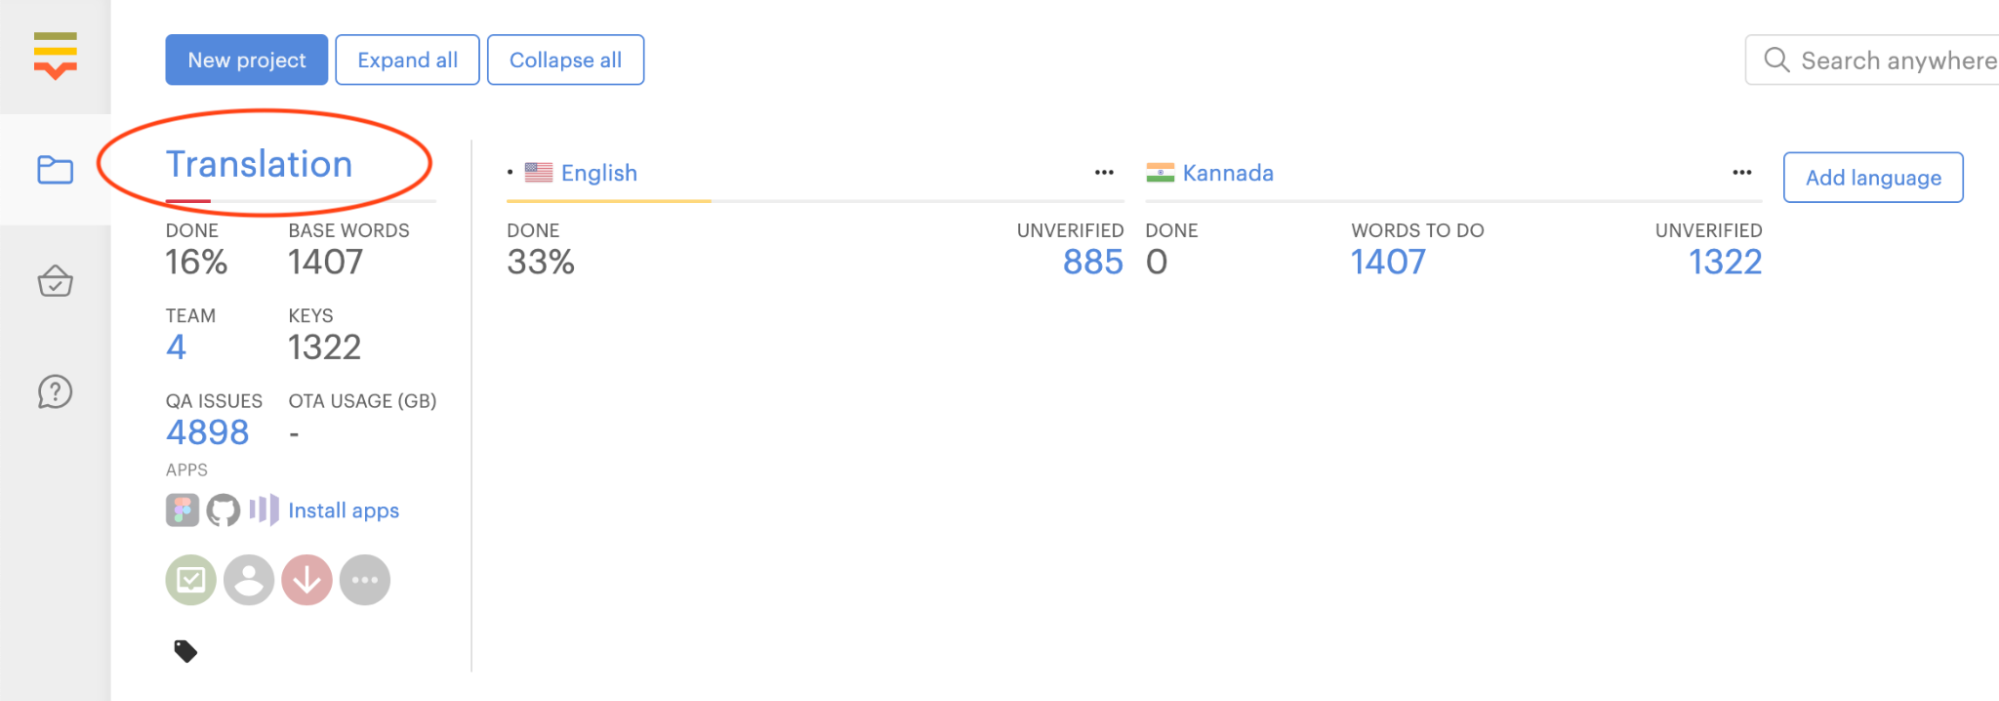
Navigation to ‘Translations’ module
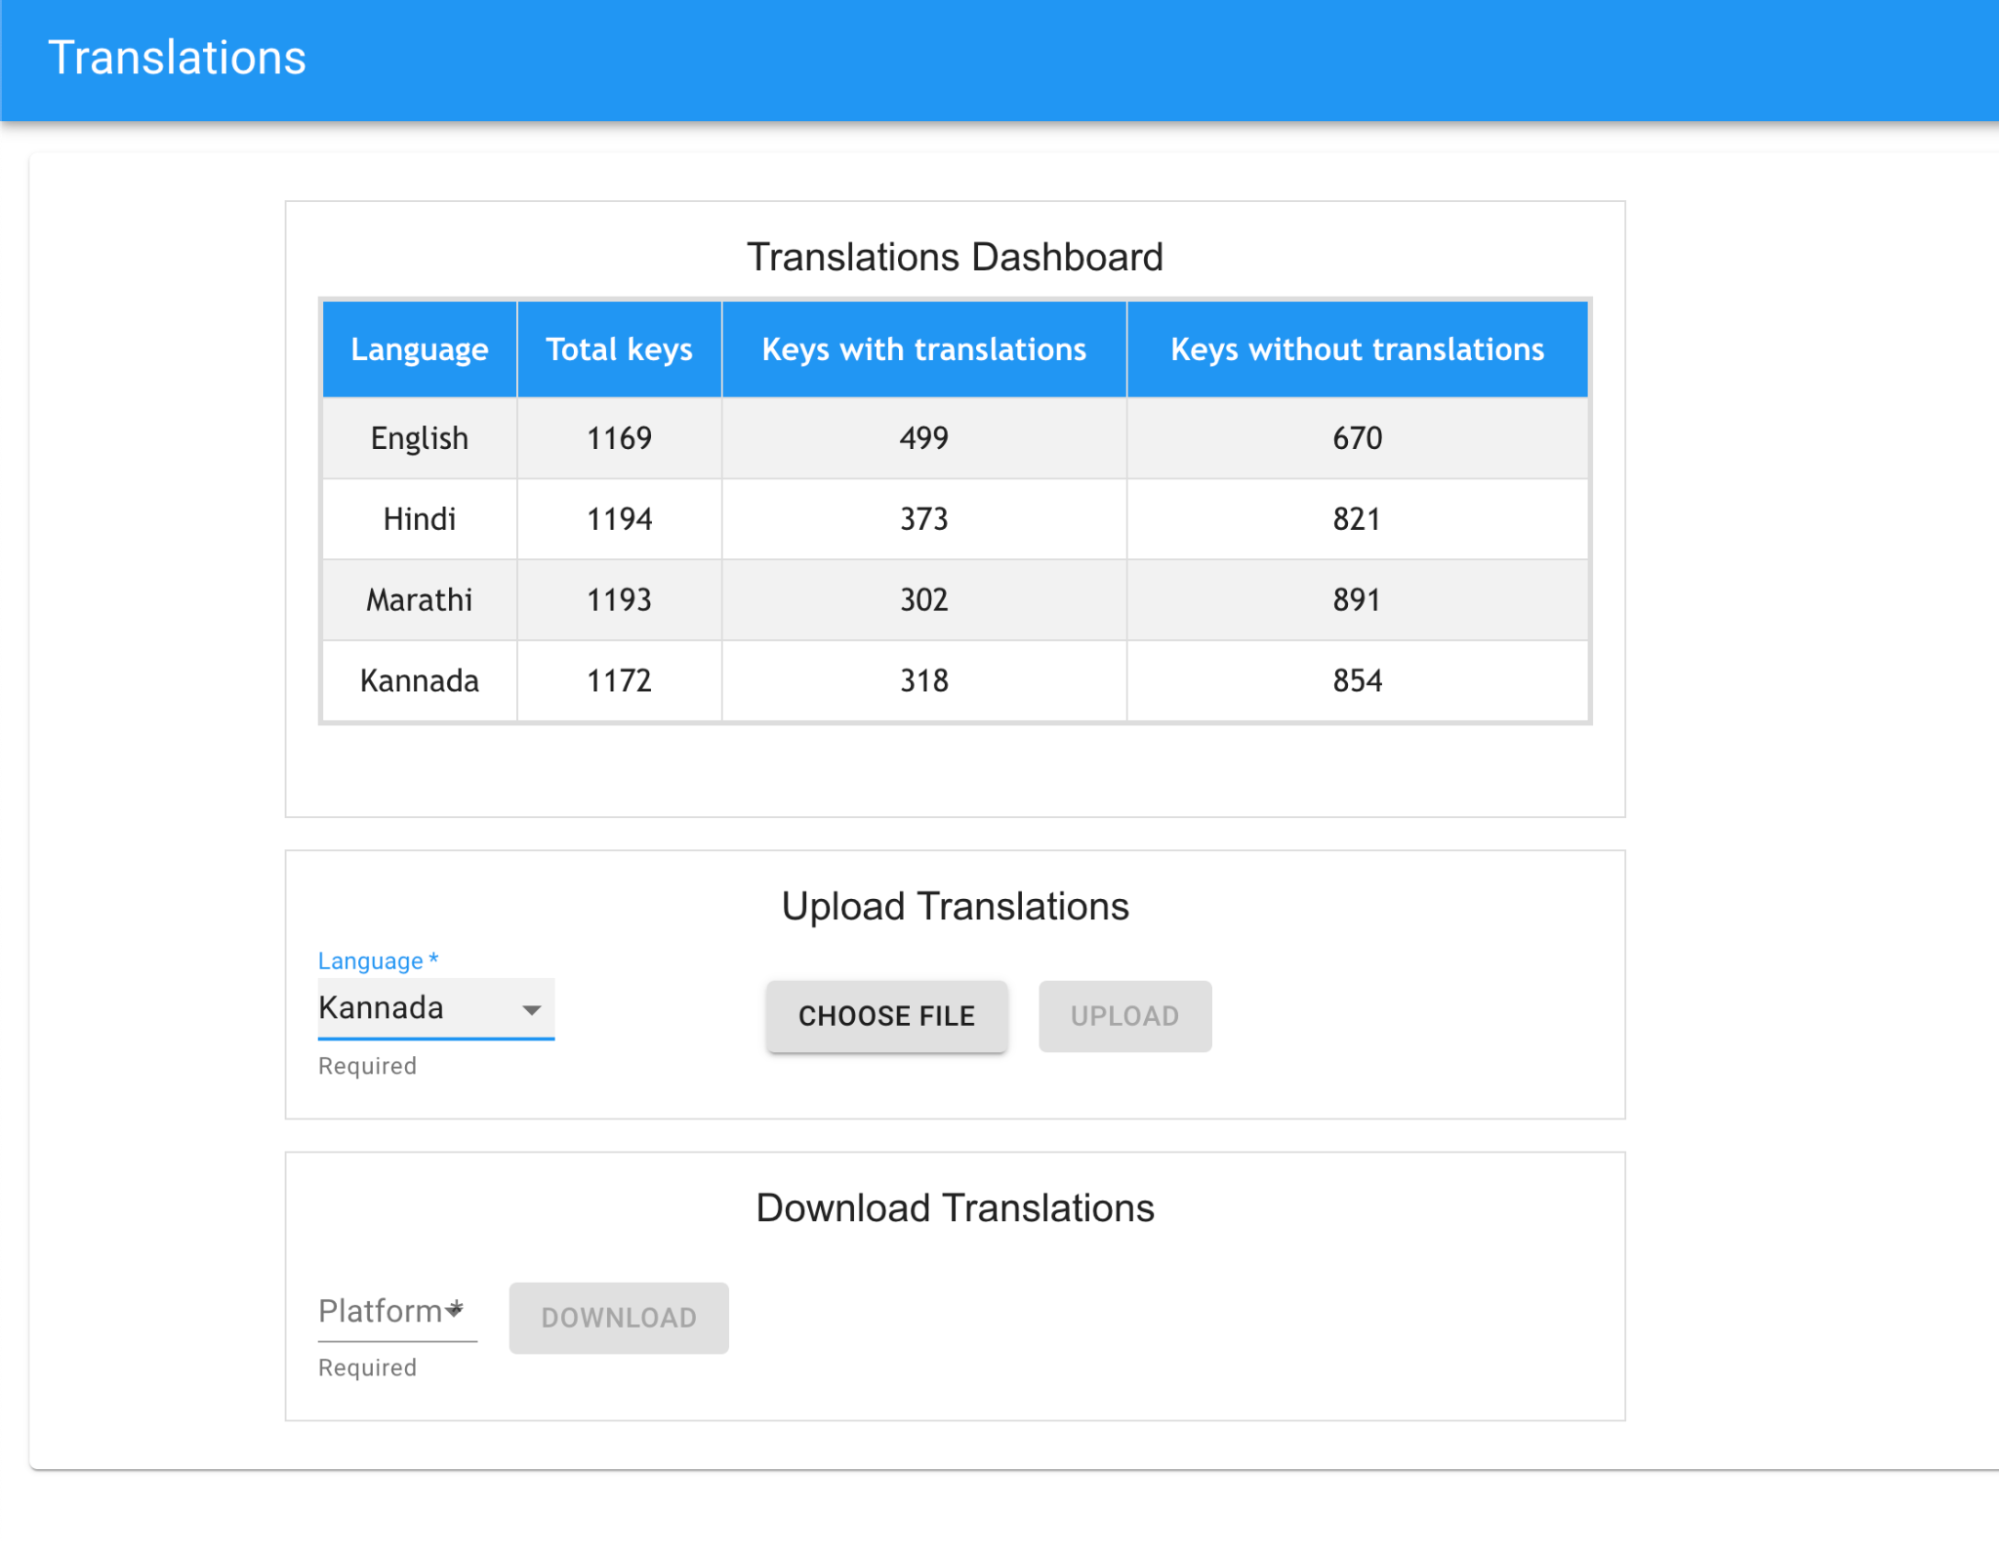
Login to Avni Web Console and go to the ‘Translations’ module.
Downloading Translation Keys from Avni
- From the “Translations Dashboard”,download the keys after choosing the desired platform. Platforms are:
- Web
- Android
- In general, most organisations need translations only for their field users who perform data-collection using their mobile devices. In such cases, the platform of interest is “Android” (Mobile).
- If additionally, your organisation also wants translations to be done for the Data-Entry App, then also download the keys for the “Web” platform.
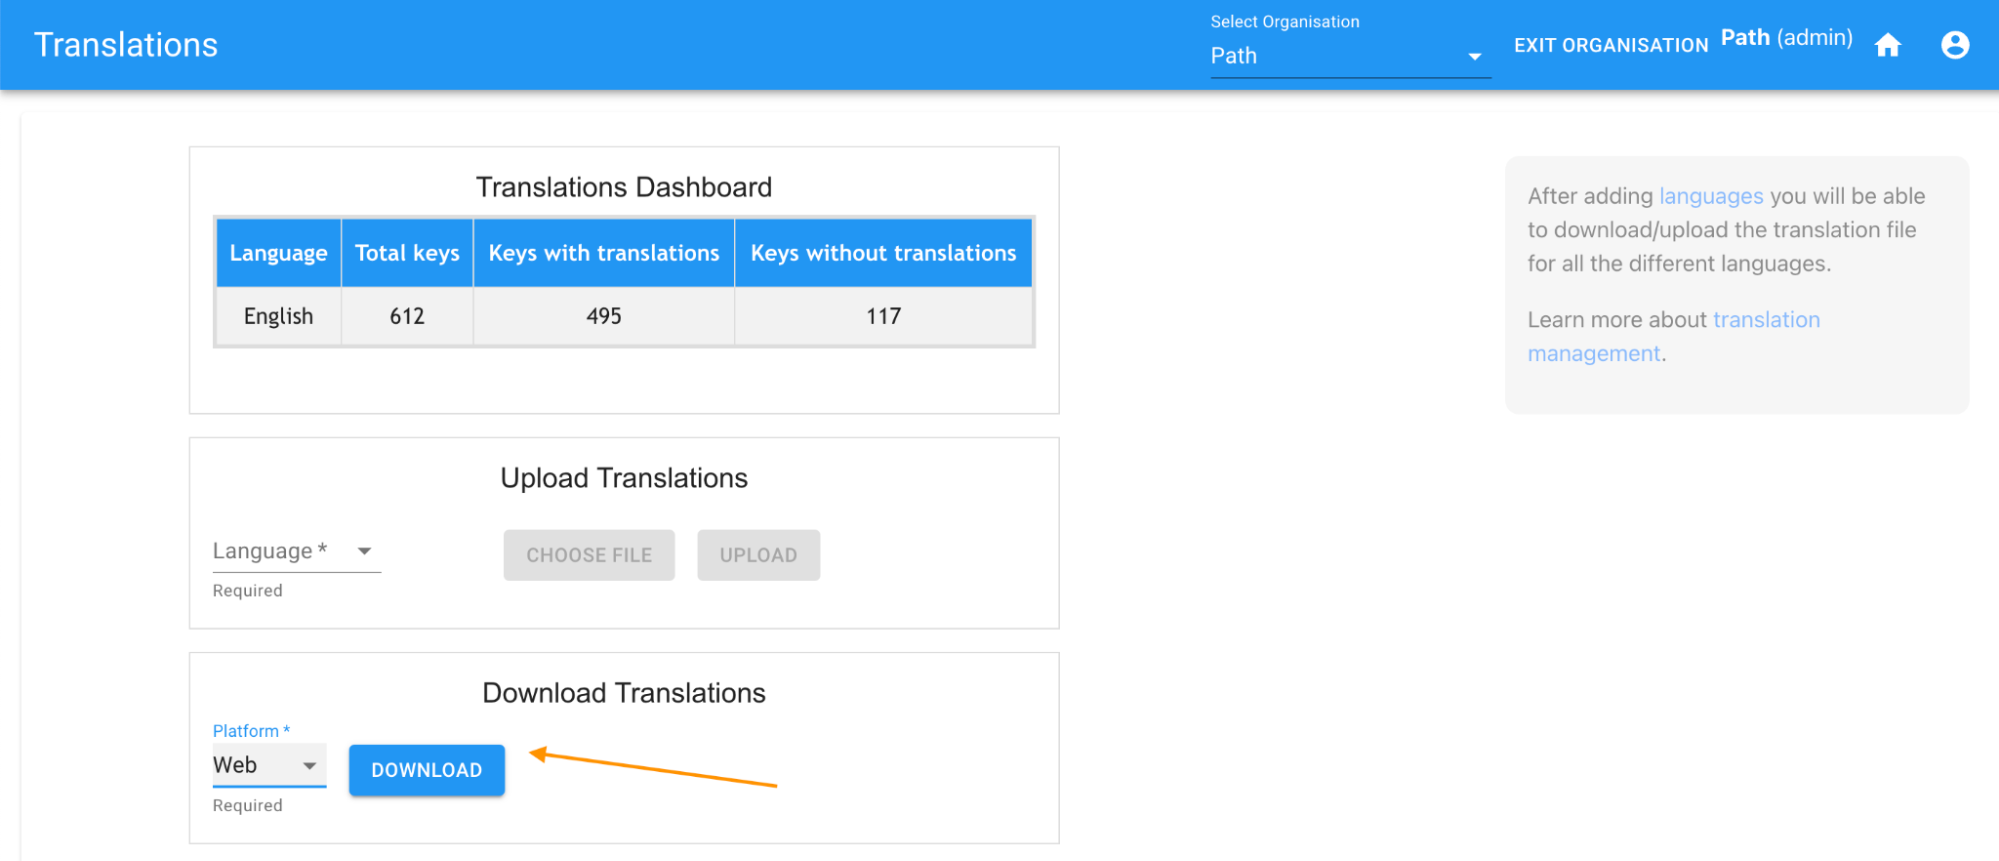
- For each platform selection download, the app will download a zip file containing one JSON file per language available in the organisation config.
- The JSON file will contain keys for both the standard platform app as well as those specific to your implementation, covering all labels in the app, form fields, location names and any other concepts created in the implementation.
- The file will also contain existing translated values, if any. This is useful when you have to update the translations after a while, as you will already have all previously uploaded translations available for retention or modifications as needed
- IMPORTANT Note: When organisations do not want Locations to be part of translations, then they need to bundle export without locations, import those into a temporary org and export translations from that temporary organisation. This was required for one of our organisations since they had a very large number of locations (More than 100,000) and hence were in need to translate other things before locations.
Setting up a project in Translation Management System (TMS)
- The JSON files can be edited with any tool that the implementer is comfortable with, to come up with translated values for the target language.
- But for most use cases, we would have multiple translators involved and/or a lot of keys are to be translated. In such cases, we highly recommend using an external translation management system (TMS) like Lokalise which provides a sophisticated editor for performing translations. The TMS provides the ability to import/export JSON files and supports a variety of use cases related to translations.
- Avni has an enterprise-free plan for Lokalise. If you would like to use Lokalise, please request the Avni team to create your account and project to get started.
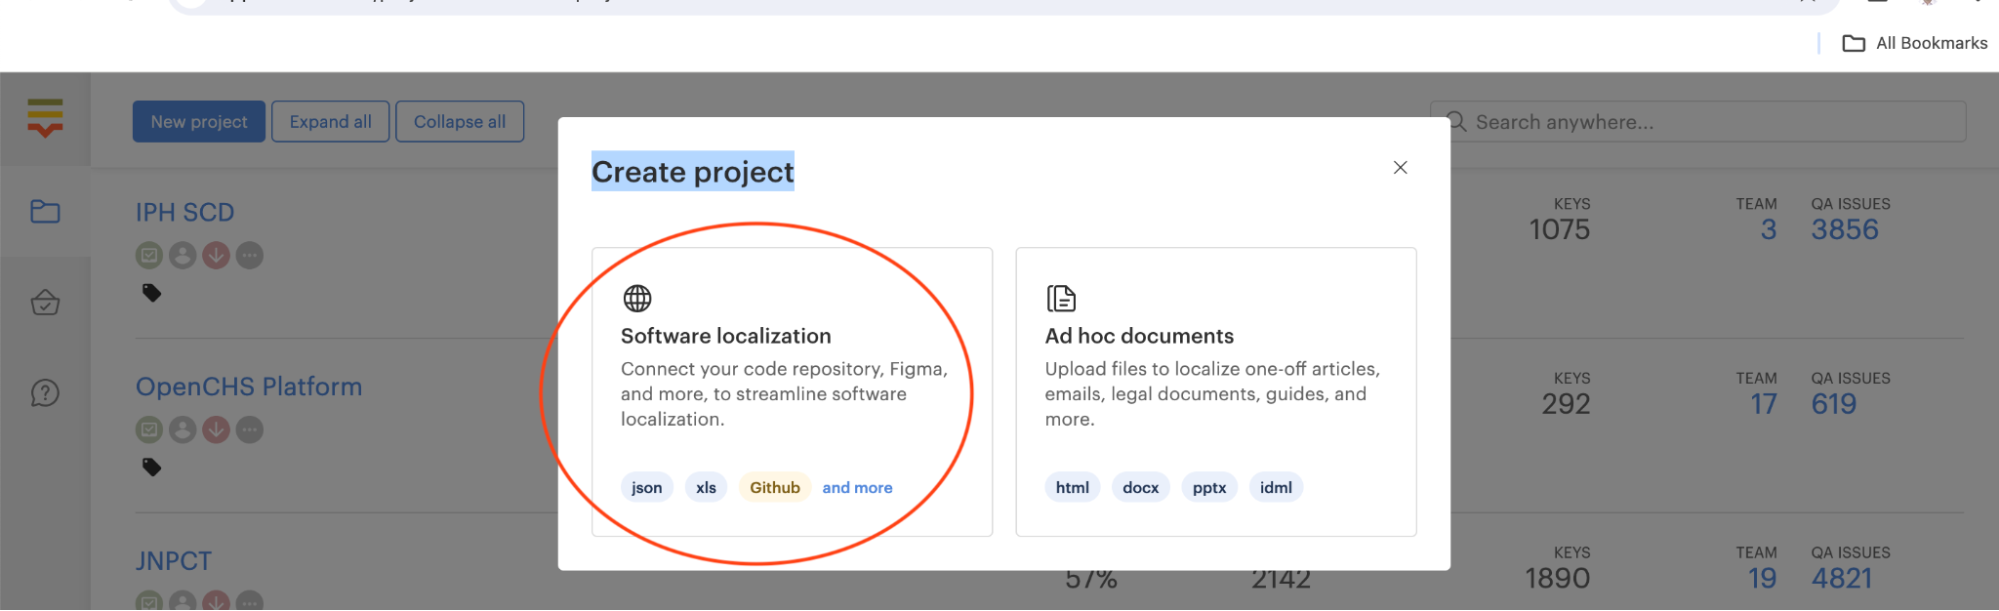
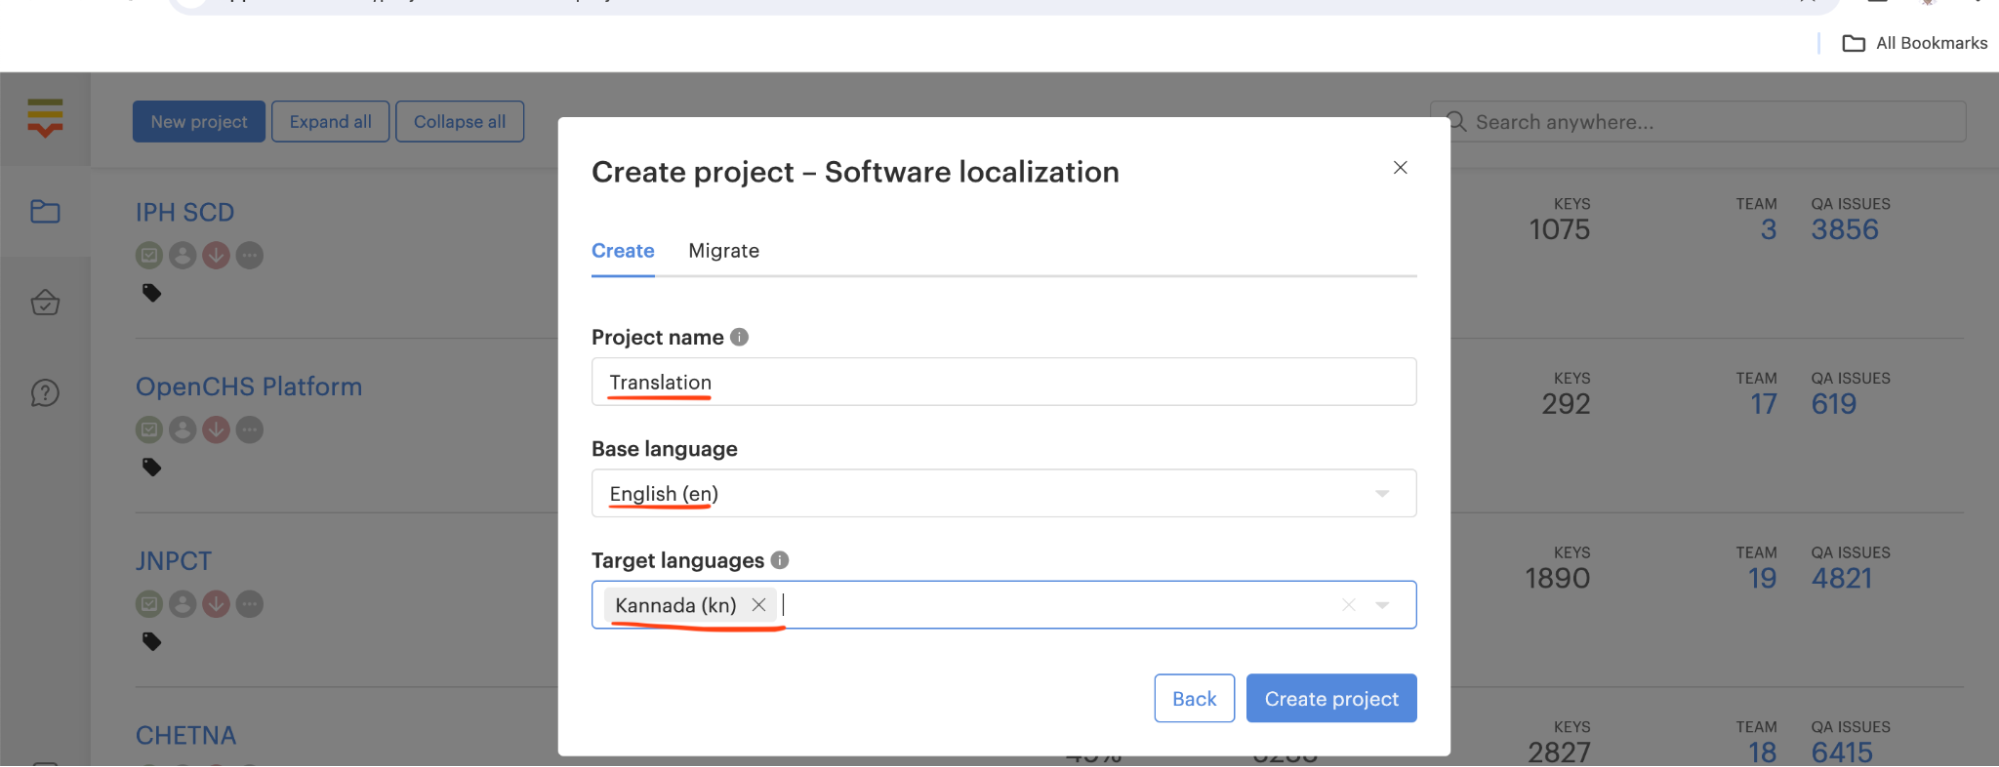
Creating an implementation project in Lokalise
This is an optional step, required only if the implementation project does not already exist.
-
In the Project section, a new project needs to be created as shown in the screenshot below.

-
While creating the project, provide the Project name, Base language (Which will be english always), and target language in which translations are needed.
Uploading Translation keys to Lokalise
Once the project is ready in TMS and you have downloaded the translation ZIP file(s), log in to Lokalise with Samanvay's official email address, if not already done.
-
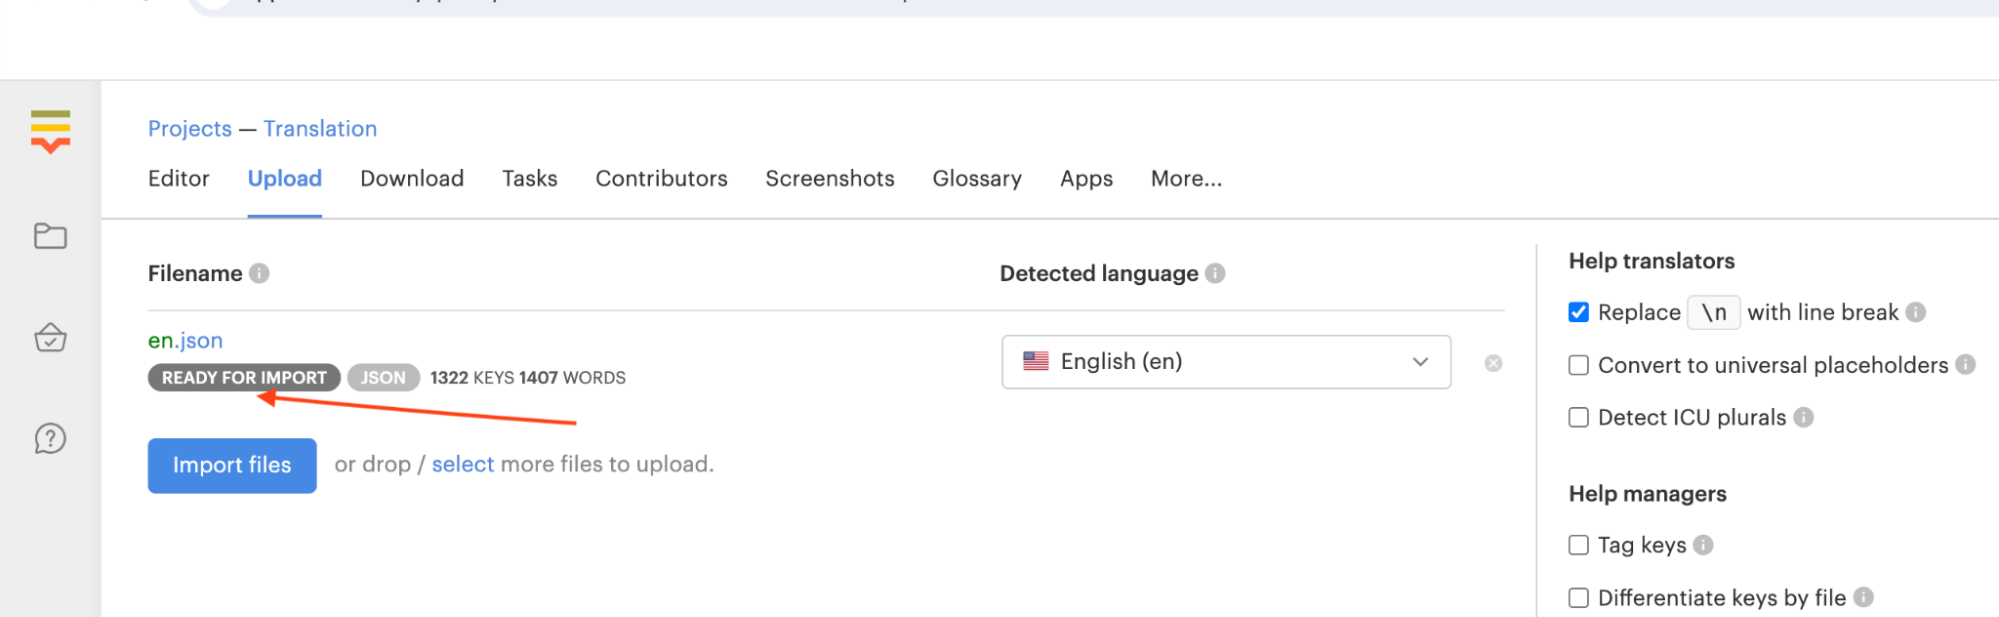
Unzip the downloaded translation zip file
-
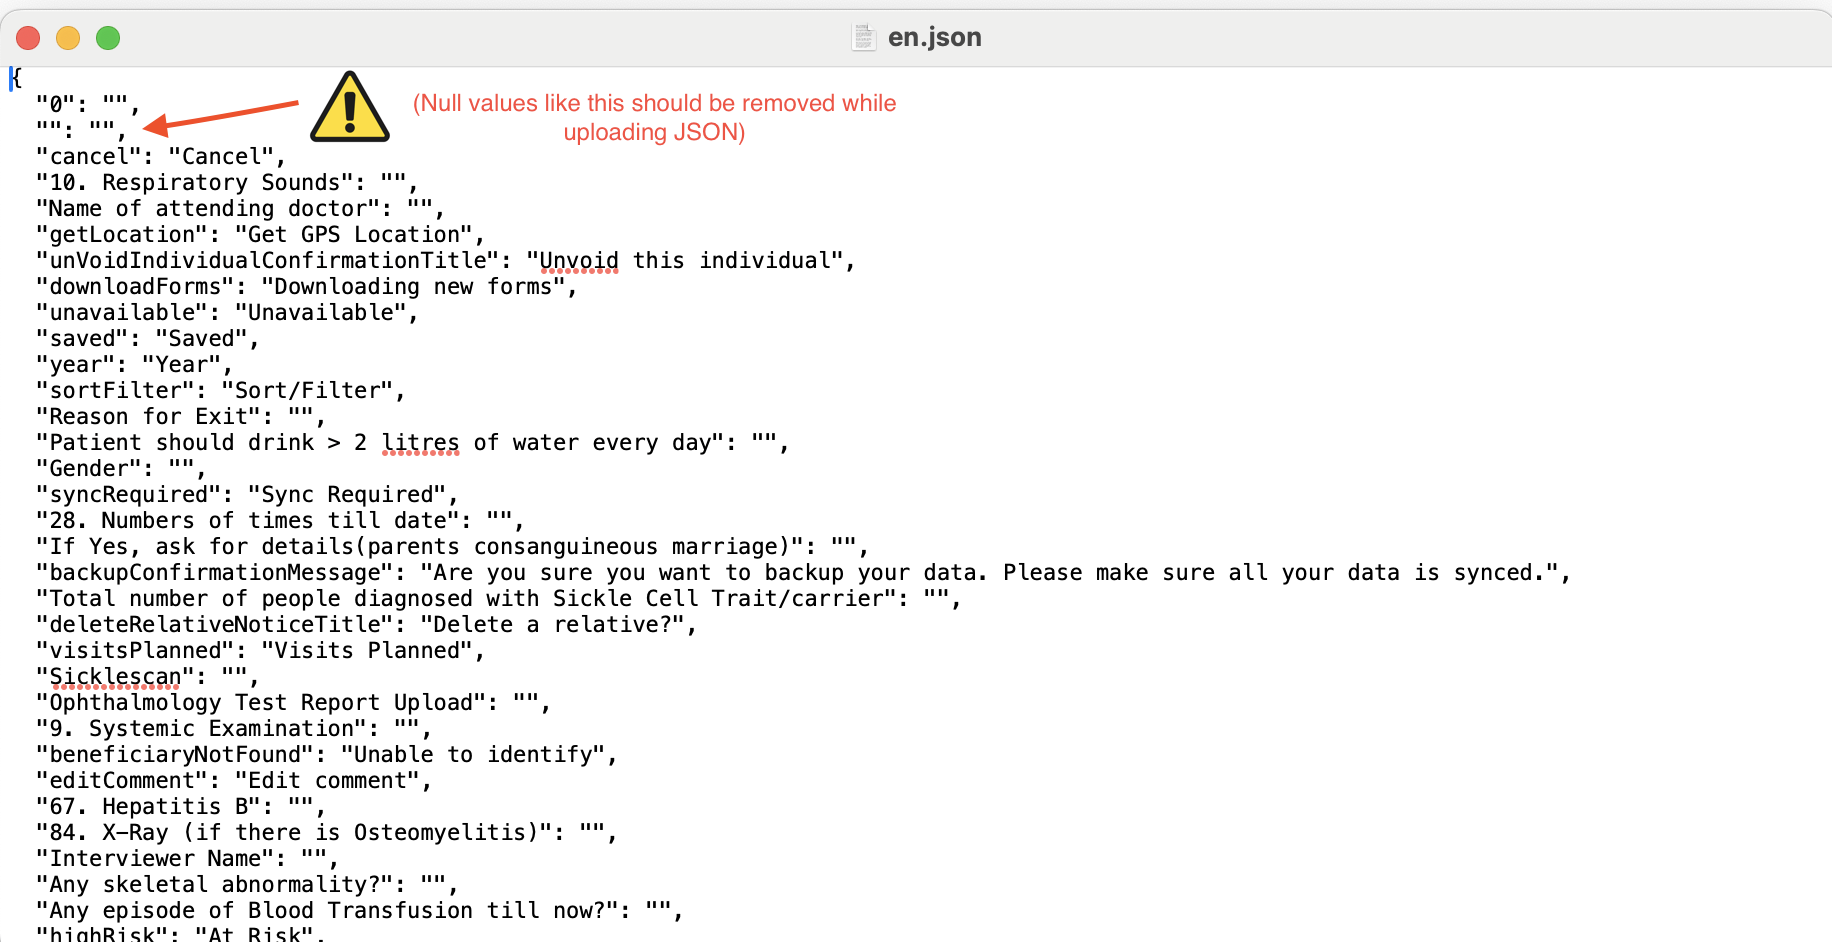
Before uploading the JSON, please make sure that empty values are removed from the json files
-
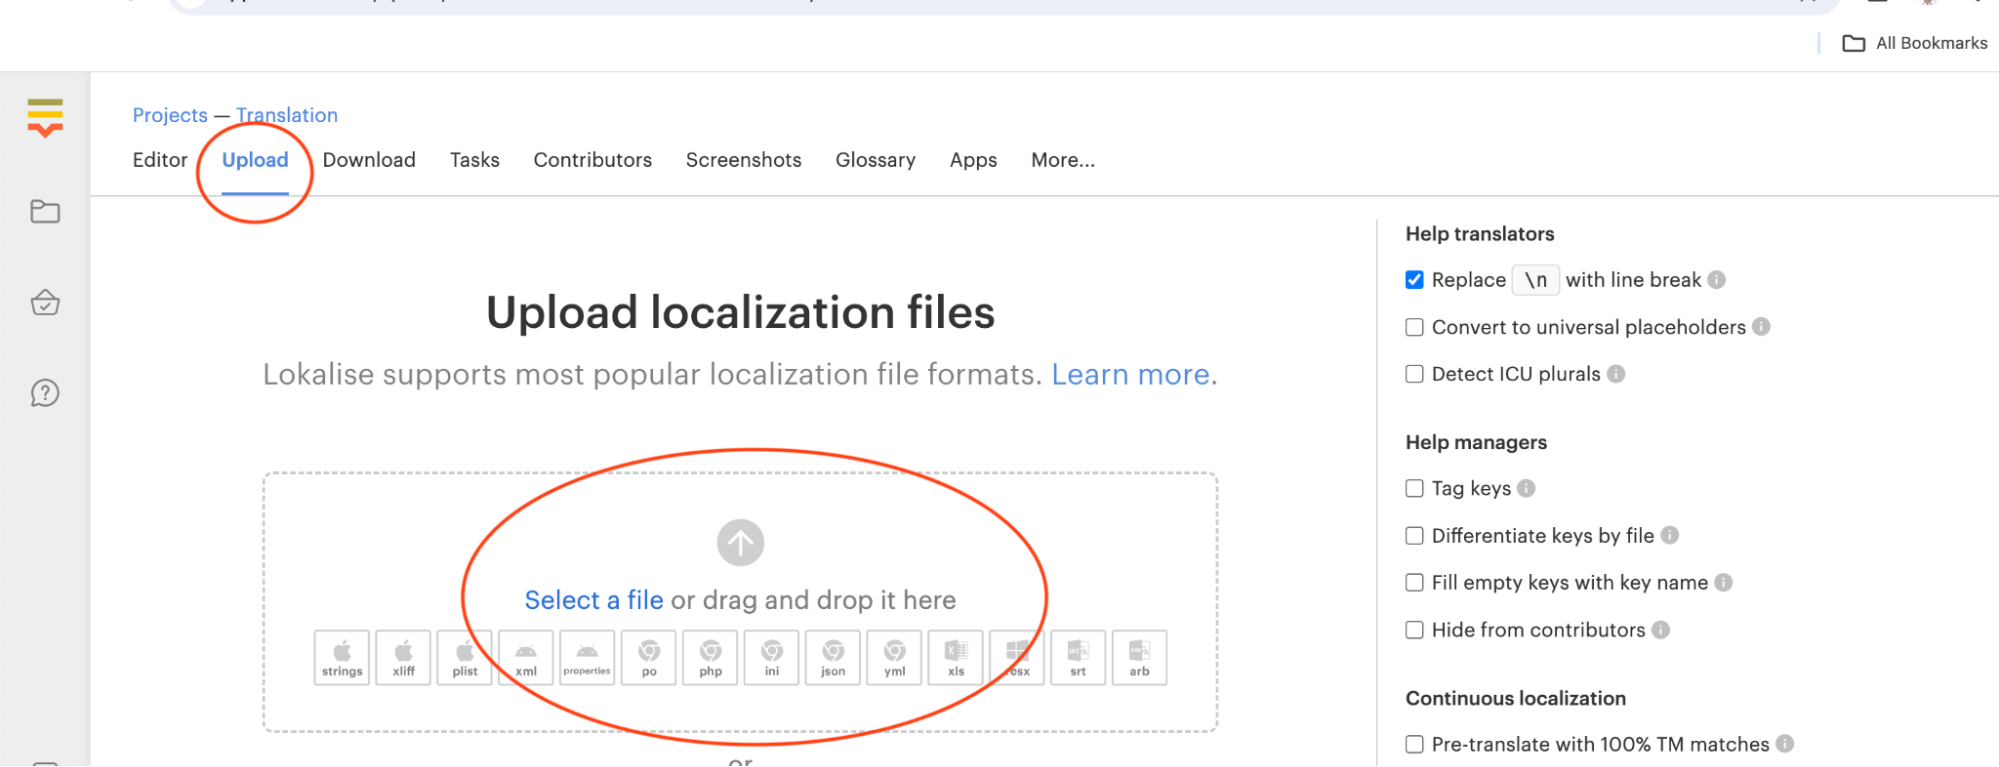
In your project, navigate to the ‘Upload’ section and import the JSON file from the unzipped folder of the previously downloaded Translations zip file.
-
In the translation zip file that is downloaded, go to the local folder and select the English json file
-
Once the JSON file has been uploaded successfully, you will see the ‘Ready for Import’ message.
-
Go to the ‘editor’ section and verify the keys available for the translation.
Inviting Contributors to the project
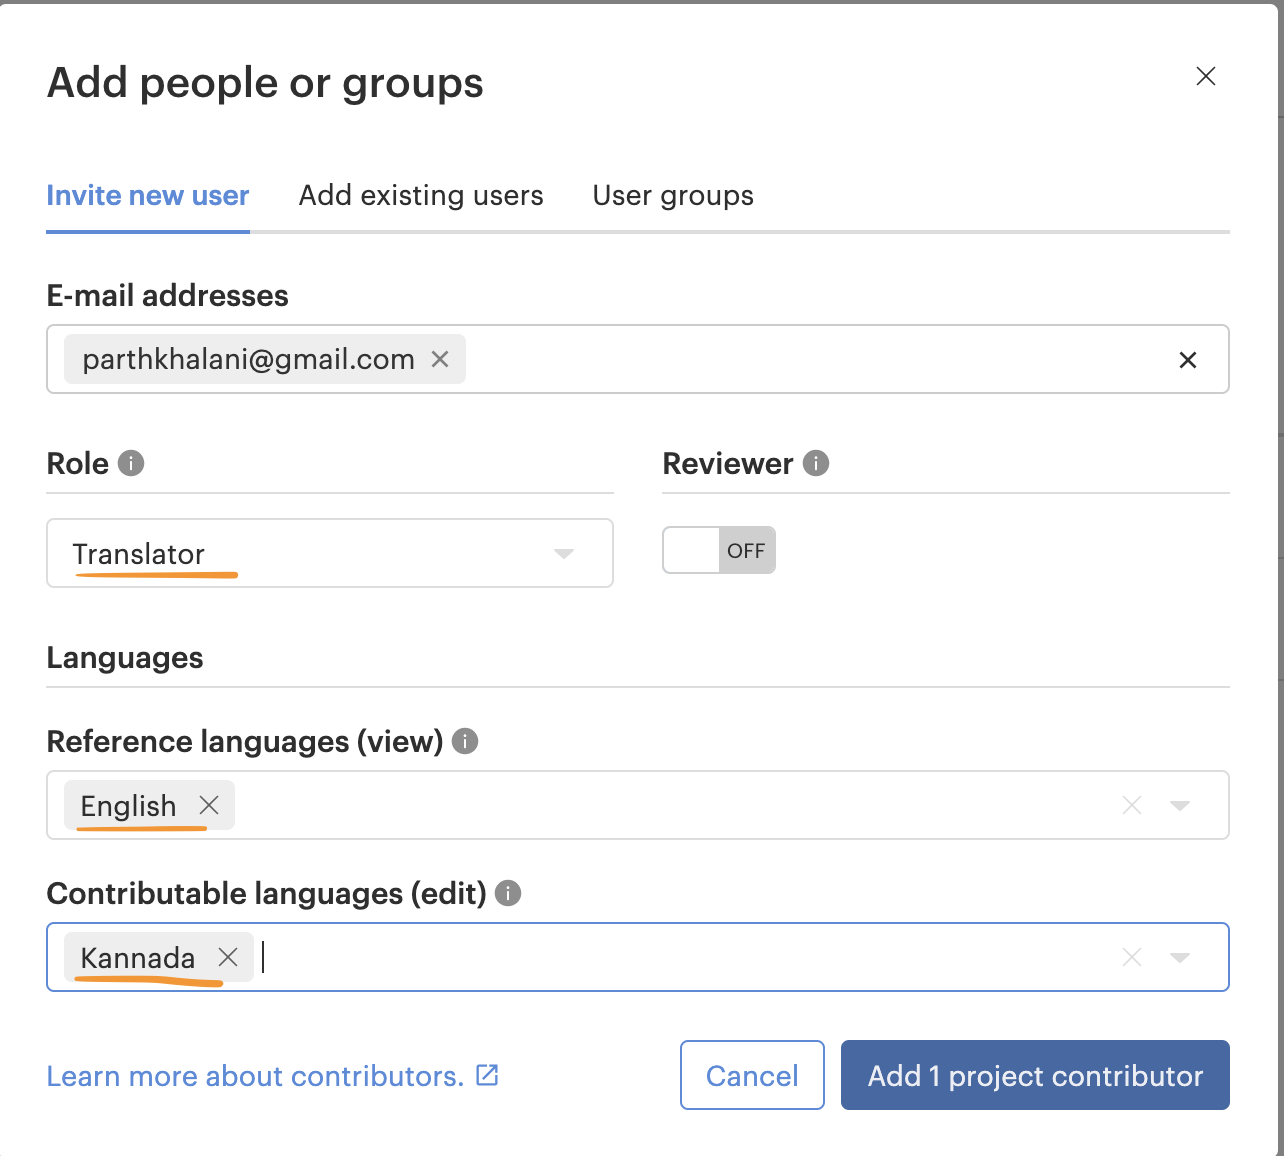
Next, Navigate to the ‘Contributors’ section to send out invites to other people

Perform below mentioned tasks to invite users to collaborate on the project
- Role should be selected as ‘Translator’
- “Reference language” should have the base language (Usually English) and
- “Contributable language” should have target language
Guide for translating keys using Lokalise
-
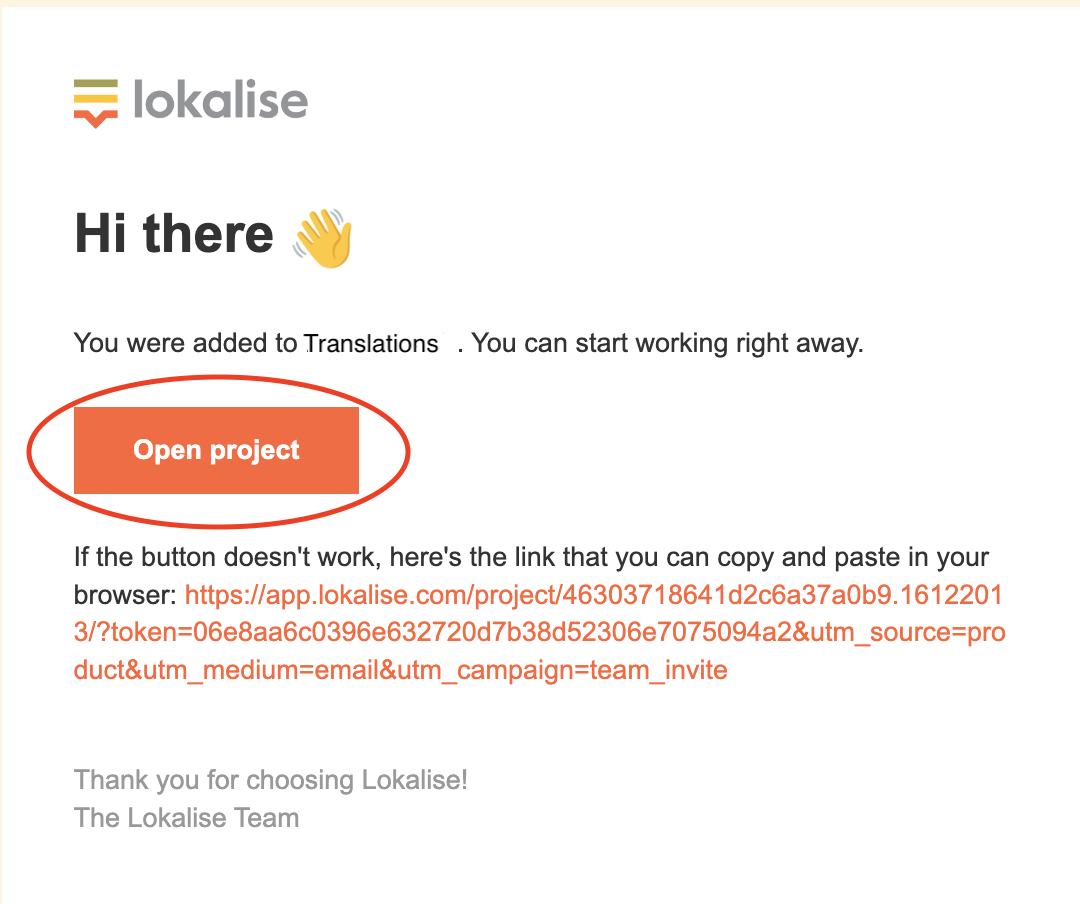
All invitees will receive an Email invite from Lokalise with instructions to login and access the project.
-
Once logged in, available projects will be shown in the projects tab/ home screen. you can click on the project name to access the translation items.
-
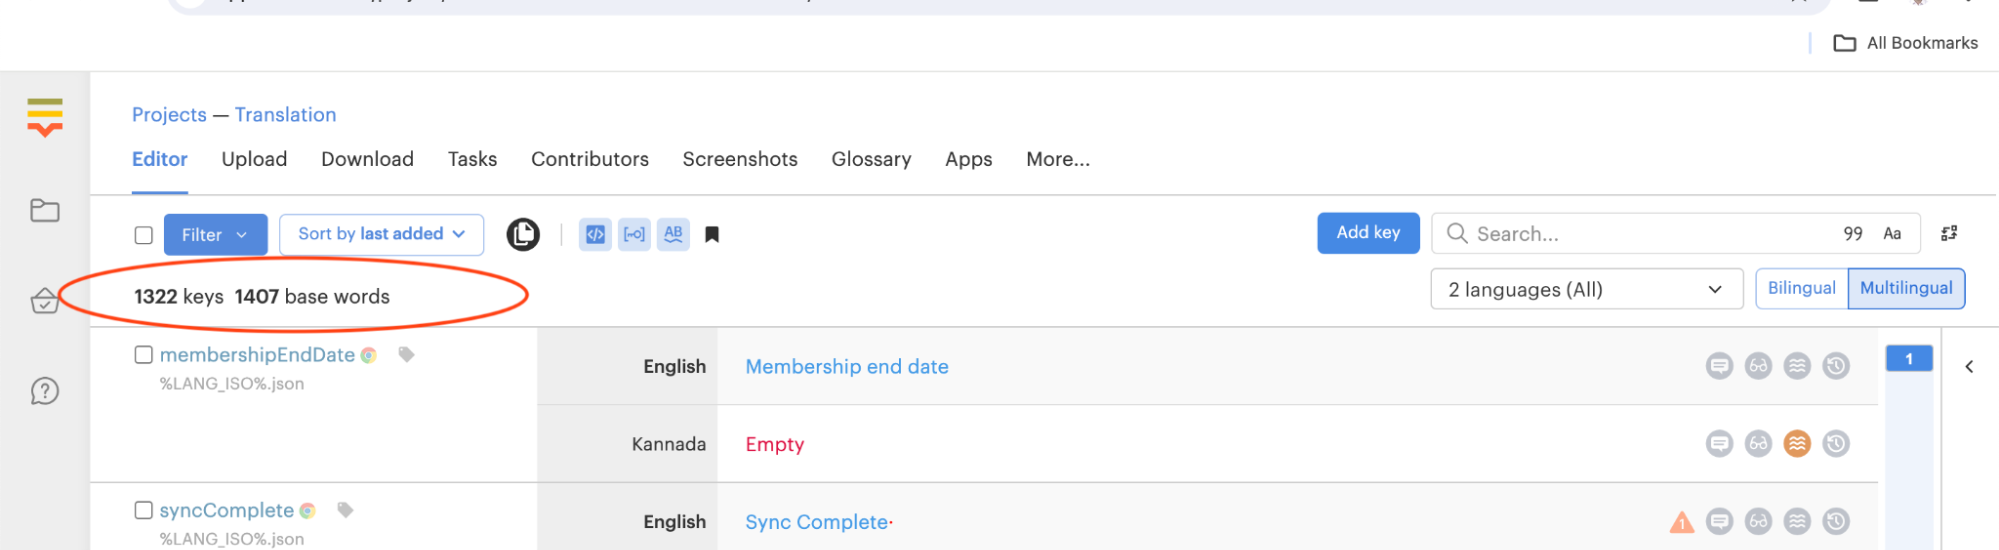
The project would display the editor page by default, and the list of keys should be visible at the bottom.
-
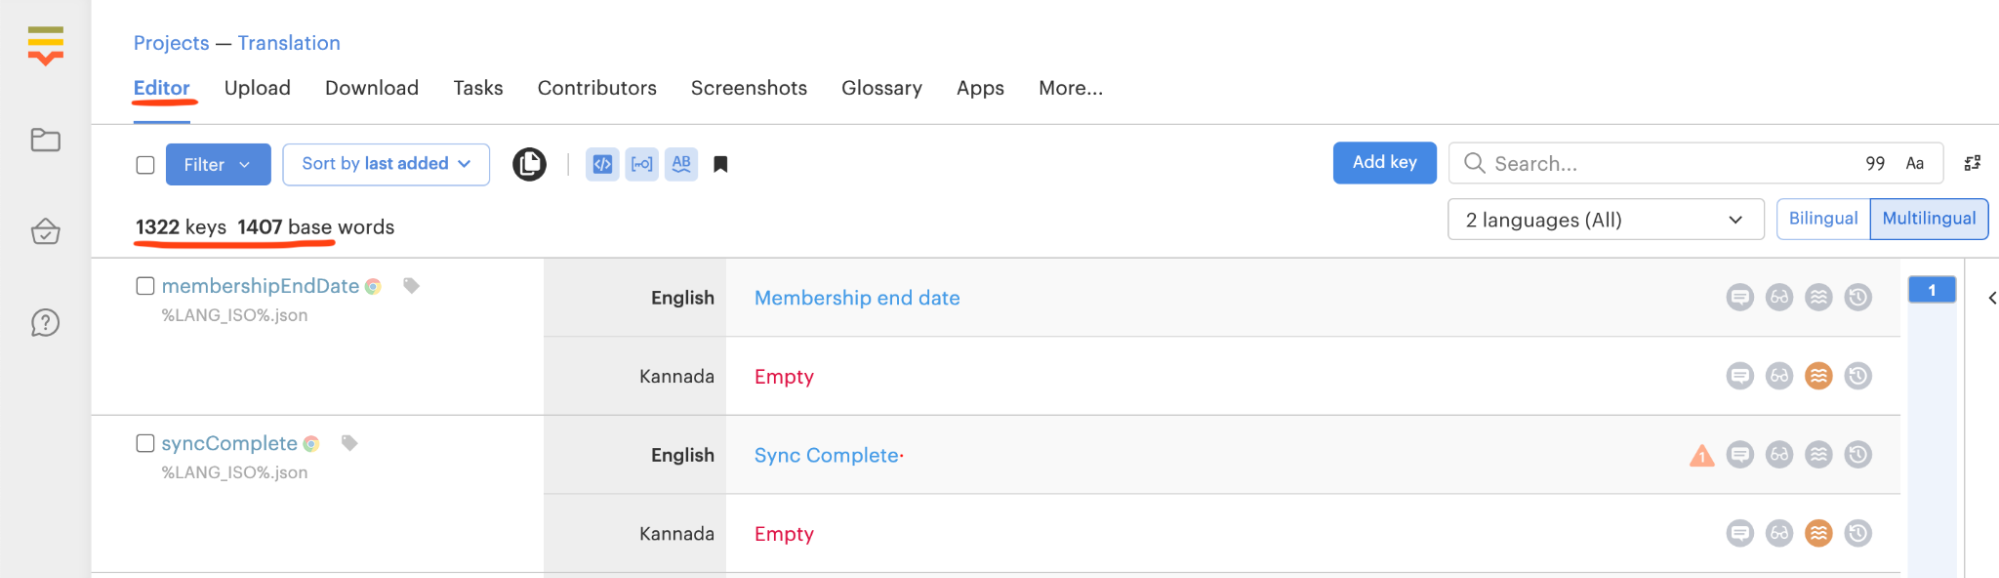
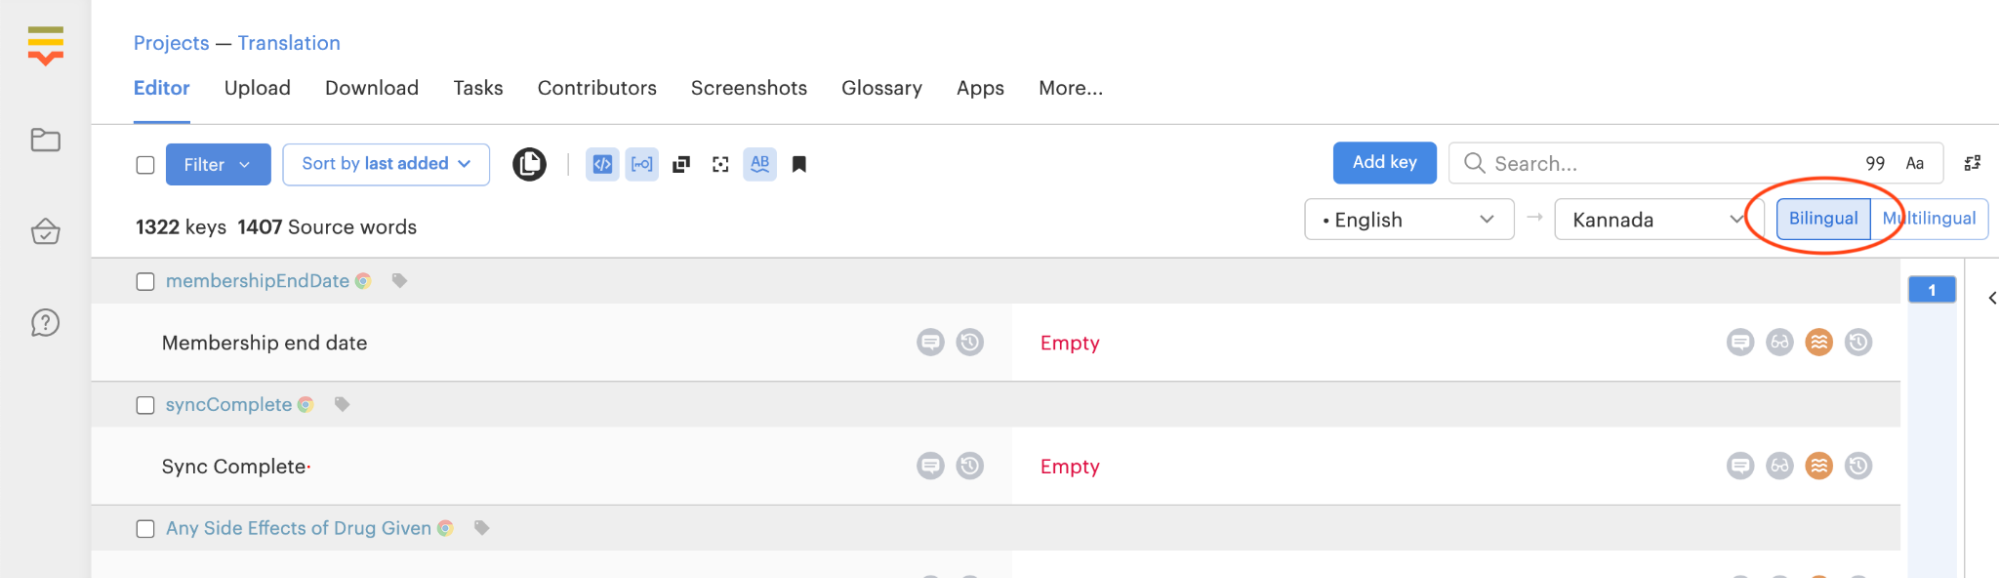
You can select the Bilingual option shown in the screenshot below and search the question or required field names to be translated.
-
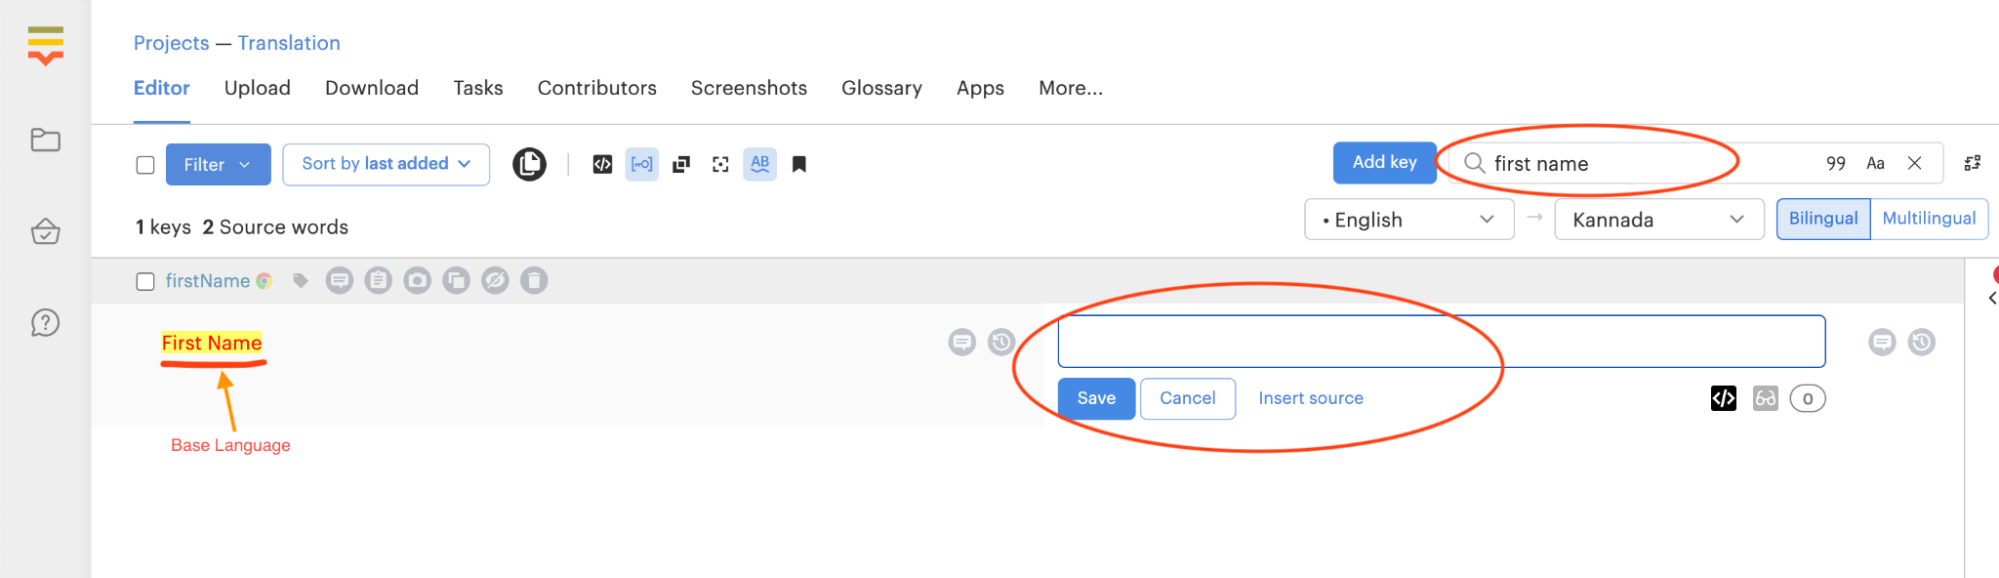
After giving the keywords in the search bar, you can see the results below which show questions and field names on the left side. against which you need to provide the Kannada translation and save the response.
-
Additional notes
- Keep the required forms handy while you start the translation process, you can refer to the questions from respective and update the values in Lokalise.
- In case of questions, the box on the left side might show "empty" and the question would be visible above that in blue fonts. you can provide the appropriate translation against that on the right-hand side box.
Translating Keys with Dynamic string having placeholders
Consider the following “Android” Platform keys, which are examples for Dynamic strings with placeholders:
| numberAboveHiAbsolute | "Should be {{limit}}, or less than {{limit}}" |
|---|---|
| enrolmentSavedMsg | "{{programName}} Enrolment Saved" |
In-order to translate them to Hindi, you would have to specify following in the translated json file:
| numberAboveHiAbsolute | "{{limit}} के बराबर या {{limit}} से कम" |
|---|---|
| enrolmentSavedMsg | "{{programName}} एनरोलमेण्ट सेव हुआ" |
As shown above, ensure that you retain the string placeholder content within “{{” and “}}” as is in native english. Ex: “{{limit}}”, "{{programName}}”
Uploading Translations
After completing translation for all the required keys, questions and forms you can download the translated values JSON file of the target language.
-
Go to the “Downloads” section of the project
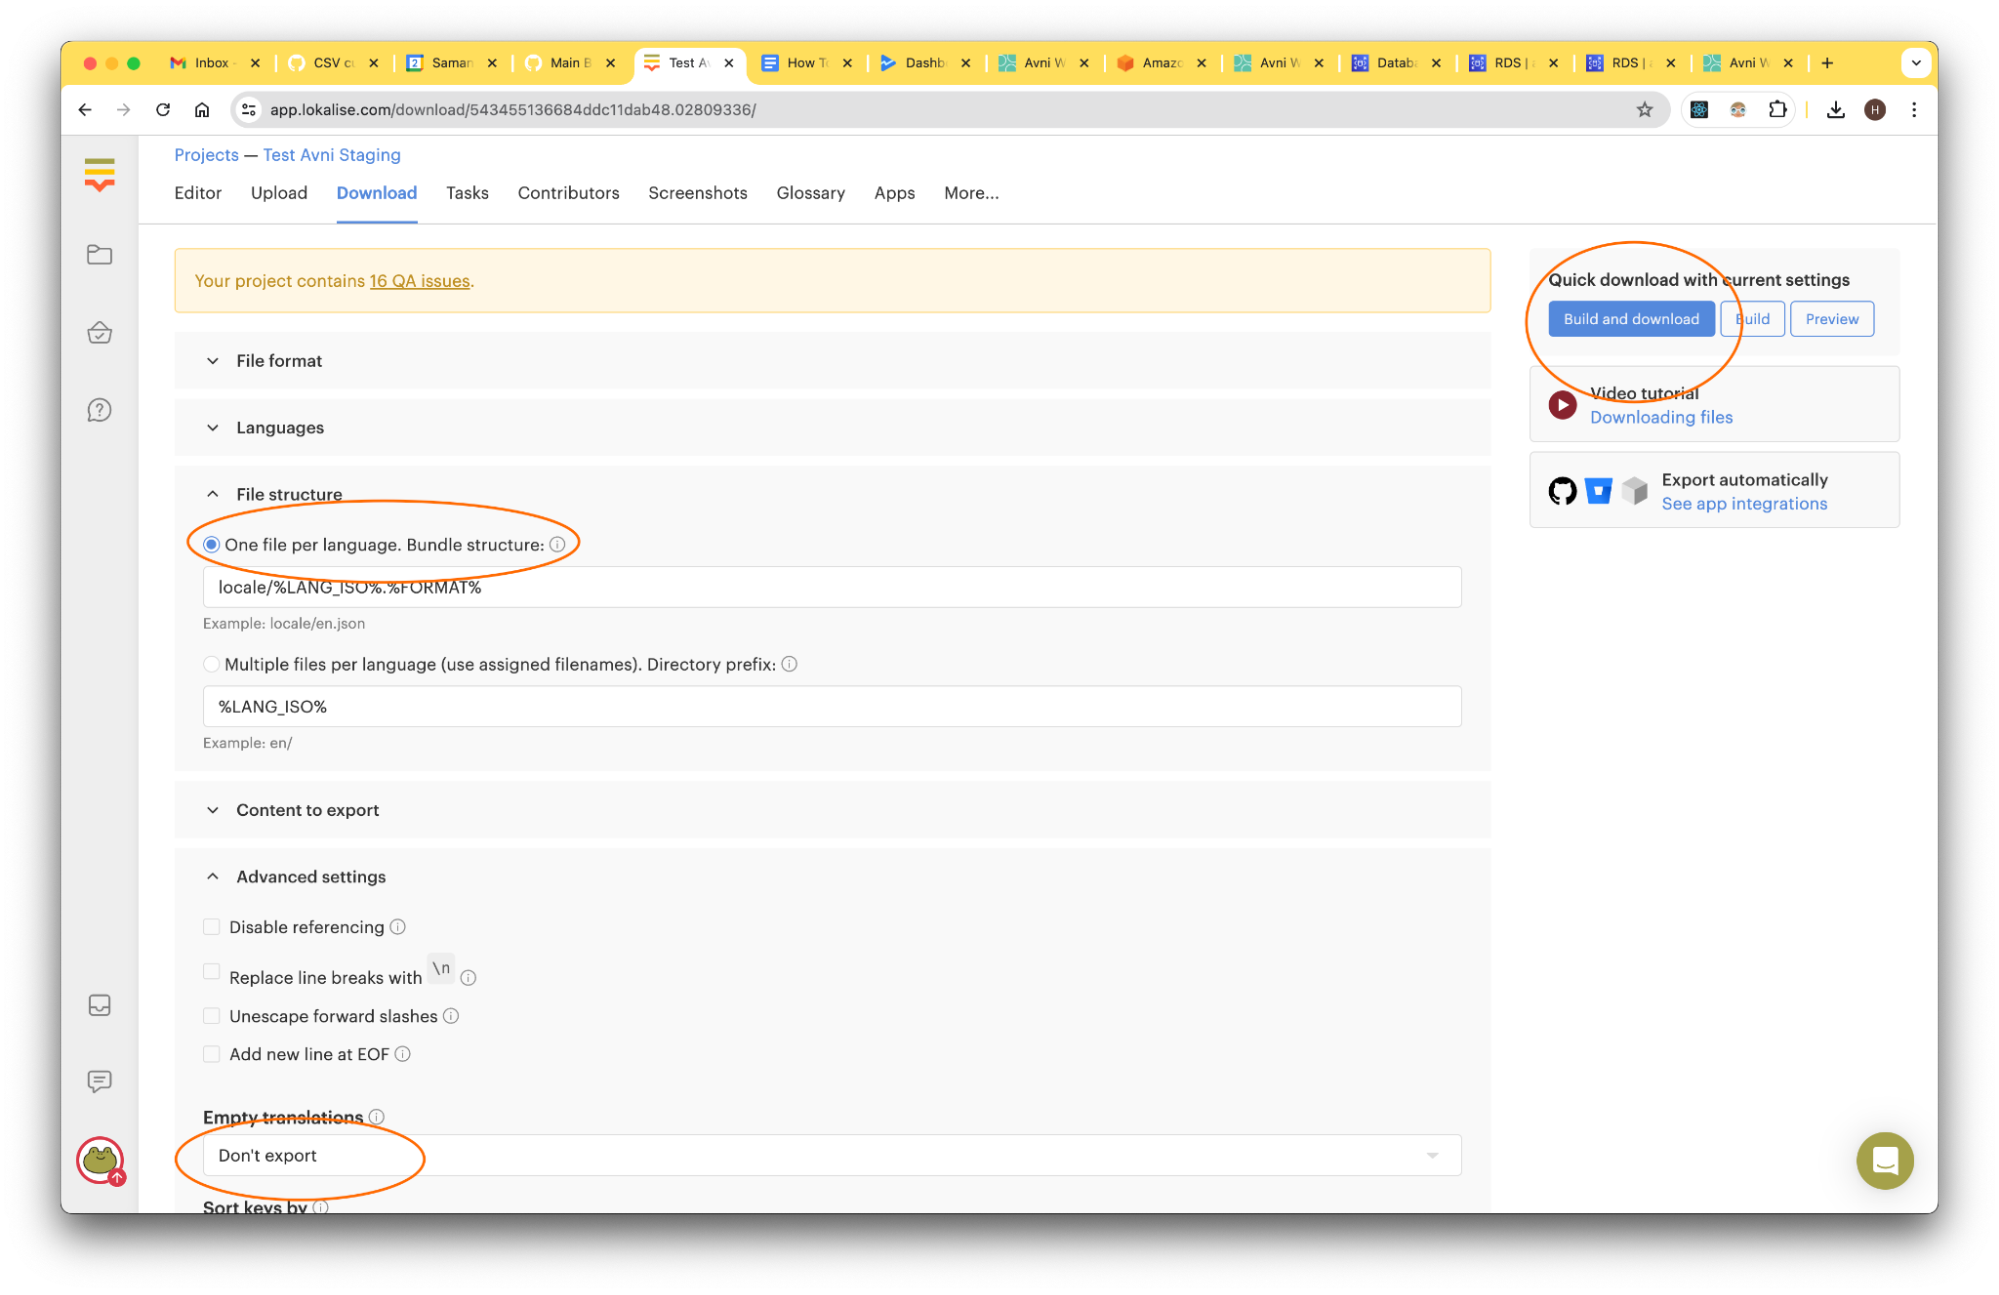
-
As seen above, select the ‘Don’t Export’ option for the “Empty Translations” field, so as to export only the translated fields.
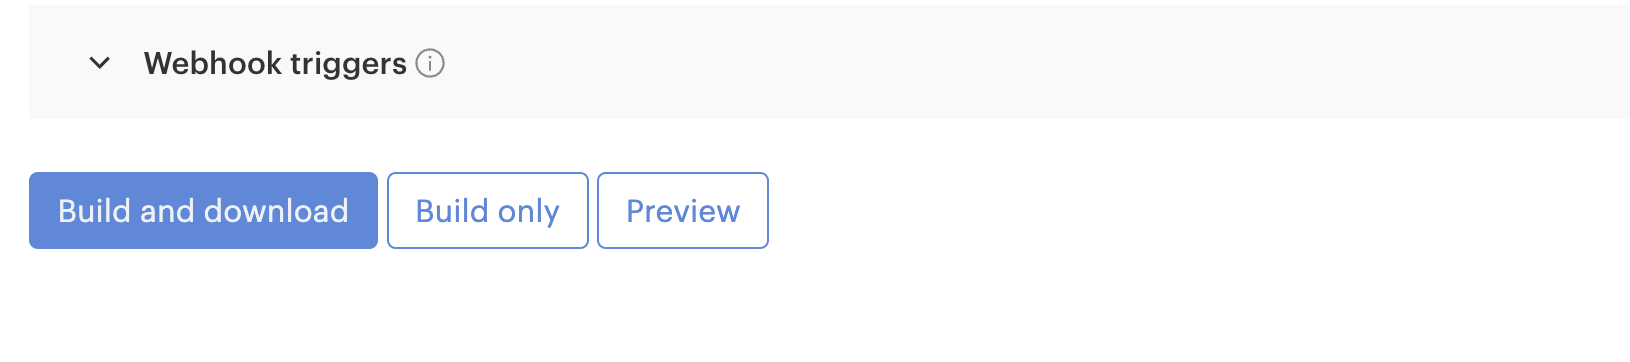
-
Click on “Build and Download” option to download the Translated values ZIP file
-
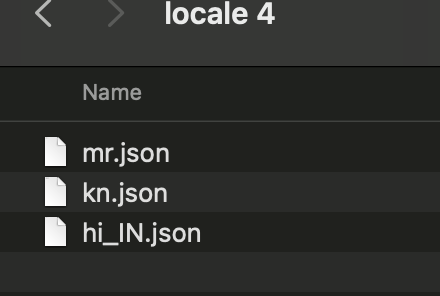
Please note that the downloaded ZIP file would contain the JSON file of the base language (English) and targeted language JSON.
-
Now the JSON file of the translation language needs to be uploaded into the Avni. Navigate to the “Translations Dashboard“. Using its “Upload Translations” functionality, upload the JSON file, after choosing an appropriate language. Be careful about choosing the target language, it should be same as the language of the translated values.
-
On successful upload of the translated values, you should see a change in the value of the “Keys with translations” column for the corresponding Language, in the “Translations Dashboard”.
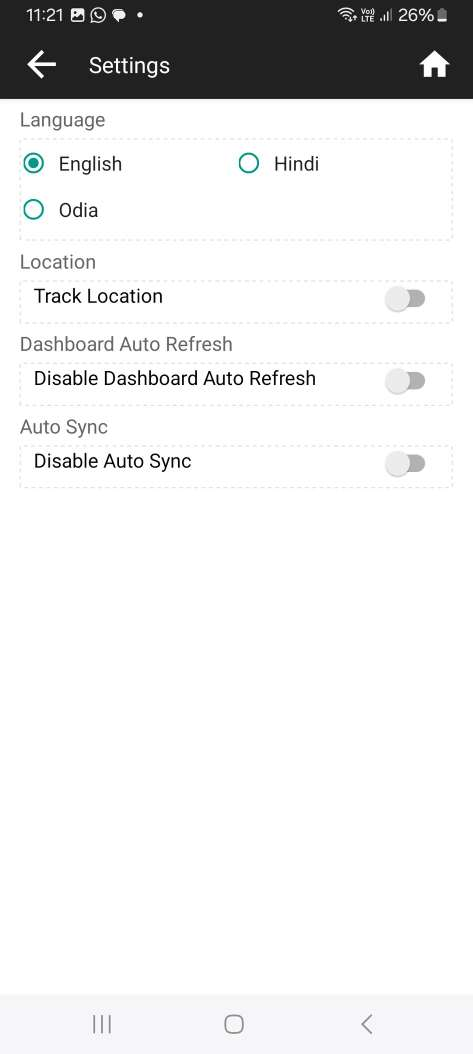
Using the Avni client application in User’s native Language
On the Avni client app, users would need to sync their devices in-order to get the new translations.
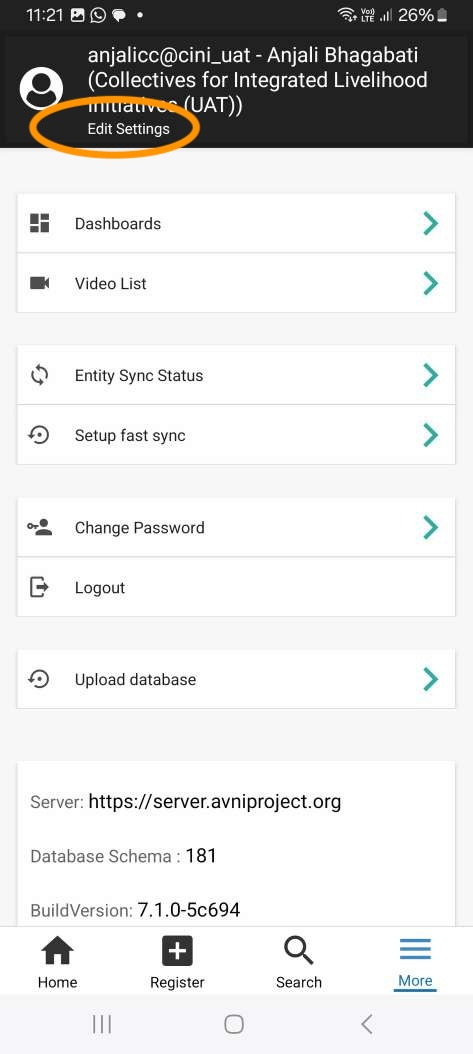
If the default language for the User hasn’t been set to his/her desired native language, then the user should be able to switch to it, by navigating to the “More” menu and clicking on the “Edit Settings” button at the top, and selecting the language in which he/she wants to see the app content.
Updated 5 months ago