Getting Started with Avni Self-Service Reports 📊
What This Guide Will Help You Do
This guide will help you learn how to create reports and visualize your Avni data in Metabase, even if you've never worked with data tools before! We'll walk through real examples with step-by-step instructions.
Quick Tip: This guide focuses on practical everyday tasks. If you need information about setup or administration, please refer to the Self-Service Reports Guide for Avni. If needed, contact Avni support team for further guidance.
The Basics: Understanding Metabase
What is Metabase and why should I care?
Metabase is a simple tool that helps you look at your organisation's data in Avni, without needing technical skills. Think of it like a smart photo editor for your data - it helps you:
- See overall Avni organisation data at a glance
- Create charts and graphs easily
- Share insights with your team
- Make better decisions based on actual numbers
- Identify trends and patterns in your data
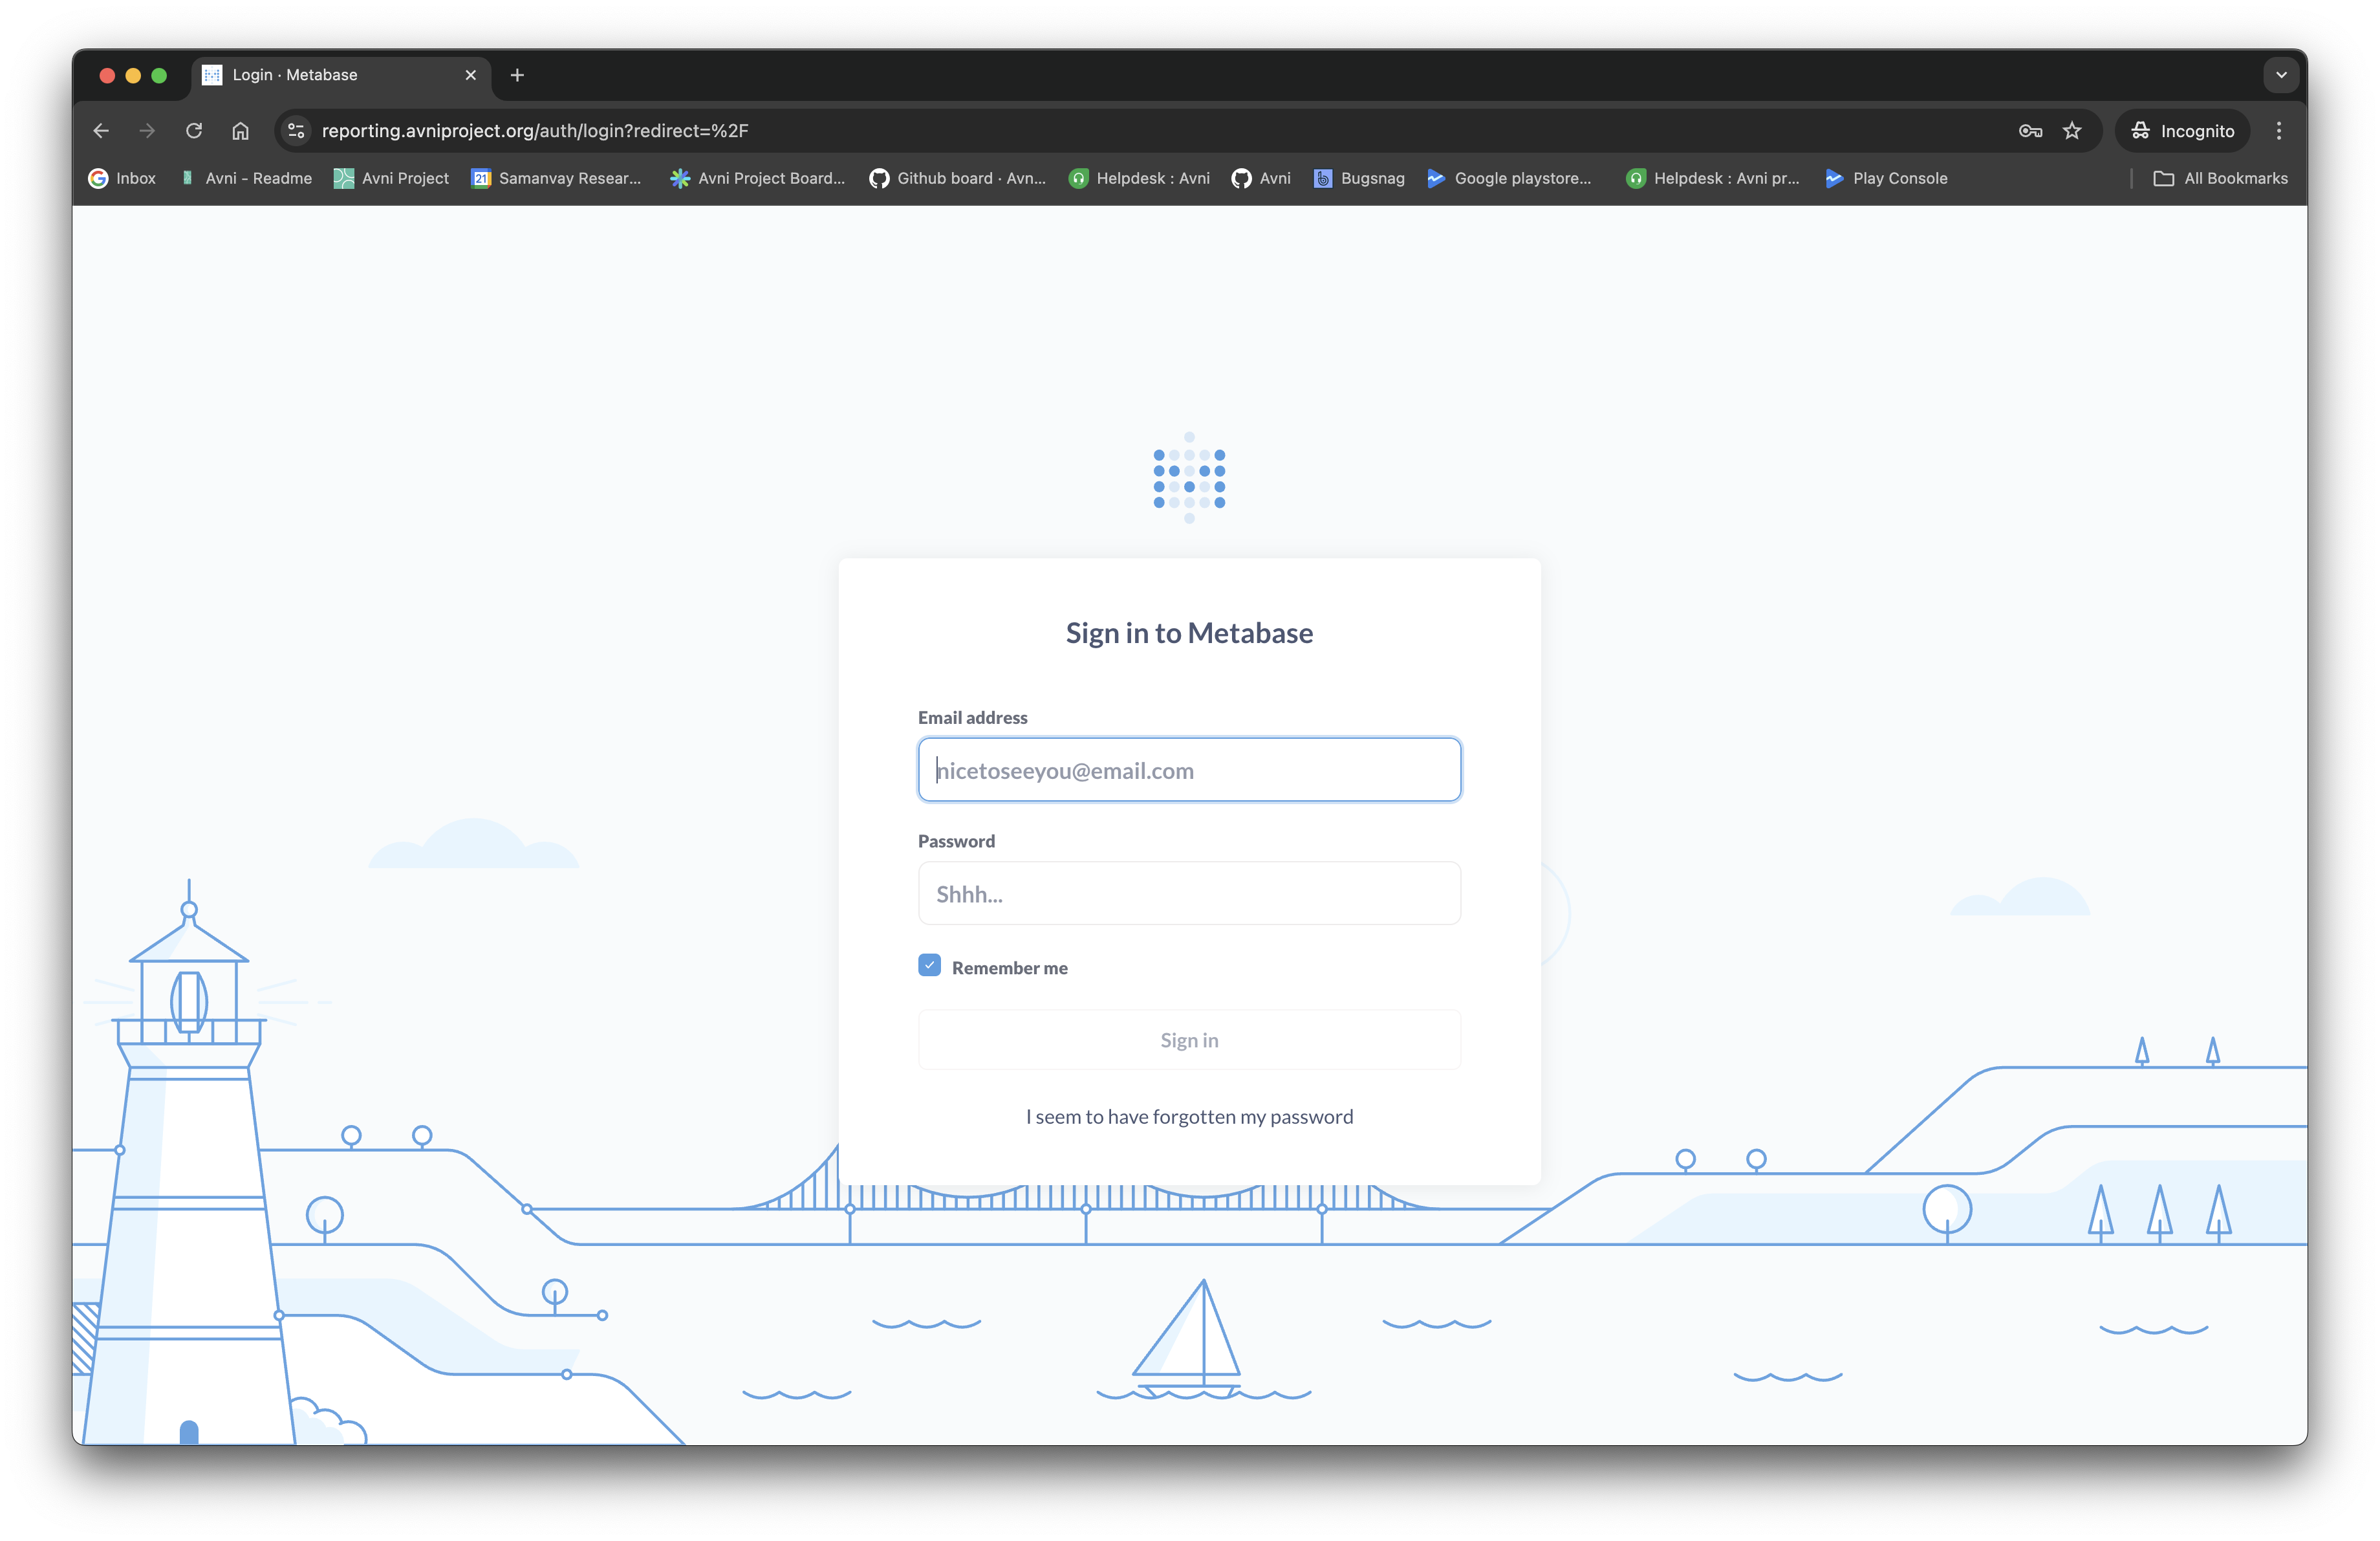
How to Log In 🔑
- Open your web browser and go to https://reporting.avniproject.org/
- Enter your email address
- Enter your password
- Click the "Log in" button
Help! I Can't Log In 🆘
Don't worry! Try these steps:
- Click the "Forgot Password" link on the login page
- Enter your email address to receive reset instructions
- If that doesn't work, contact your Avni support team for help
Who Can See My Reports? 👁️
Only people from your organization can see your data and reports:
- Team members in your organization
- System administrators who help manage the platform
Where Does This Data Come From? 📱→💾
All the data you see in reports comes from information collected by field workers using:
- The Avni mobile app on phones and tablets
- The Avni web application on computers
This information is automatically organized into easy-to-use tables via the ETL service, that you can explore in Metabase.
Understanding Your Data
What Are Data Tables?
In Avni, your information is organized in tables - think of them like Excel spreadsheets or organized lists. Each table contains specific information about your program. The Avni ETL service creates special reporting-friendly tables that make it easy to build reports and visualizations.
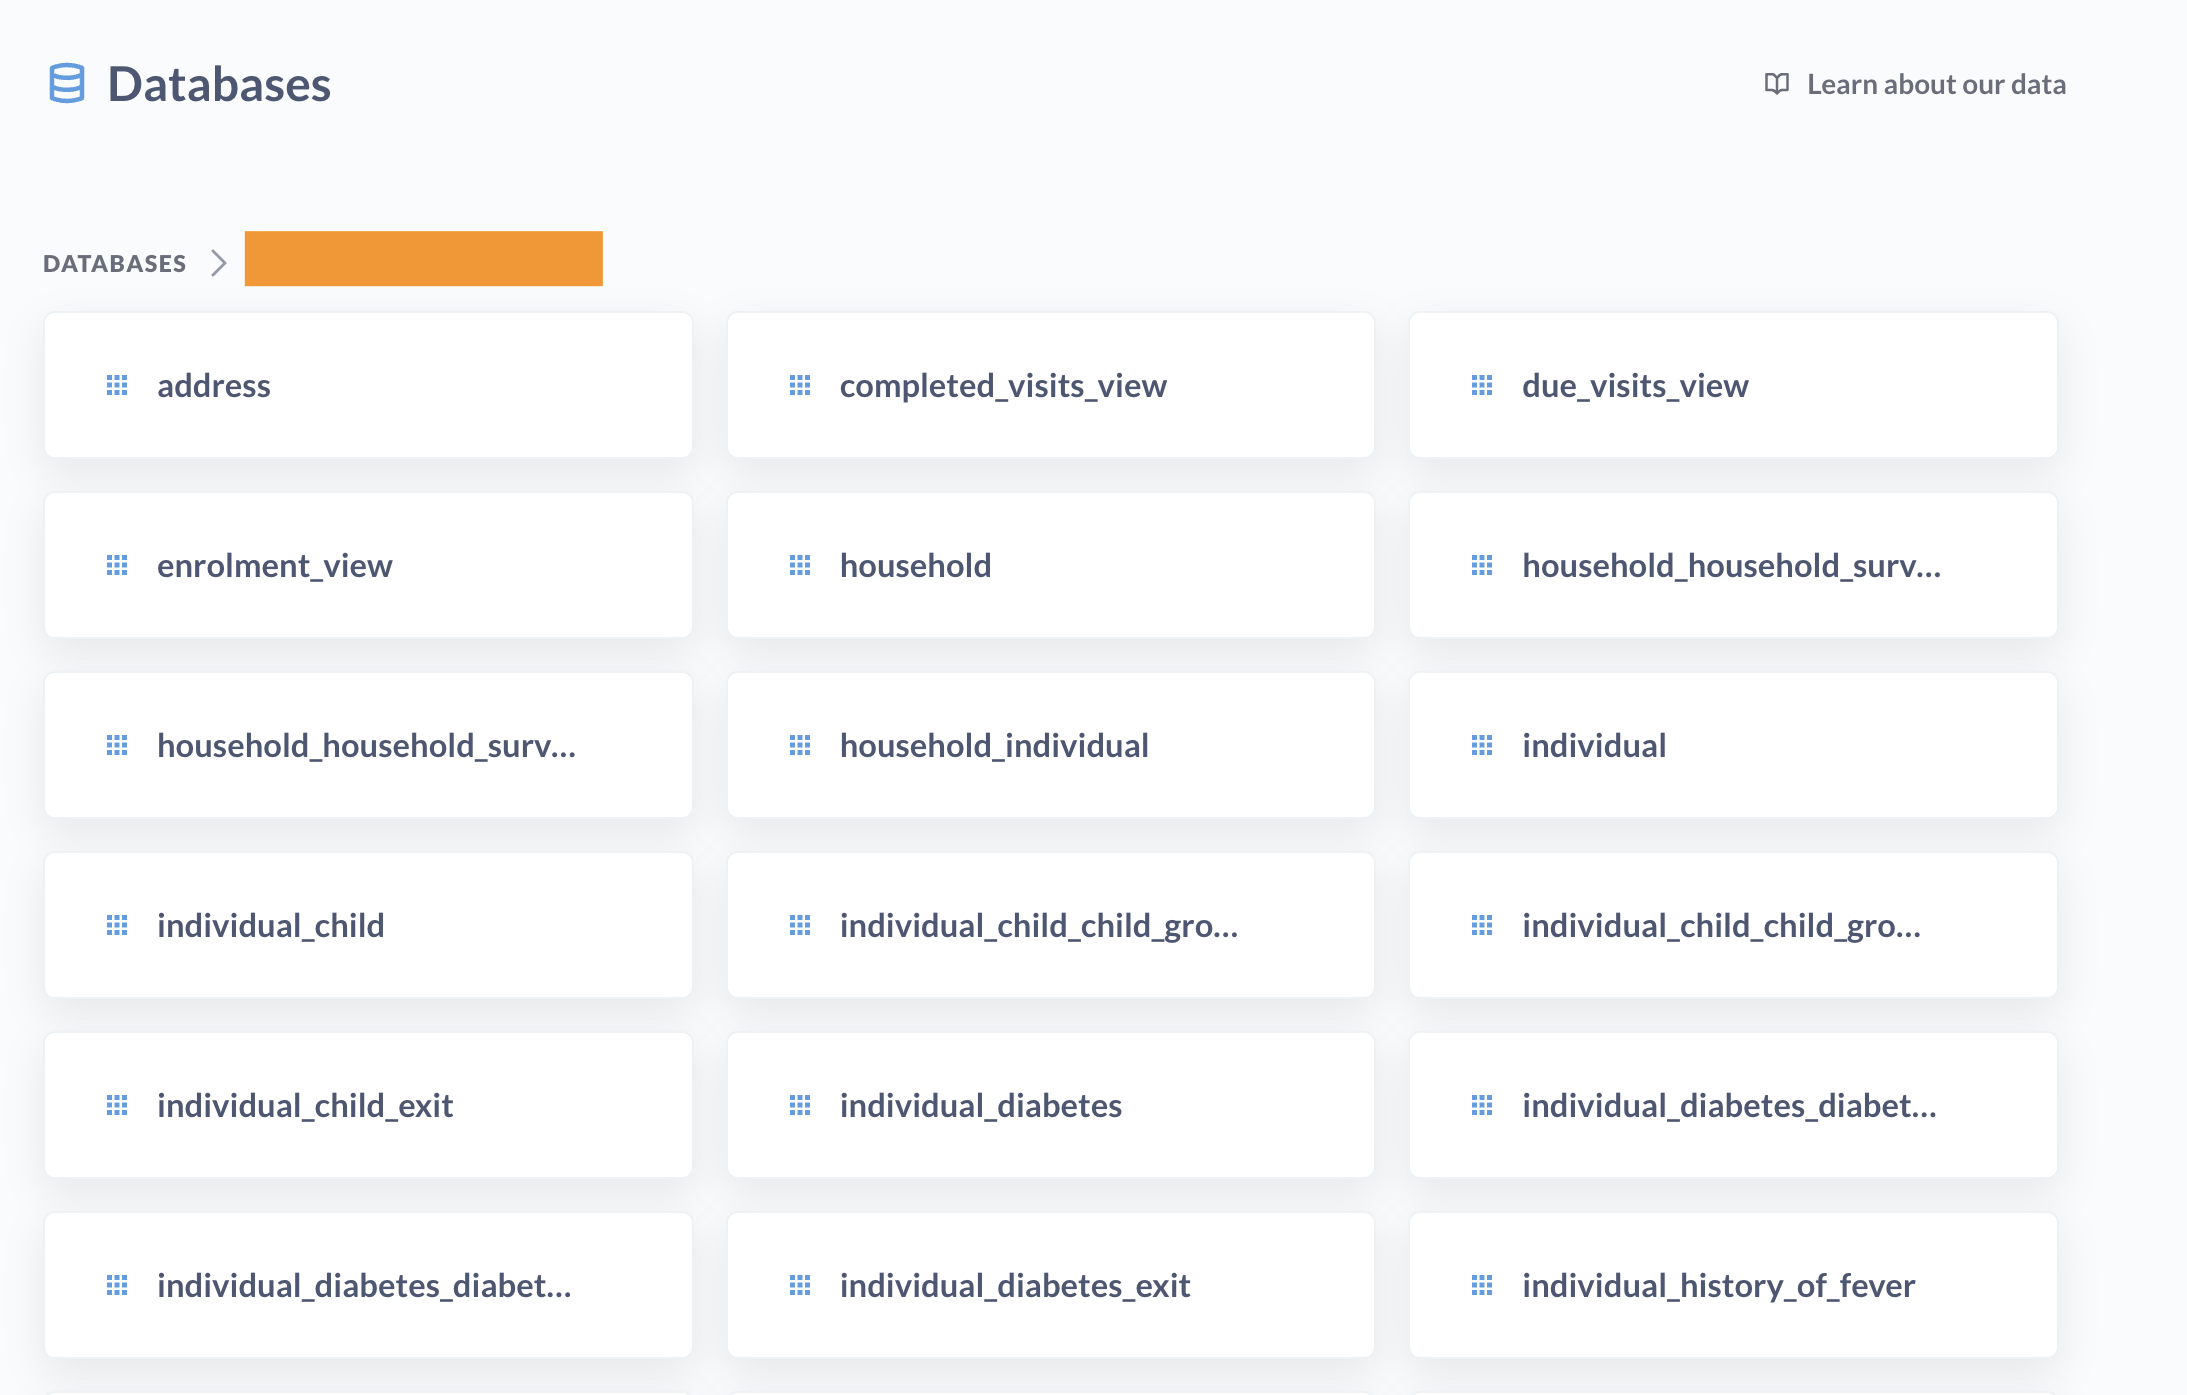
Example of organisation specific tables
Your Main Tables Explained
Here are all the important tables you'll work with in Metabase:
1. Subject Tables
These tables contain information about the main people or things you track:
- Example:
Individual,Household,Facility - Each row represents one person or entity in your program
- Contains basic information like name, ID, registration date, address details
- Table names follow the pattern:
<subjectType>
2. Encounter Tables
These tables show visits or interactions that happened outside any program:
- Example:
Individual_Baseline,Household_Annual_Visit - Each row represents one visit or interaction
- Contains all the information collected during that encounter
- Table names follow the pattern:
<subjectType>_<encounterType> - Cancelled encounters are in separate tables named:
<subjectType>_<encounterType>_cancel
3. Program Tables
These tables show which people are enrolled in which programs:
- Example:
Individual_Nutrition_Program,Individual_Pregnancy - Each row represents one person's enrollment in a program
- Contains enrollment details like date joined, date exited
- Table names follow the pattern:
<subjectType>_<programName> - Program exits are in separate tables named:
<subjectType>_<programName>_exit
4. Program Encounter Tables
These tables show visits that happened within specific programs:
- Example:
Individual_Nutrition_Program_Monthly_Visit - Each row represents one program visit
- Contains all information collected during that program visit
- Table names follow the pattern:
<subjectType>_<programName>_<encounterType> - Cancelled program encounters are in separate tables named:
<subjectType>_<programName>_<encounterType>_cancel
5. Supporting Tables
Additional tables that help with specific data types:
- Address Table: Contains detailed address information for all subjects
- Media Table: Stores all media files (images, documents) in your system
- Repeatable Group Tables: For information that can appear multiple times
- Table names follow the pattern:
<parentTable>_<question_group_concept_name>
- Table names follow the pattern:
Try It Yourself: Exploring Tables
Let's explore these tables together:
-
Open the Data Browser:
- Click on "Browse Data" at the top of the screen
- Find and click on the folder labeled with your Organisation Name, Ex: "BI DEMO"
-
Look at any of the Subject Type Table:
- Click on any of the Subject Type Table, Ex: "beneficiary" table
- Notice each person has a unique ID number
- Browse through the information like names and addresses
-
Understand How Tables Connect:
- Open any ProgramEnrolment / ProgramEncounter Table,"participation" table
- Find the "Individual ID" column
- This ID connects to the ID numbers in the "beneficiary" table
- Similarly, the "Program ID" connects to IDs in the program table
Understanding Connections: Tables connect through ID numbers. Think of it like this: if beneficiary #123 appears in the participation table with program #456, it means that person is enrolled in that specific program.
Finding Exactly What You Need
Filtering: Zooming In On Specific Information
Filtering lets you focus on exactly the information you care about - like looking at beneficiaries from only certain states or programs started after a specific date.
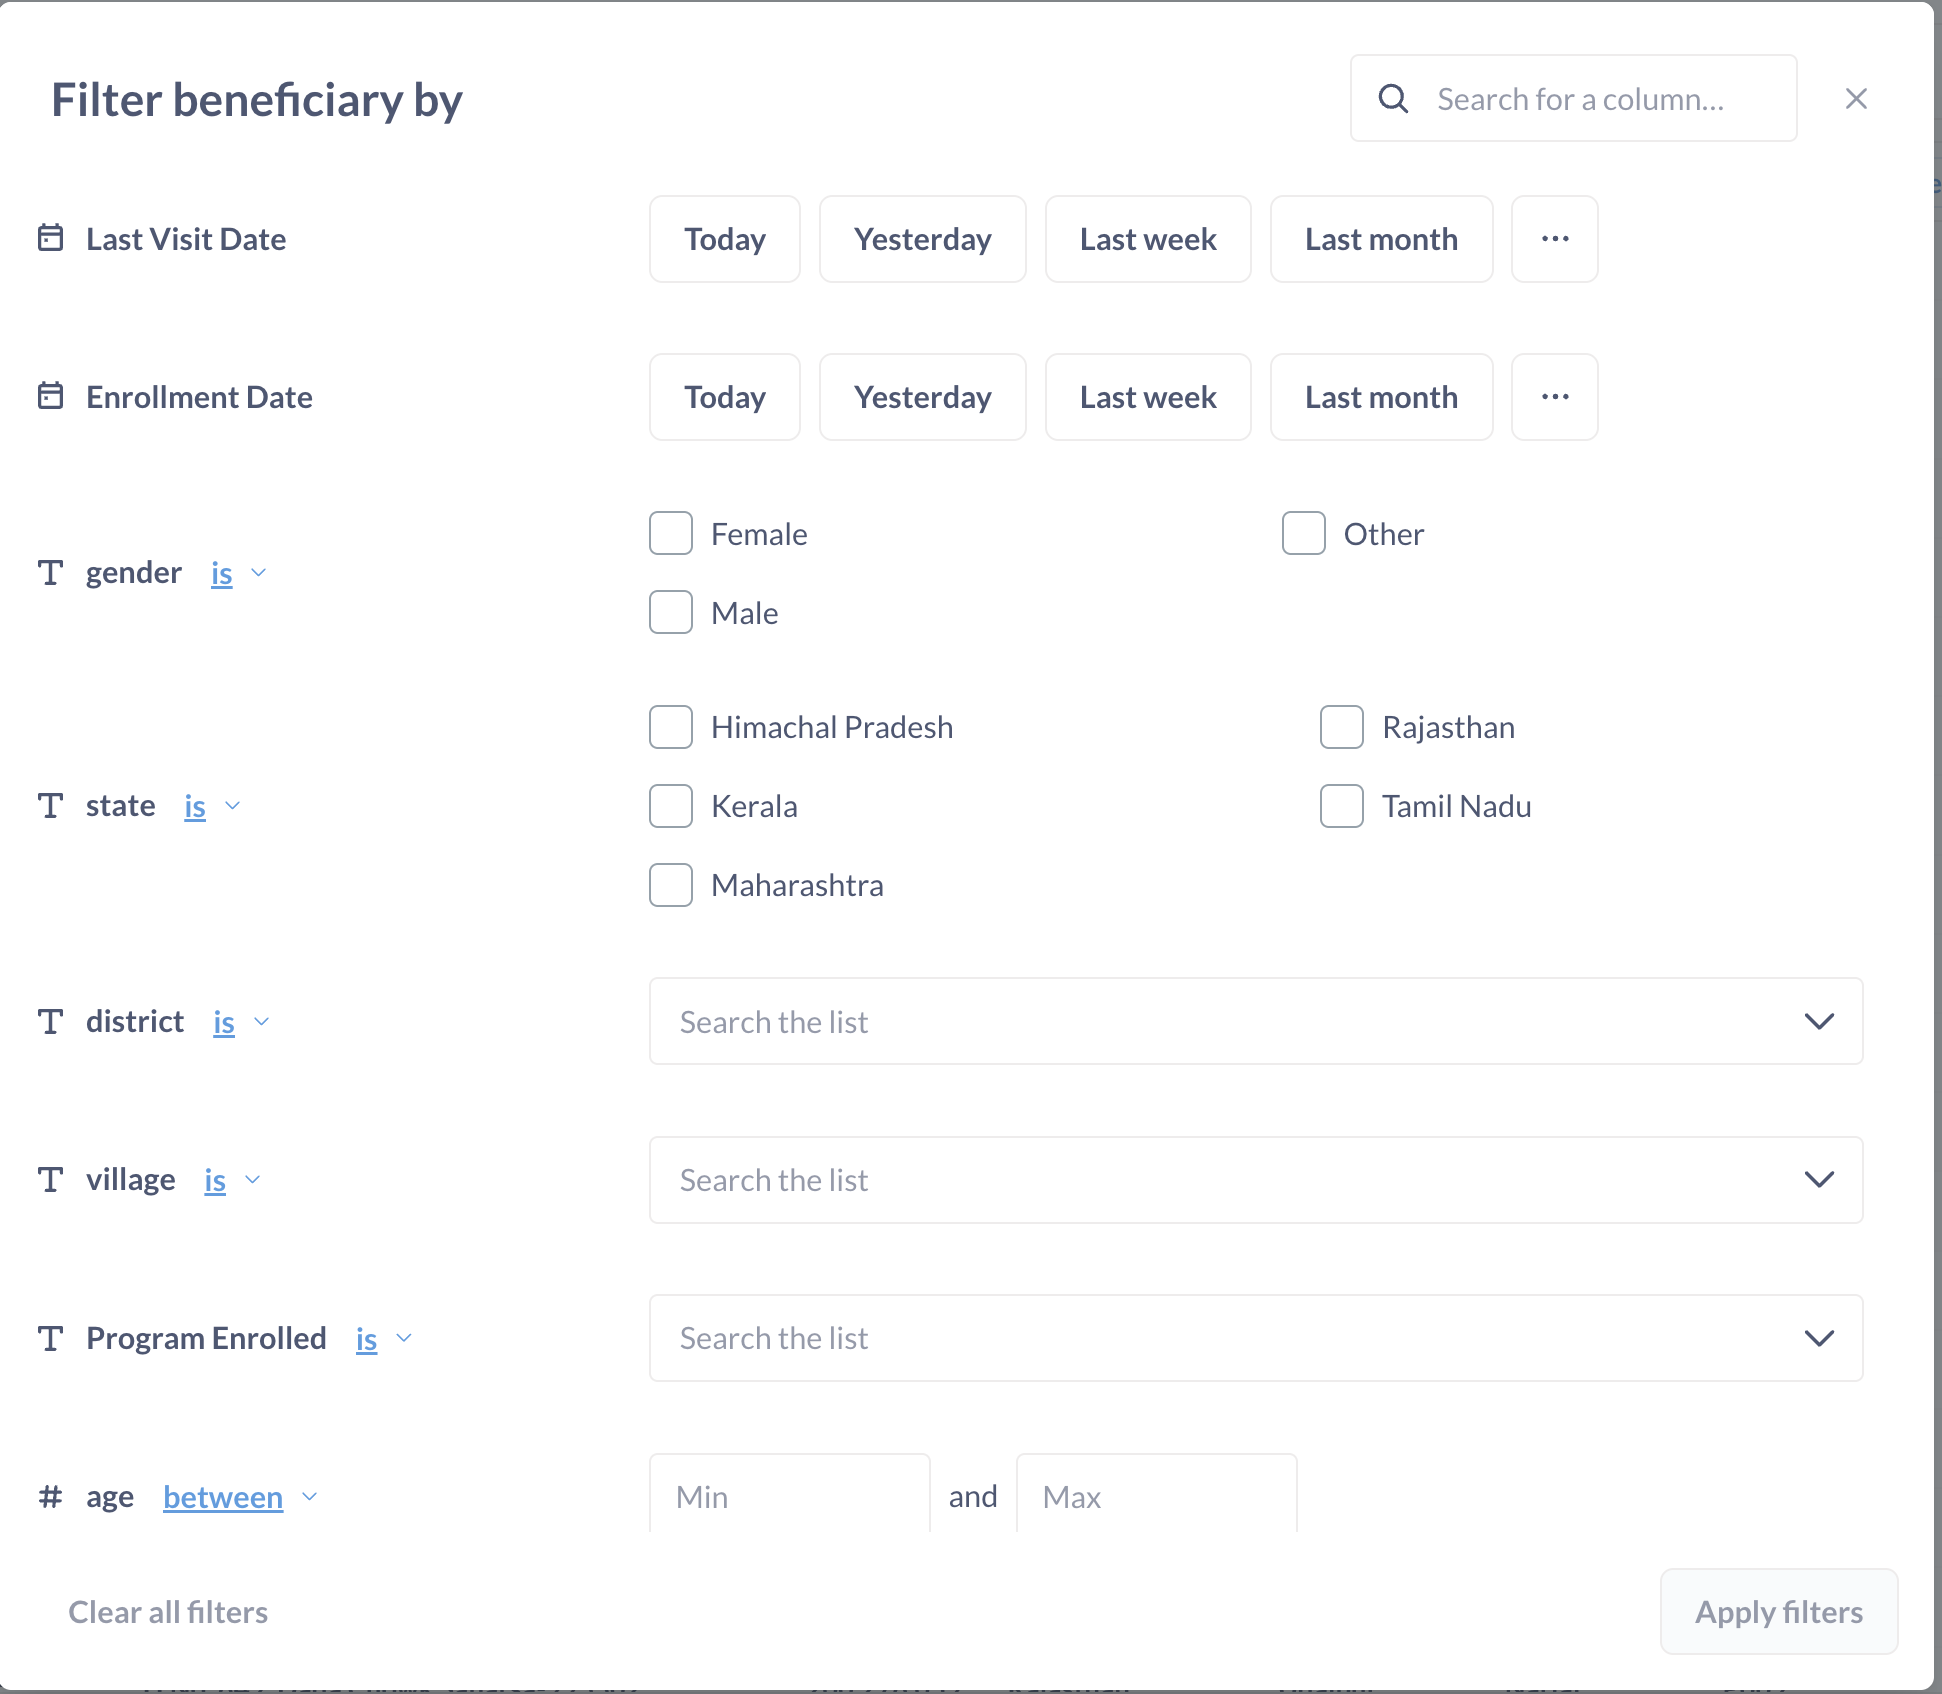
Example of Filters configuration screen for a table
Try It Yourself: Simple Filtering
Exercise 1: Filter by State
- Open any of the Subject Type Table, Ex: "beneficiary" table
- Find any address related column, Ex: "state" column and click on it
- Choose "Filter by this column" from the menu
- Select a few addresses (states) you're interested in
- Click "Add Filter" to see only people from those states
Exercise 2: Create Custom Filters
- Open any of the ProgramEnrolment / ProgramEncounter Table, Ex: "participation" table
- Look for the "Filter" button at the top right of the screen
- Add criteria Ex: "Role equals Caregiver"
- Click "Apply Filter" to see the results
Saving Your Work For Later
When you create a useful report:
- Click the "Save" button
- Give your report a clear name (add your name to avoid confusion)
- Choose where to save it (your personal collection or a shared folder)
Why Save? Save your reports so you don't have to recreate them every time. It's like bookmarking a webpage you want to visit again!
Creating Summaries: The Big Picture
Creating Summary Reports: Counting and Grouping
Summarizing helps you count things by categories - like how many beneficiaries are in each state or how many people are in each program.
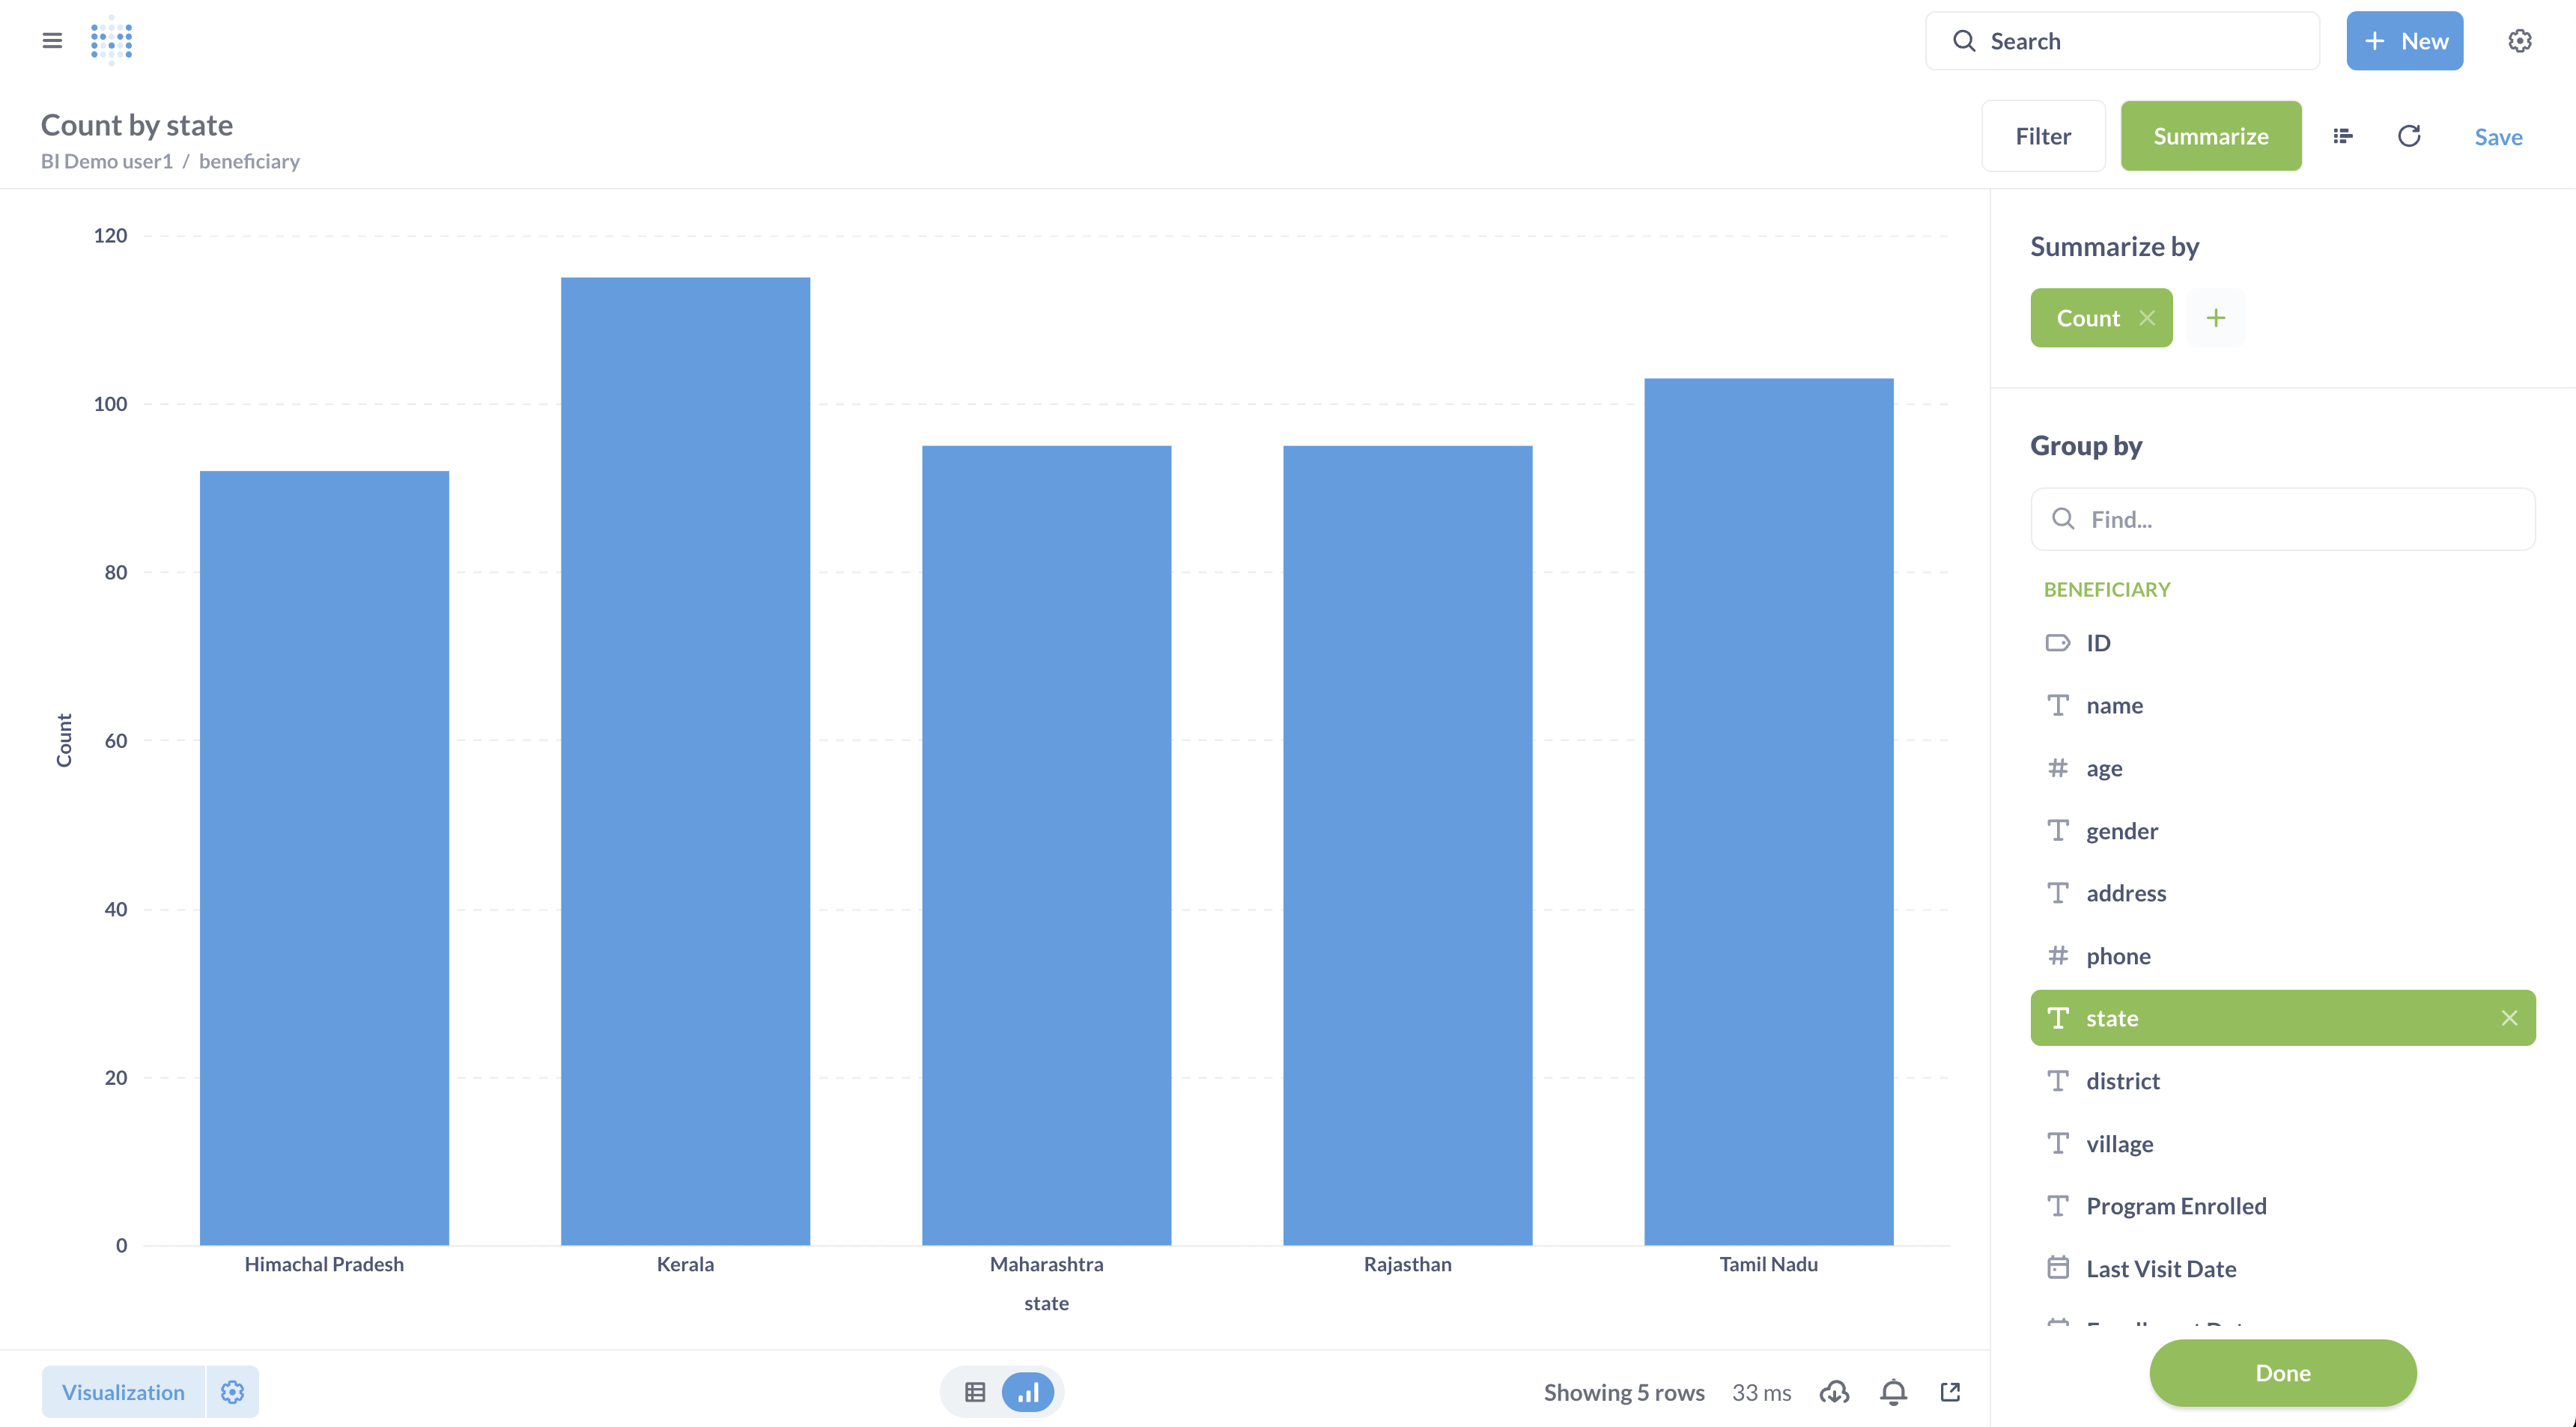
Example of Summarization of a table
Try It: Create Your First Summary
-
Start with filtering:
- Open any of the ProgramEnrolment / ProgramEncounter Table, Ex: "participation" table
- Click "Filter" at the top
- Choose "Last Visit Date" and select "Last month"
- Click "Apply" to see only recent visits
-
Then create a summary:
- Click the "Summarize" button
- Under "Group by" select "State"
- Watch how your data transforms into a count by state!
-
Create a visualization:
- Look at the bottom left for "Visualization"
- Click and choose "Pie Chart"
- Click "Done" to see your beautiful chart
What Did We Just Do? We created a report showing how many beneficiaries from each state had visits in the last month. This helps you see which states are most active!
Bringing Different Information Together: Using Joins
What is a Join?
A join lets you combine information from different tables. Think of it like putting two spreadsheets side by side and connecting matching rows.
For example, you might want to see beneficiary names alongside their program enrolments, even though this information is stored in separate tables.
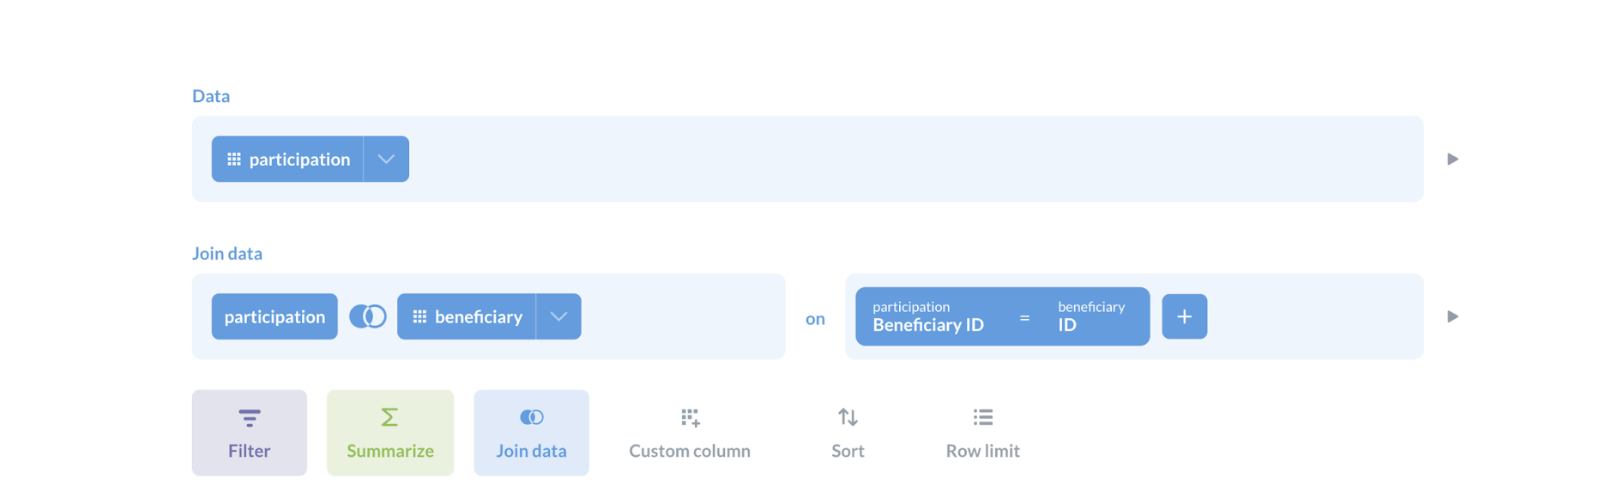
Illustration of a join in Metabase
Try It: Joining Tables Step by Step
-
Start with the basic table:
- Open any of the ProgramEnrolment / ProgramEncounter Table, Ex: "participation" table
- Look for the button next to "Summarize" (it's labeled "View")
- Click it to enter editing mode
-
Select which columns you want:
- Keep only the columns you're interested in
- For example: keep "Role" and "Beneficiary ID"
-
Connect to another table:
- Find and click "Join Data"
- Select the related Subject Type table, Ex: "beneficiary" table
- Click the join button
-
Tell Metabase how to connect the tables:
- Choose ProgramEnrolment / ProgramEncounter Table -> Subject Type Table, Ex: "participation" -> "beneficiary"
- Match ProgramEnrolment / ProgramEncounter Table Reference ID column with Subject Type Table ID column, Ex: "beneficiary_id" with "ID"
- Click "Join these columns"
-
Clean up your view:
- Remove any extra columns you don't need
- Click "Visualize" to see your combined data
Make It Look Nice:
- Go to the "Visualization" section
- Click the gear icon above the table
- Rename columns to make them easier to understand
- For example, change "beneficiary_id" to "Person ID"
Why This Matters: By joining tables, you can see complete information in one view. For instance, you can see a person's name and address along with which programs they're enrolled in, even though that information comes from different tables.
Practice Activities: Try It Yourself
Now that you've learned how to join tables, try these exercises to build your skills:
-
Create a Summary Chart by Category:
- Use any joined data you've created
- Click "Summarize"
- Group by any category field of your choice (like Role, Gender, Age Group, etc.)
- Switch to a bar graph visualization
- See the distribution across your chosen category!
-
Create a Program Enrolment Chart:
- Join any Program Enrolment table with its related Program table
- Group by "Program Name" or another program attribute
- Create a bar graph showing counts by program
-
Build a Complete Profile View:
- Create a table with address fields (like "State", "District"), person details, program information, and other relevant attributes
- Use the Sort feature to organize your data logically (e.g., by location)
- This gives you a complete view of who is enrolled where!
Creating Your Own Calculations
Adding Custom Columns
Sometimes you need information that isn't directly in your data. Metabase lets you create your own calculations!
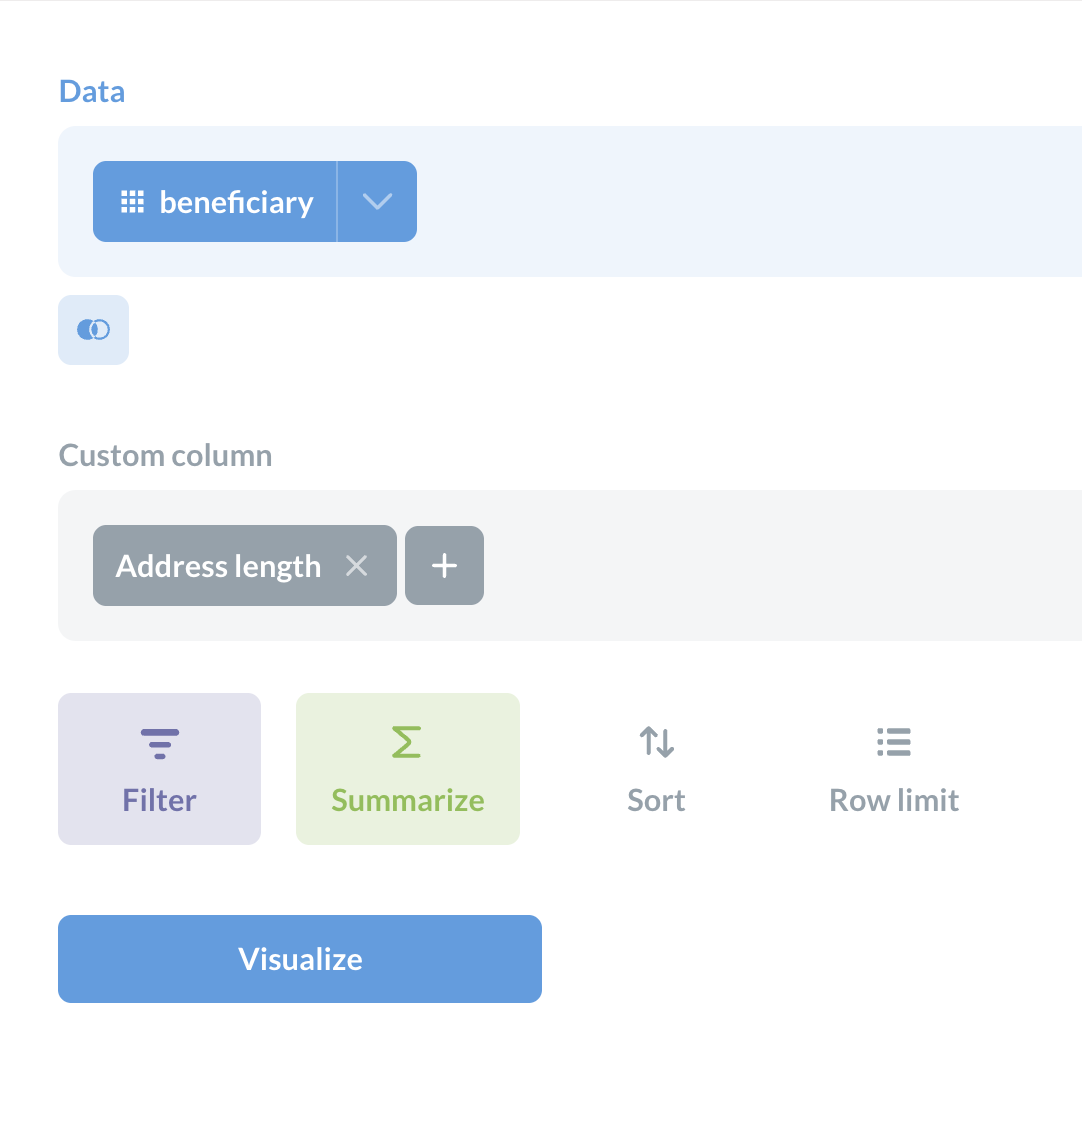
Example of a custom column
Try It: Calculate Address Length
Let's say you want to see how long each person's address is:
- Open any of the Subject Type Table, Ex: "beneficiary" table
- Click "Edit Query" (near the top of the screen)
- Find and click the "+ Add custom column" button
- For the formula, type:
length([Address]) - Name your column: "Address length"
- Click "Done" then "Visualize" to see your new column!
Advanced Analysis: Grouping and Averaging
What if you want to see the average address length for each district?
This is where grouping comes in - it's like organizing your data into buckets and then calculating something about each bucket.
Try It: Calculate Averages by Group
-
Start with your table that has the Address length column
-
Click "Summarize"
-
Set up your grouping:
- Group by "State" and "District"
- For the calculation, choose "Average of" → "Address length"
-
Add filters if needed:
- Maybe filter where "Address is not empty"
-
Use "Sort" to organize by state and district
-
Click "Visualize" to see your results
Visualize Your Results
Try creating different visualizations:

- Try a line graph for the address length data
- Try a bar chart comparing districts
- Try a map visualization if geographical data is available
Final Tip: The best reports answer specific questions. Before creating a report, ask yourself: "What exactly do I want to know?" Then build your report to answer that question!
Additional Information regarding behind the Scenes: How Your Data Gets generated for use in Reporting 🔧
Why We Need Special Reports Tables
You might wonder why you're using special tables for reporting instead of the regular Avni database. Here's a simple explanation:
The Challenge:
The main Avni database is designed for collecting and storing data efficiently across organizations, not for creating reports. This creates several challenges:
- Complex Data Structures: Some information is stored in specialized formats that are hard to query
- Performance Issues: Running reports directly on the main database would be very slow
- Address Complexity: Address information has many levels (state, district, etc.) that are difficult to work with
- Data Volume: Analyzing all the data at once would be overwhelming
How Avni Solves This: The ETL Service 🔄
Avni uses a standard process (called ETL - Extract, Transform, Load) that:
- Copies data from the main database into a separate organization-specific database
- Reorganizes it into formats better suited for reporting
- Updates this reporting-friendly data periodically every hour or so)
The Special Tables Created For You
The ETL service creates several easy-to-use tables:
- Subject Tables: One table for each type of person or thing you track (Ex:
IndividualorHousehold) - Encounter Tables: Tables that show visits or interactions (Ex:
Individual_BaselineorIndividual_Annual_Visit) - Program Tables: Information about program enrollment (Ex:
Individual_Nutrition_Program) - Program Encounter Tables: Records of visits within programs (Ex:
Individual_Nutrition_Program_Monthly_Visit) - Supporting Tables: Special tables for addresses, images, and repeated information
Technical Note: Table names follow patterns like<subjectType>_<encounterType>or<subjectType>_<programName>_<encounterType>to make them easy to identify.
What This Means For You
- You get faster reports
- You can easily create visualizations
- Your data is organized in a way that makes sense for analysis
- Everything updates automatically every hour or so
All of this happens behind the scenes so you can focus on getting insights from your data rather than worrying about database structures!
Updated 11 months ago