Locations
Guide to setup Locations via CSV Bulk Upload
Definitions
Below is a list of definitions that are essential for understanding this document.
- Locations: These can be names of Villages, Schools or Dams, or other such places which correspond to Geographical locations in the real world.
- Location Types: As its name suggests, Location Types are used to classify Locations into different categories. Ex: Karnataka and Maharashtra are 2 locations that could be classified into a single Location Type called “State”. Additional caveats related to the Location Type are as follows:
- You may associate a “Parent” Location Type for it, which would be instrumental in coming up with Location Type Hierarchy
- Each location type also has an additional field called “Level” associated with it. This is a Floating point number used to indicate relative position of a Location type in-comparison to others.
- There can be more than one location type with the same “Level” value in an organisation.
- The value for “Level” should less than the “Parent” Location Type’s “Level” field value
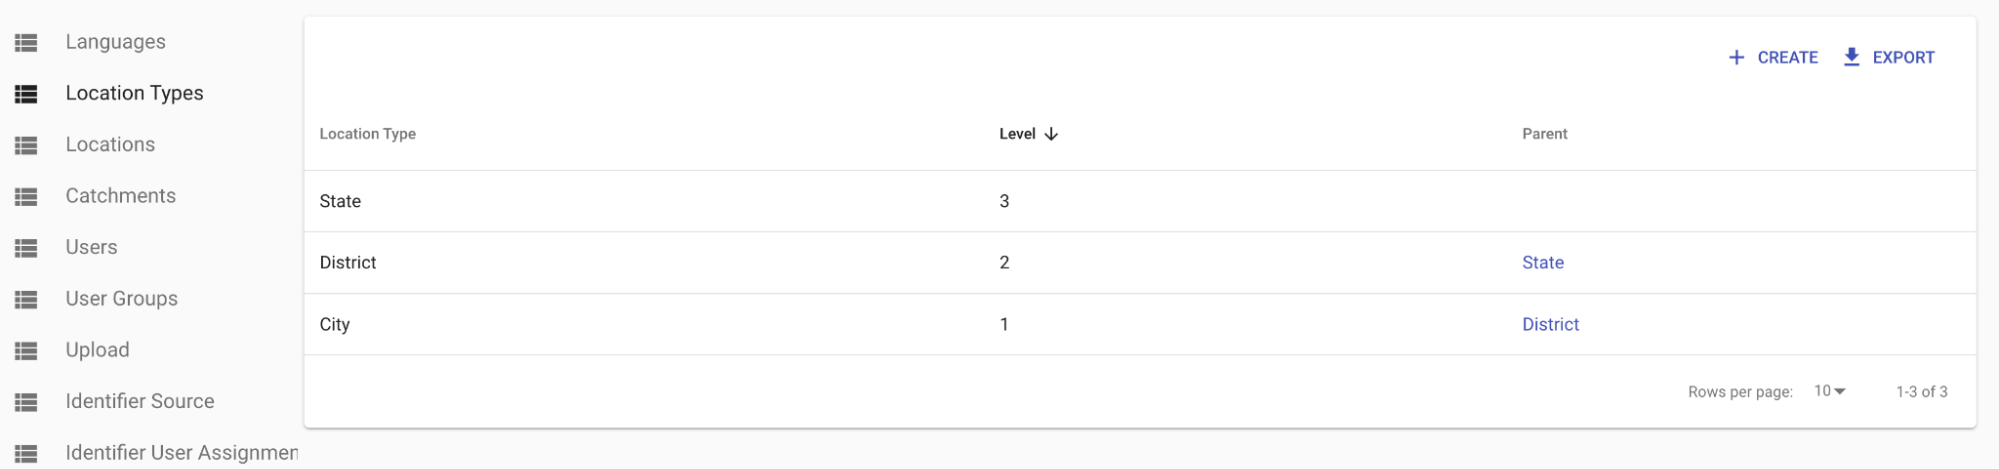
- Location Type Hierarchy: Location types using the “Parent” field can construct a hierarchy of sorts. Ex: State(3) -> District(2) -> City(1)
A single organisation can have any number of Location Type Hierarchies within it. Note that the example is a single hierarchy. - Lineage: Location Type hierarchy, are in-turn used to come up with Location lineage. Ex: Given a “Location Type Hierarchy” of State(3) -> District(2) -> City(1) being present, we could correspondingly create Location “Lineage” of the kind “Karnataka, Hassan, Girinagara”, where-in “Karnataka” corresponds to “State” Location-type, “Hassan” to “District” and “Girinagara” to “City”.
Overview
In Avni, Locations refer to geographical entities which could be a State, Village, Schools, Hospital, etc.. where an organisation provides services. It plays an important role in identifying the “Where” aspect of the data being captured / service that was provided. Locations are also used to group together Avni entities (Subjects, Encounters, GroupSubjects) based on their Geographical proximity, using the Catchments. This simplifies the assignment of Avni entities in the Geographical area of influence of a Field-Worker to him/her as a single composite entity rather than individually allocating each entity to the User.
Avni “Upload- Locations” functionality, allows Avni Admin Users to perform following actions in bulk
- Create new locations
- Update name, GPS coordinates and other properties for existing locations
- Modify the parent location for an existing location and there-after reflect the change in lineage for it and all its children
This is achieved by means of uploading a CSV(Comma-separated Values) file of a specific format. Please read through the rest of the document to learn more about initializing Location Types and setting up large amounts of Locations for each of those types for specific Location Type Hierarchy.
Steps to create Location Types Hierarchy
Navigation to the Bulk Uploads screen
- Login to Avni Web Console
- Go to Admin app
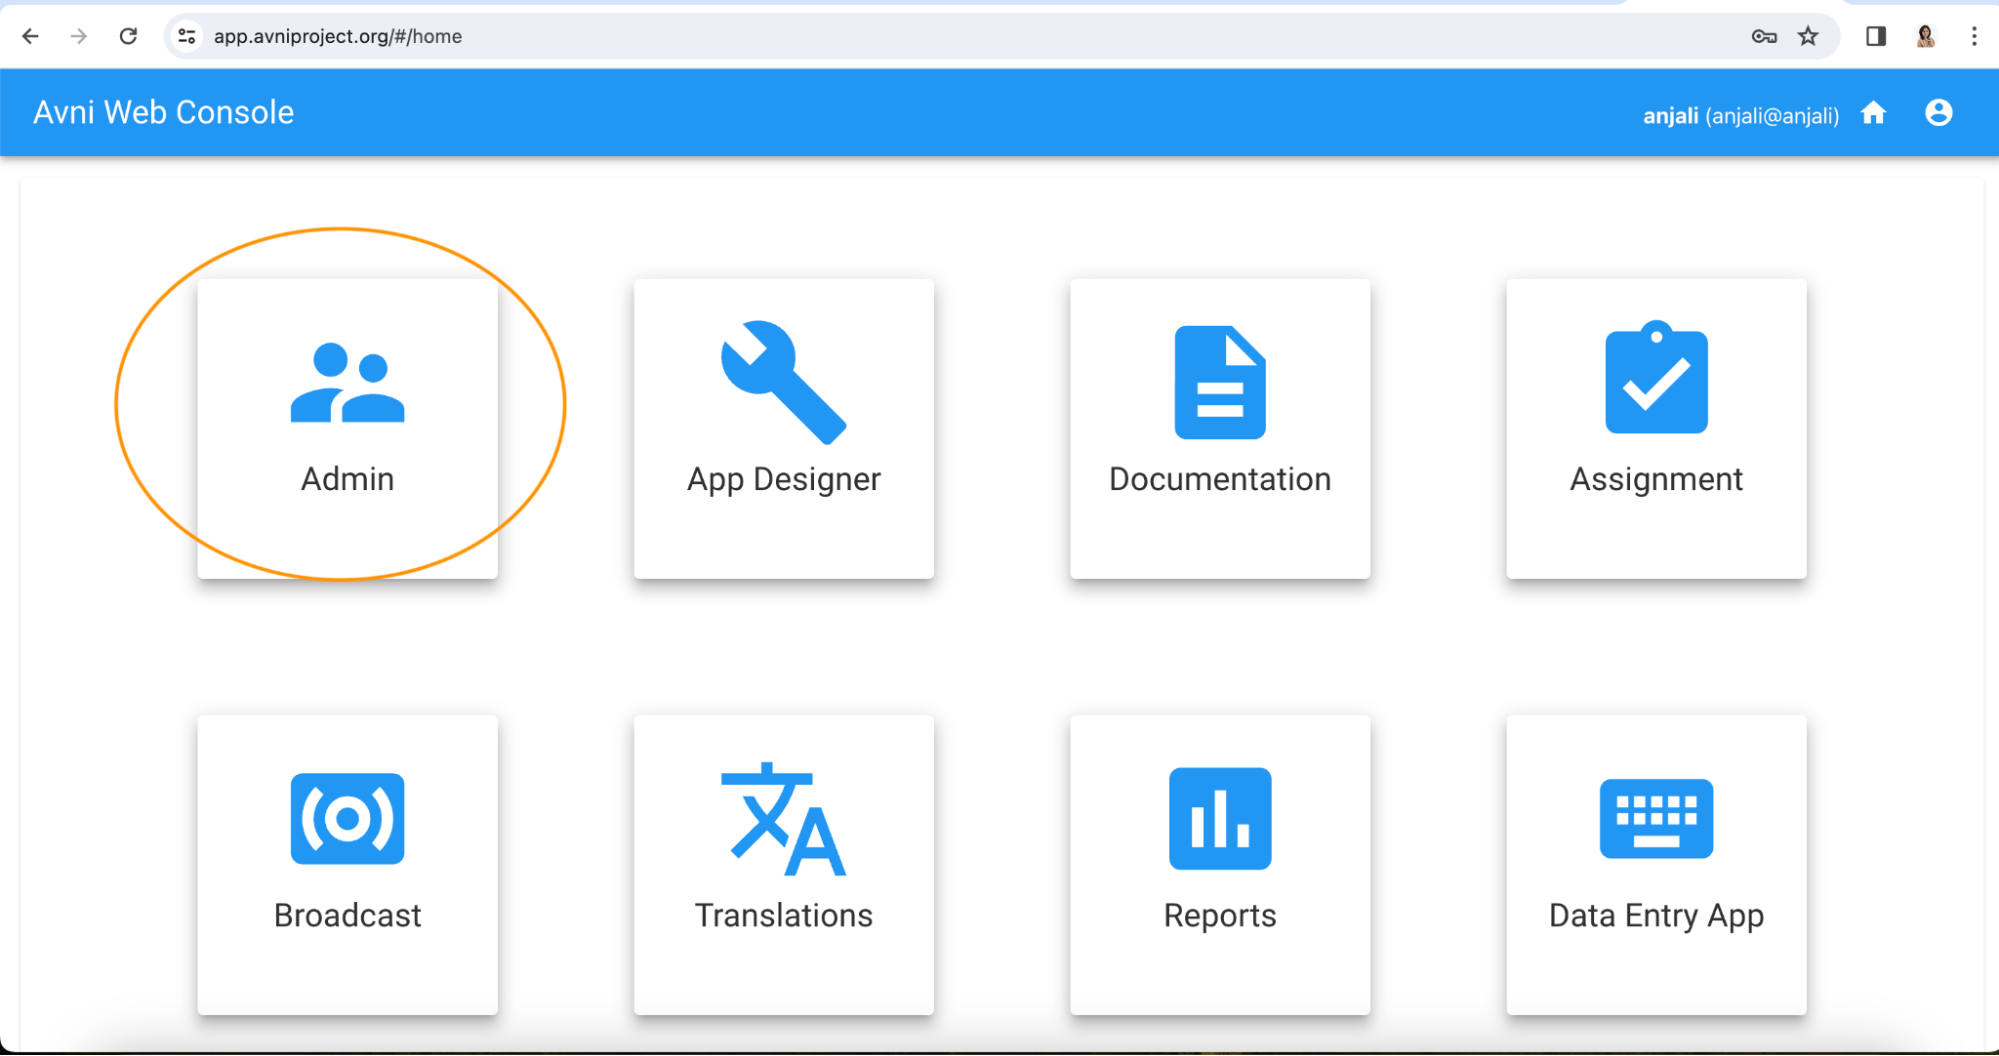
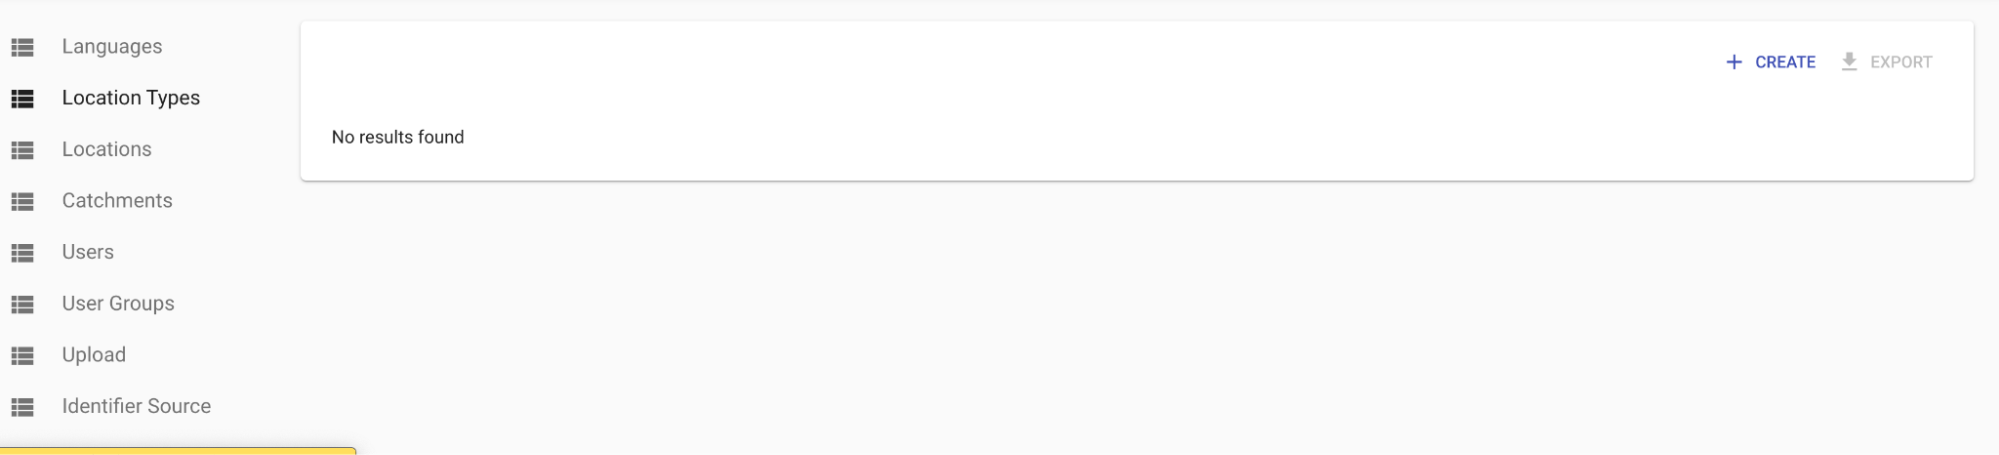
- Click on the “Location Types” section
Create Location Types Hierarchy
When we start with creation of Location types, we do so from the highest Location type to the lowest in descending order of its level within the Location Hierarchy.
For example, to set up a Location Hierarchy of State(3) -> District(2) -> City(1), you would repeat the below process 3 times, first for “State”, then “District” and finally for “City”.
Create Location Type
- Click on “CREATE” button on the top right corner, in “Location Types” screen
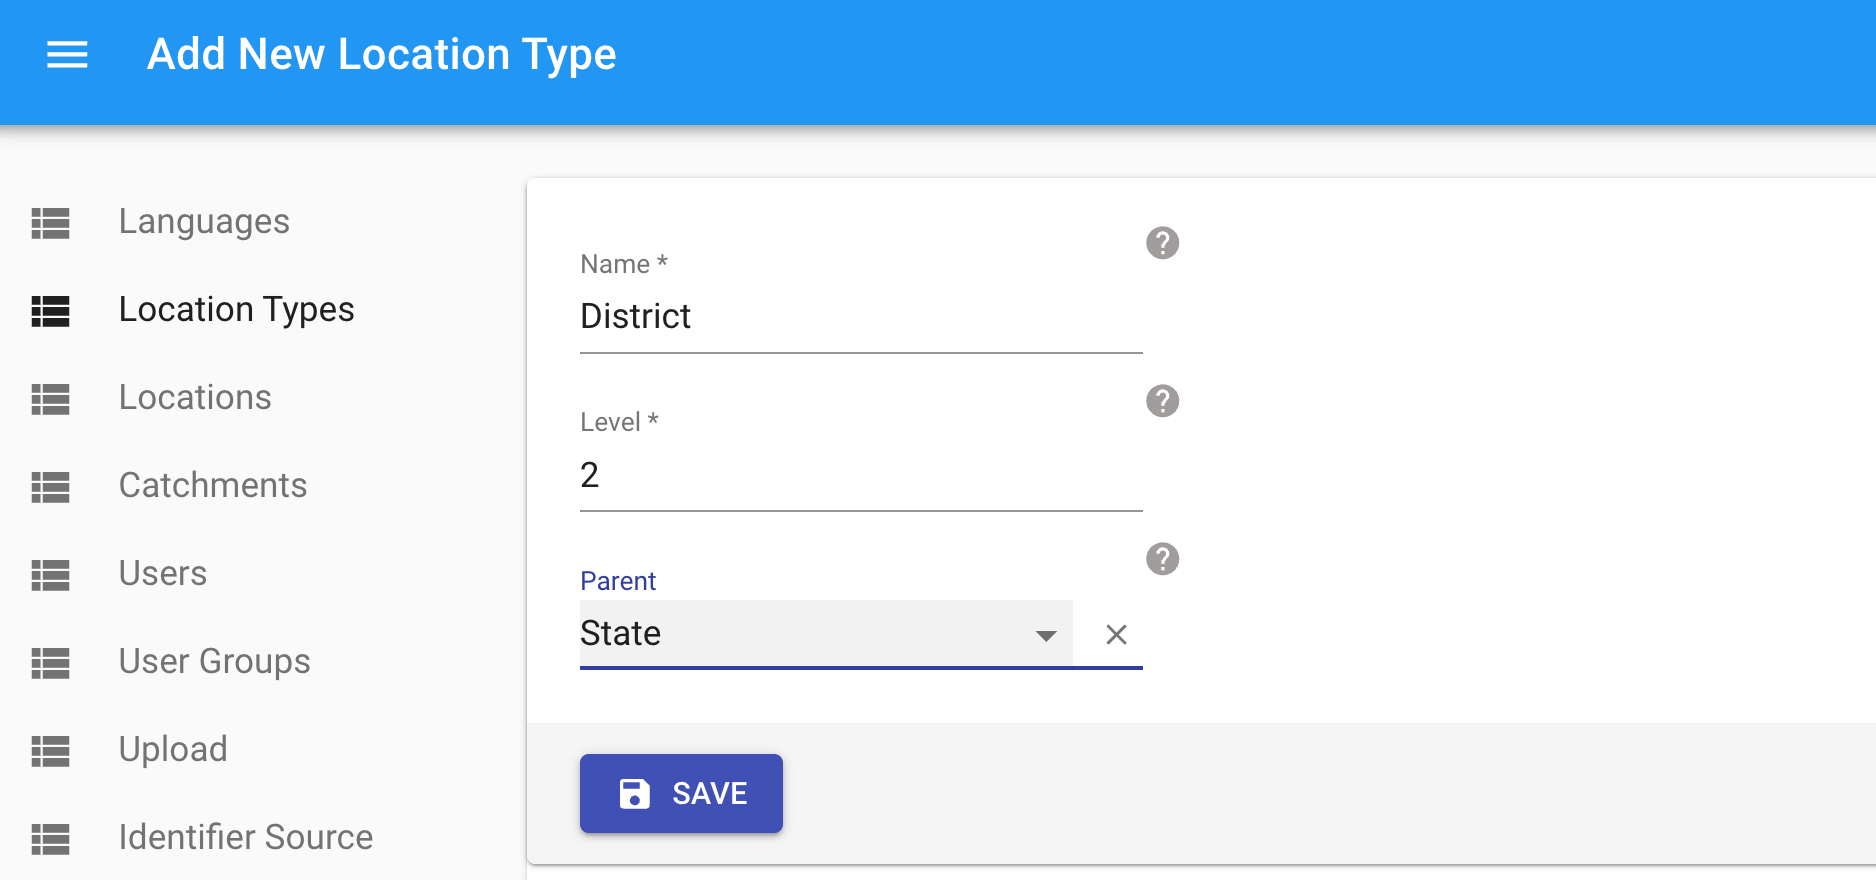
- Initialize “Name” field, to an appropriate String value starting with Upper-case Alphabet
- Initialize the “Level” field to appropriate Numeric value, which would be lower than its “Parent” Location Type’s “Level” value. Ex: “2.0”, “3”, “4.5”
- Associate “Parent” Location Type, as long as this isn’t the Highest Location type in its hierarchy
- Save the Location type, by clicking on the “SAVE” button
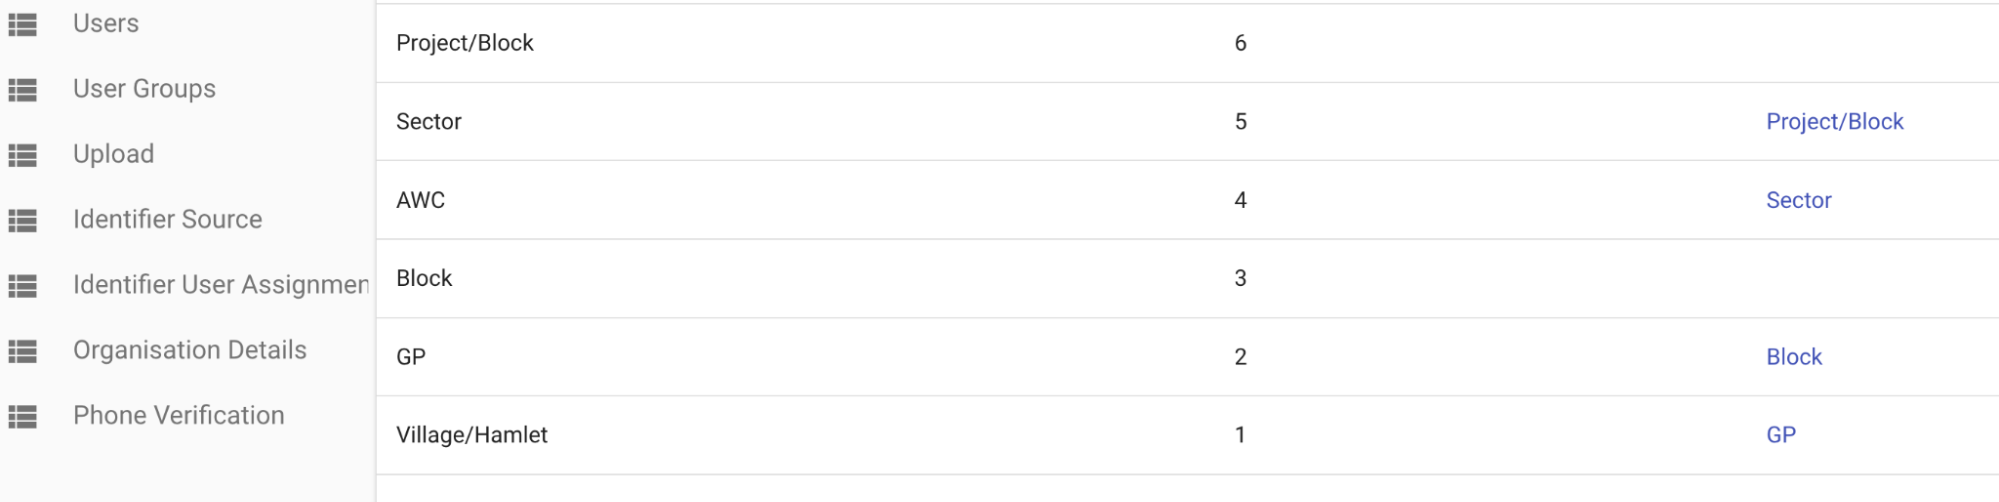
About Multiple Location Type Hierarchies within a single organization
Avni allows for an organization to have more than one Location hierarchy. The hierarchies could be linked at a specific location type or otherwise.
Example for Multiple Hierarchy joined at a common location type
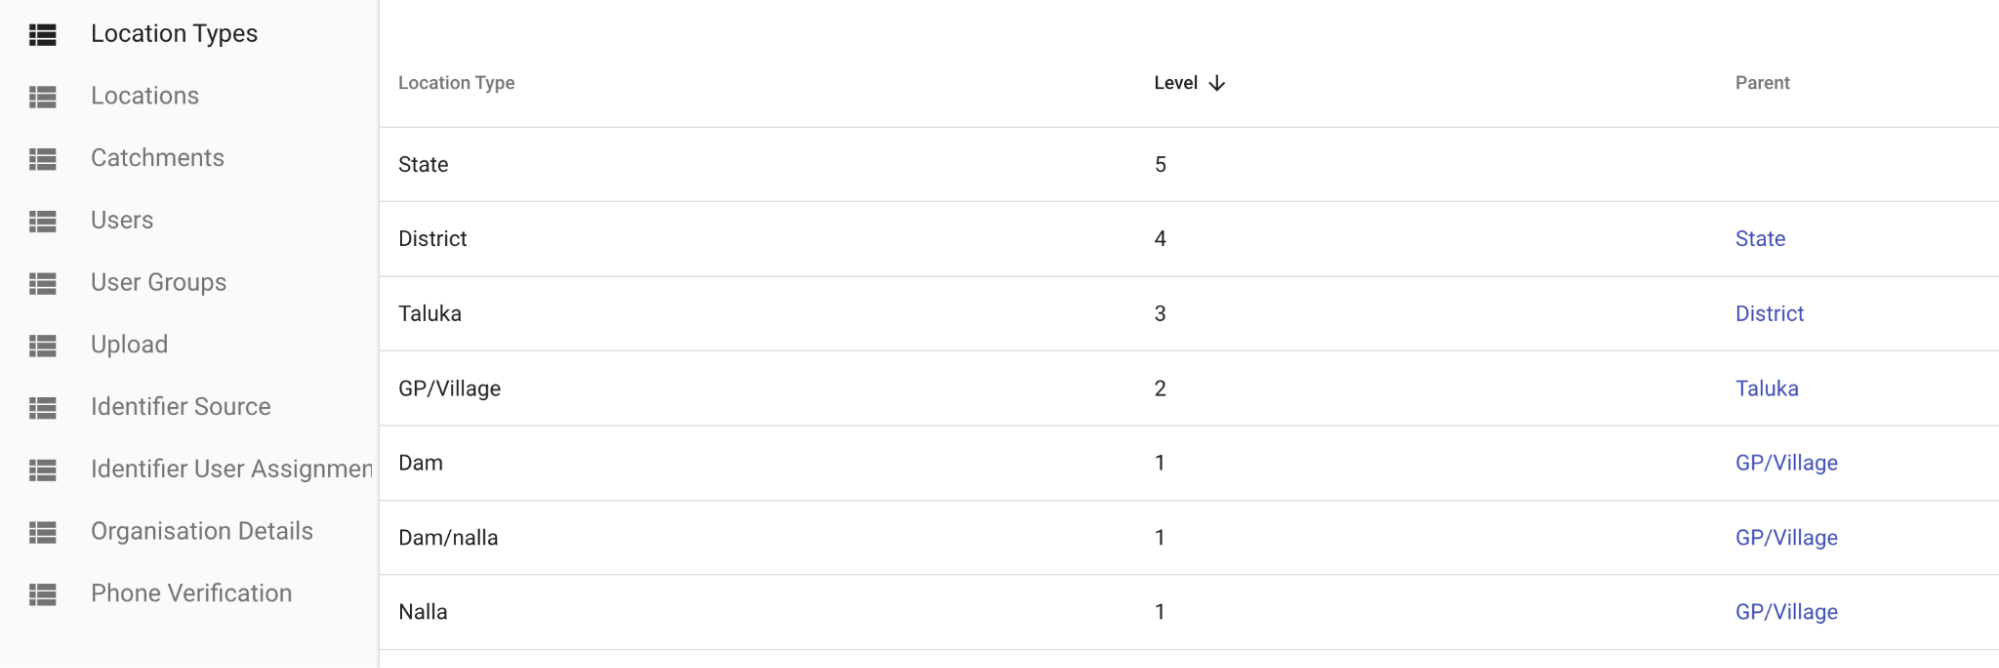
Example for Multiple Hierarchies not linked with each other
Review Location Types Hierarchy
Do a quick review of the Location Types Hierarchy, to ensure that its created as per requirement.
Steps to create Form of type Locations (Optional)
For your organization, if there is a need to specify additional details as part of each Location, then Avni allows you to configure a “Location” type Form, which can be configured to store those additional details as Observations for each Location. This is an optional feature to be done only if such need arises.
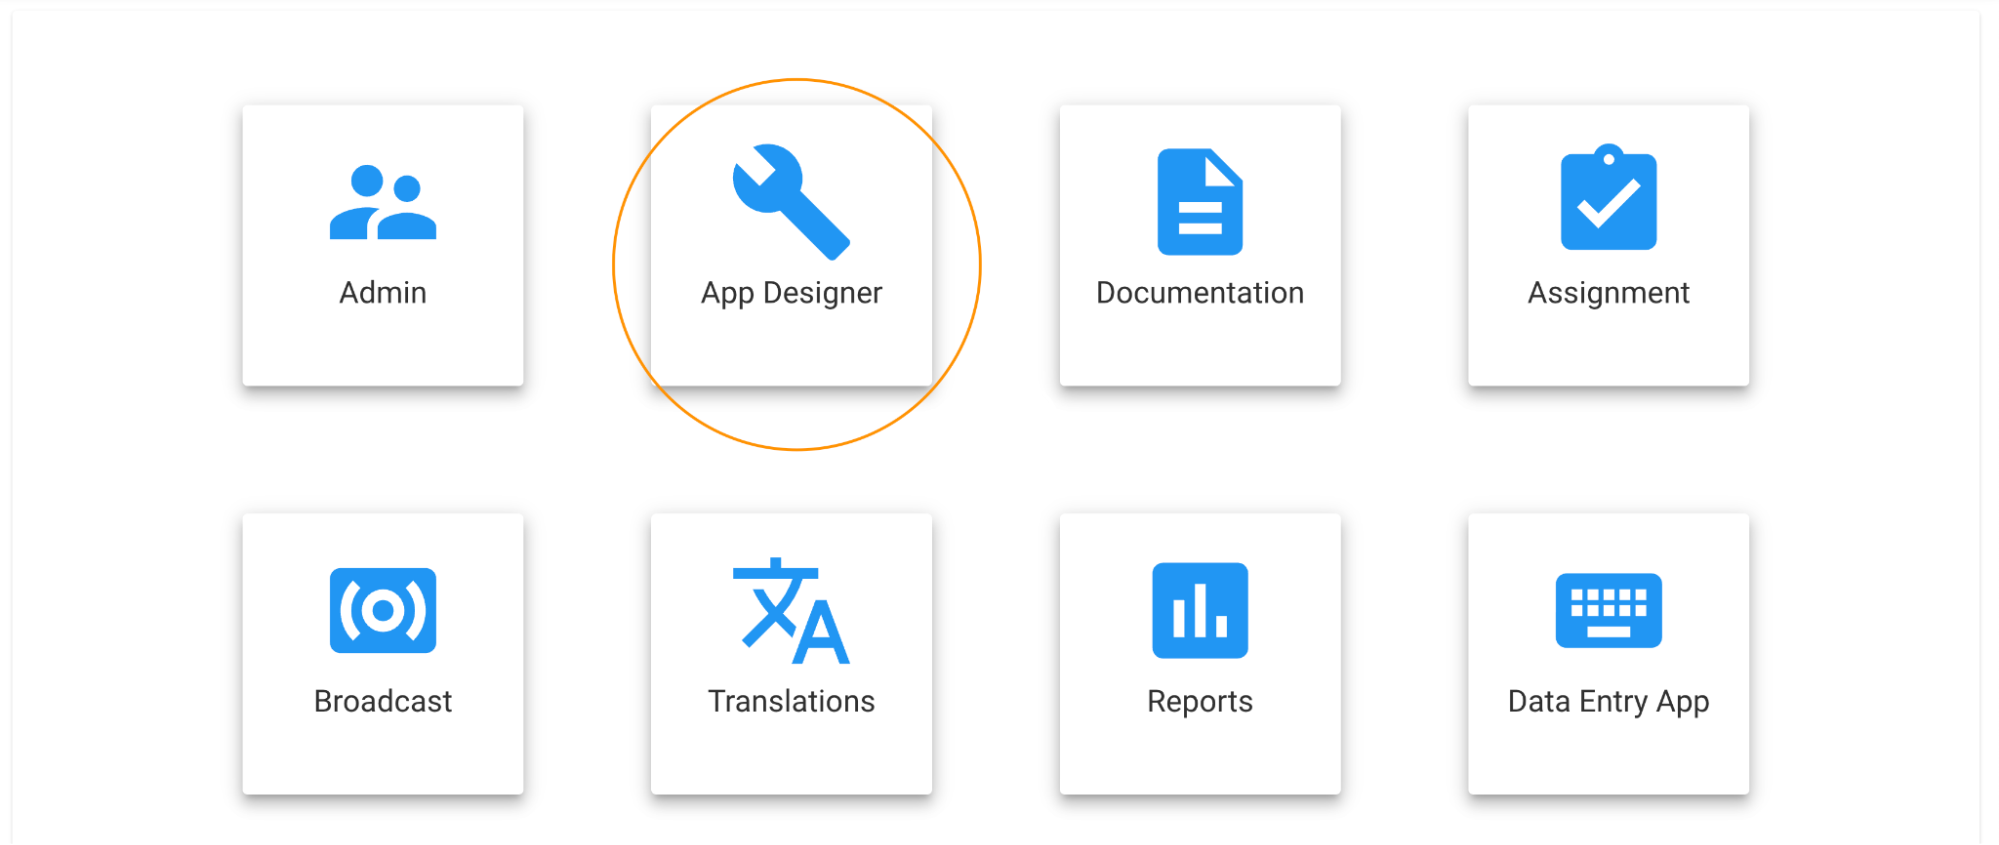
-
Navigate to the App Designer app
-
Click on Forms in the left side tab, to open up the Forms section.
-
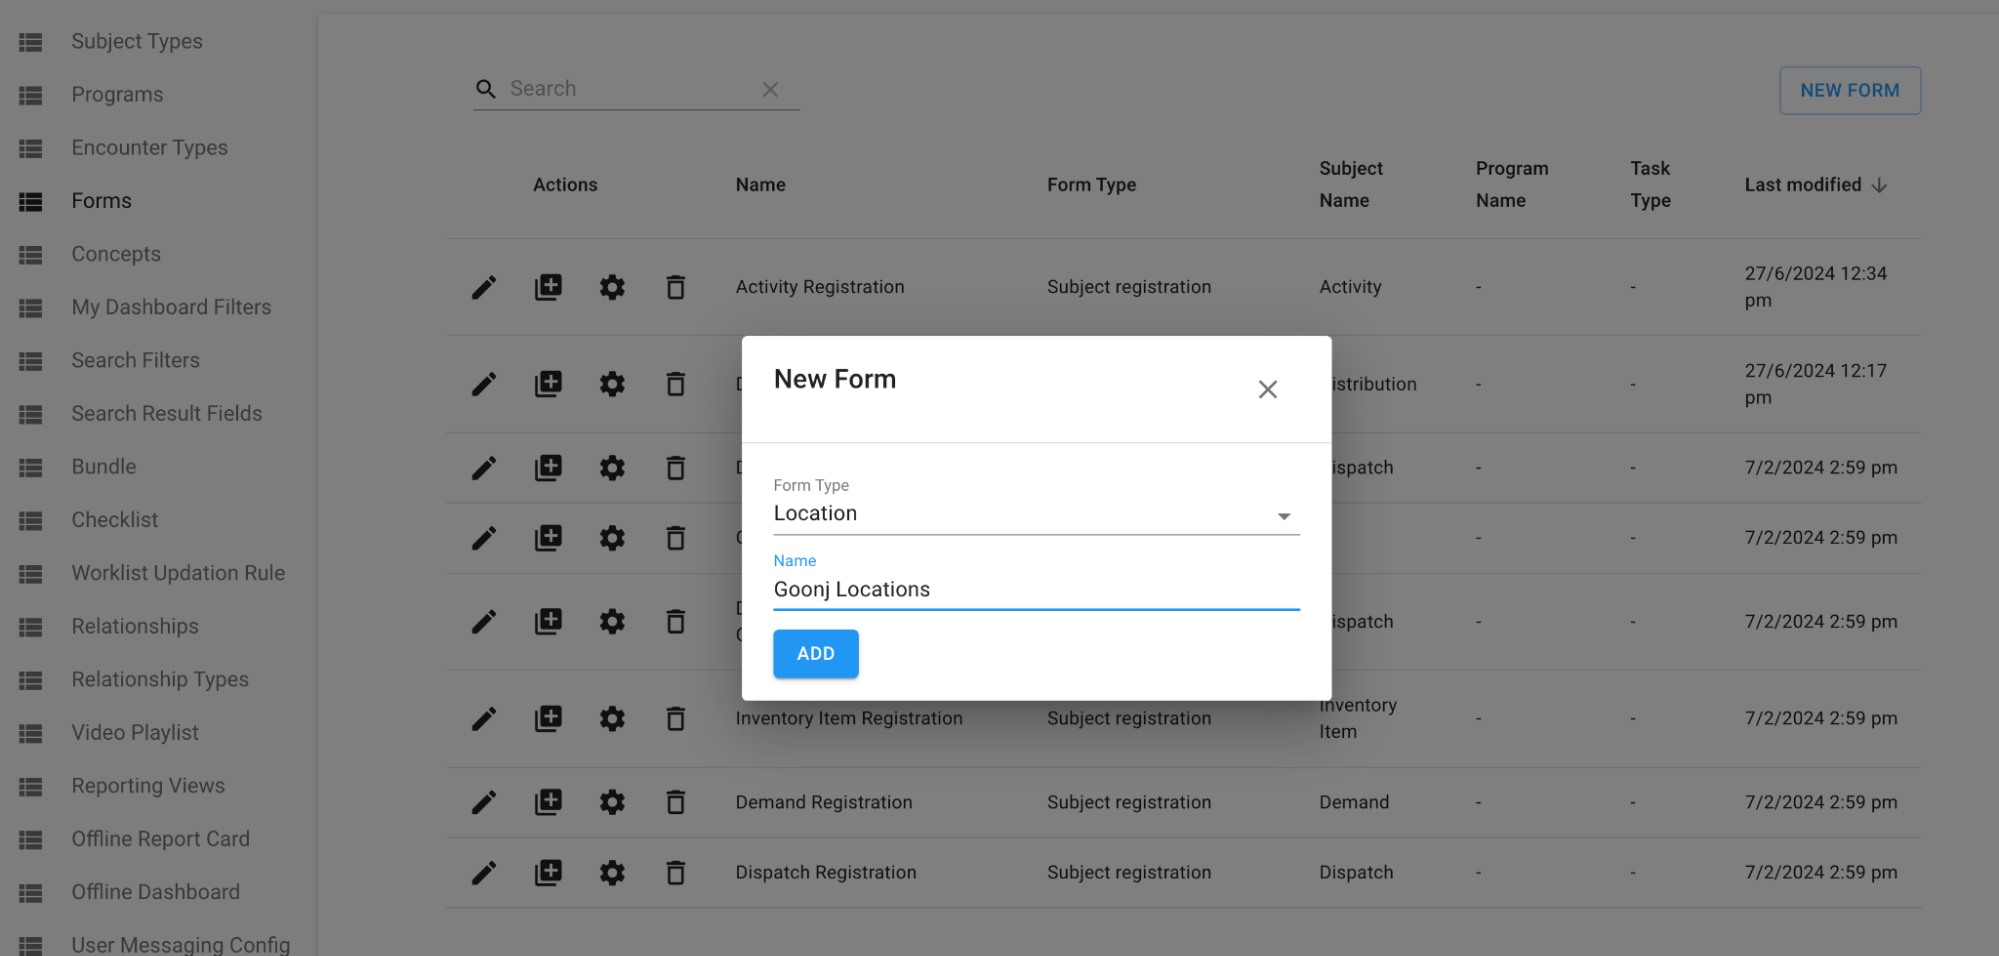
Create a new Form of type “Locations” by clicking on the “CREATE” button on the Top-Right corner of the screen.
-
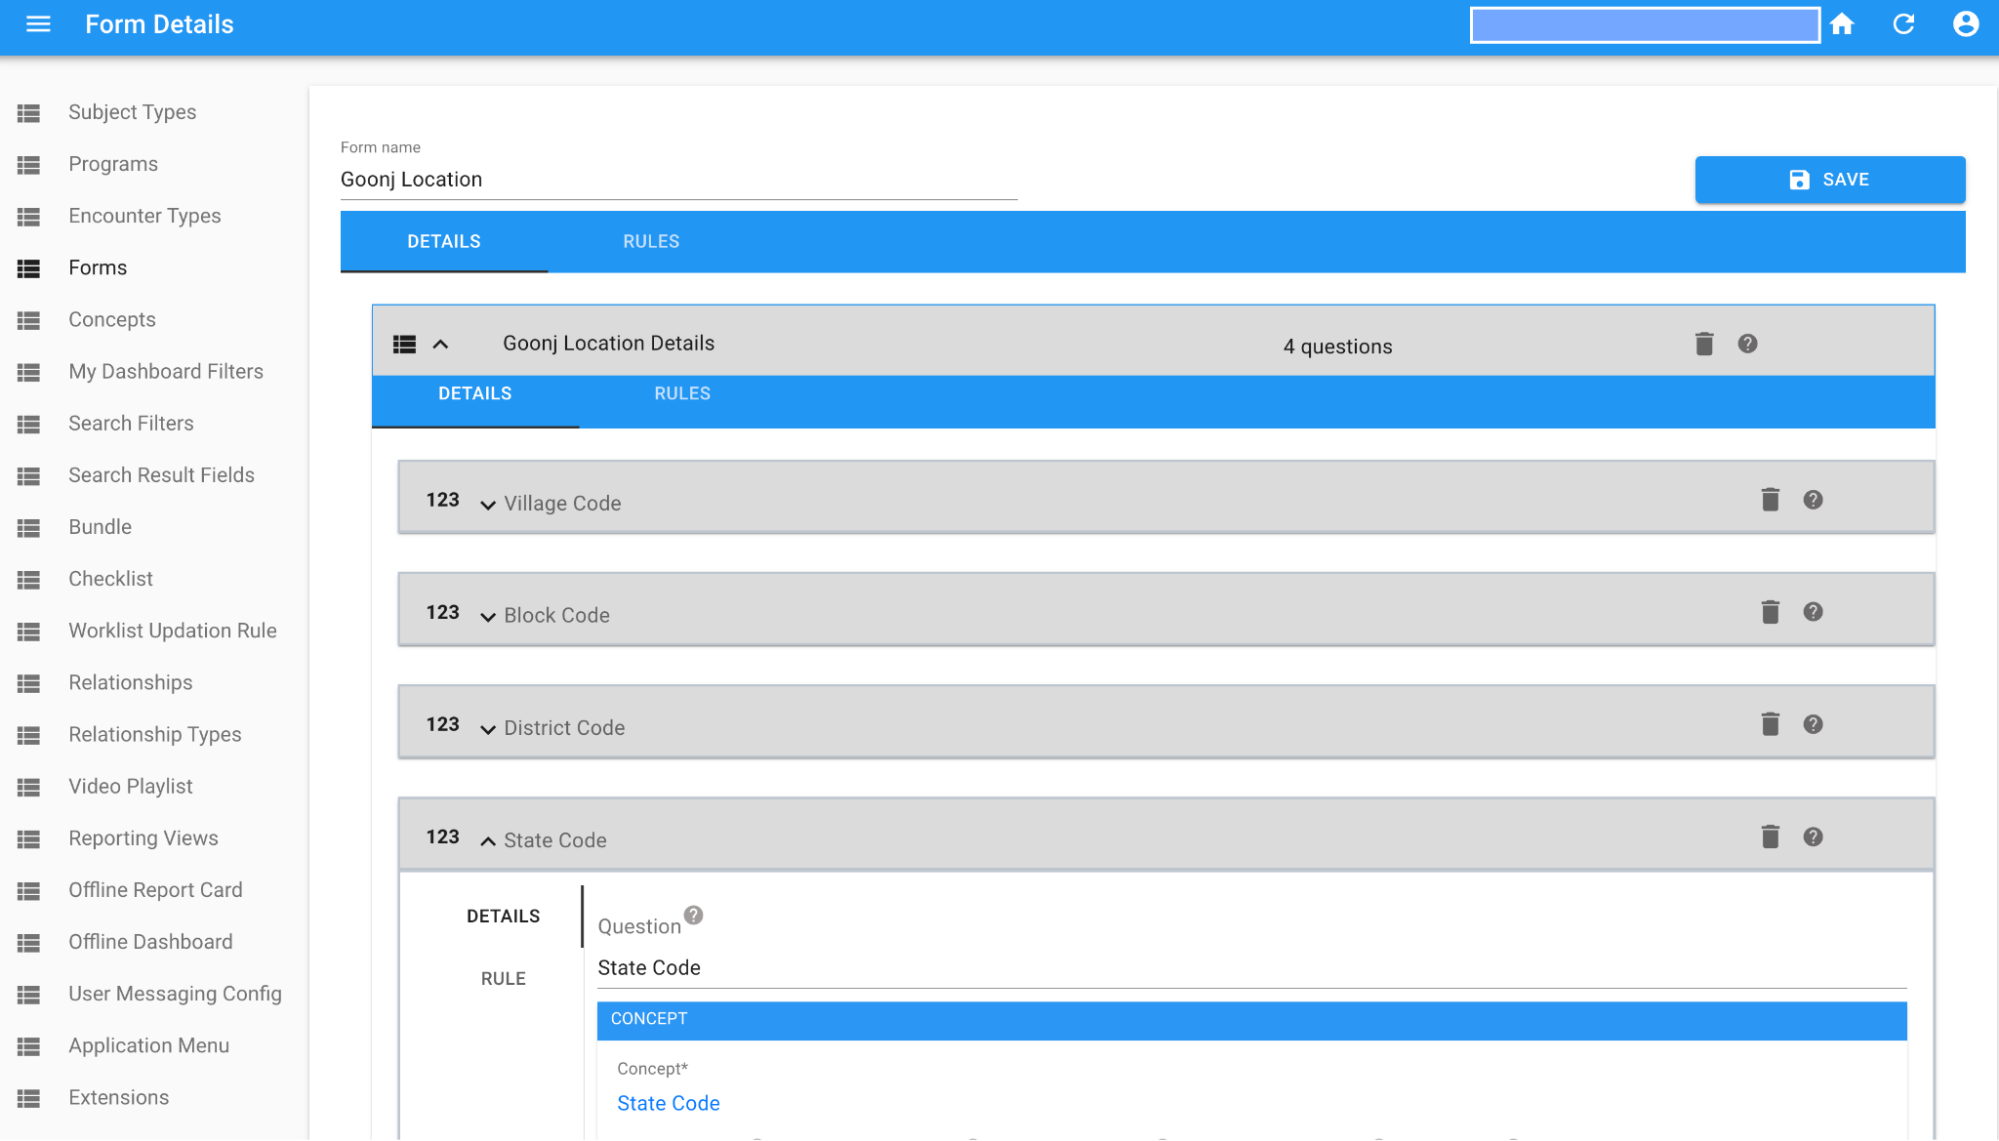
Setup the Locations type Form in the same way as you do for any other Avni Entity Data collection Forms. See below sample screenshot for reference.
Steps to create Locations via CSV upload
Prerequisites
- Ensure Location Types Hierarchy already exists
In order to start with the locations upload in the Avni app, organisation needs to have Location Types created in the requisite hierarchical order. - Ensure Location Form if needed, has already been configured
If your organisation needs additional properties to be set during Location creation, then ensure that you have configured a form of type “Locations” in the aforementioned manner
Navigation to the Bulk Uploads screen
- Login to Avni Web Console

- Go to Admin app

- Click on the “Upload” section
Download sample CSV file
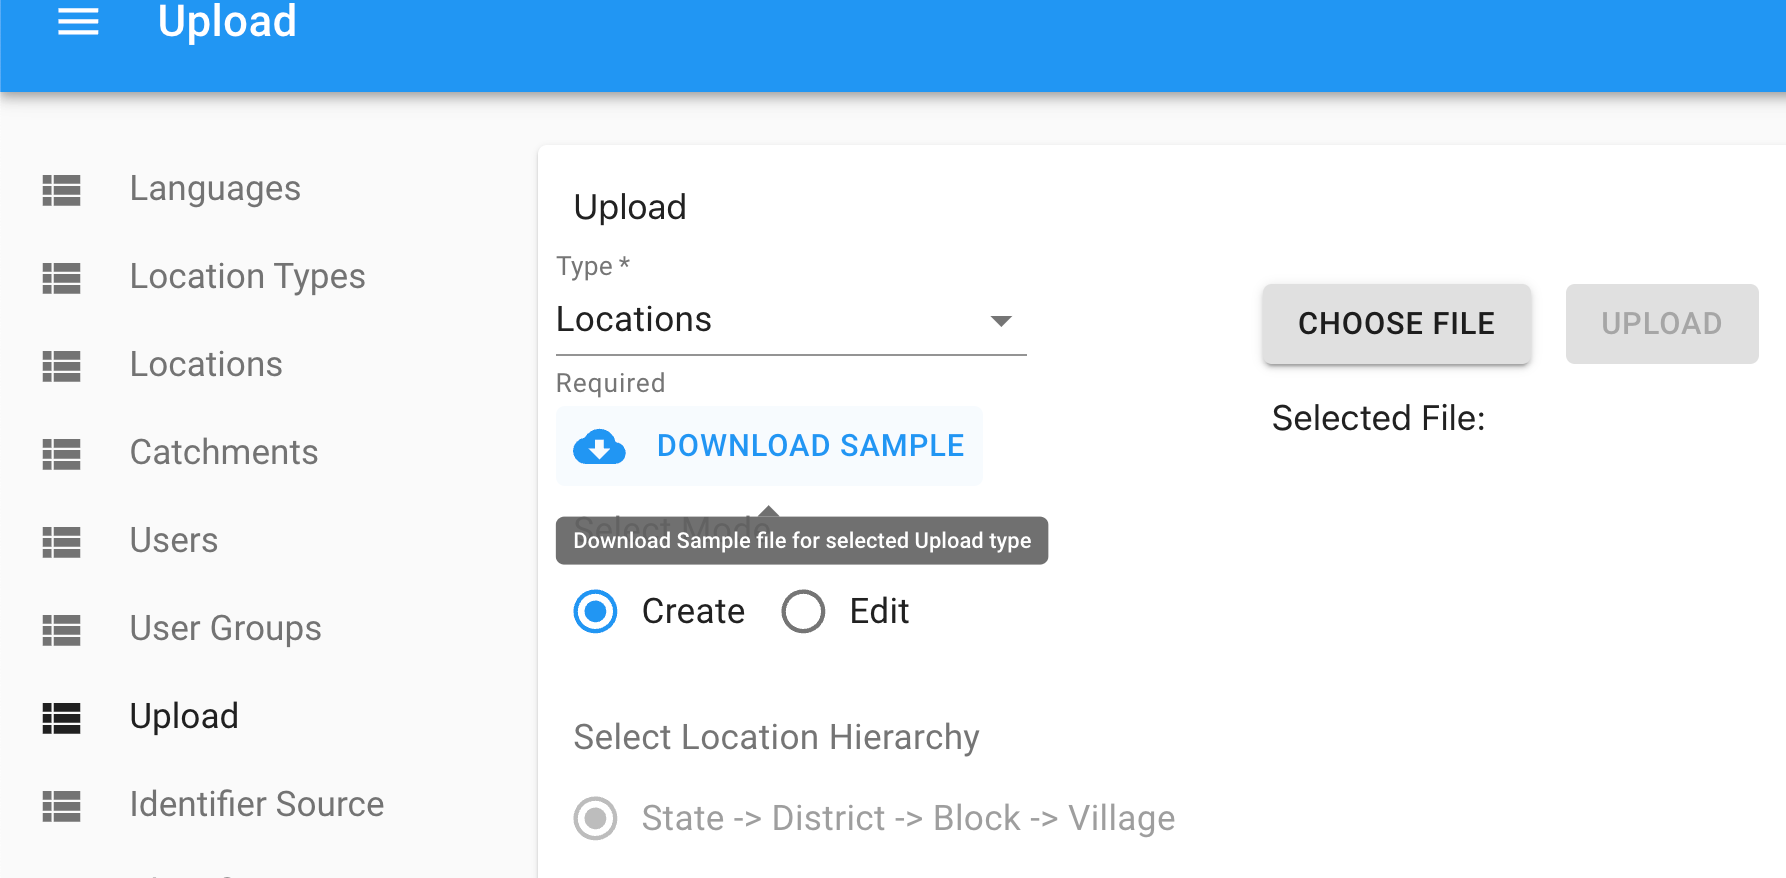
In the Avni “Admin” app, “Upload” section, we provide the users with an option to download a sample file, which would give you a rough example for coming up with the required “Locations” upload CSV file.
The locations upload file format is different for the “Create” and “Edit” modes, therefore choose the appropriate mode and apply the same, when uploading the file later as well.
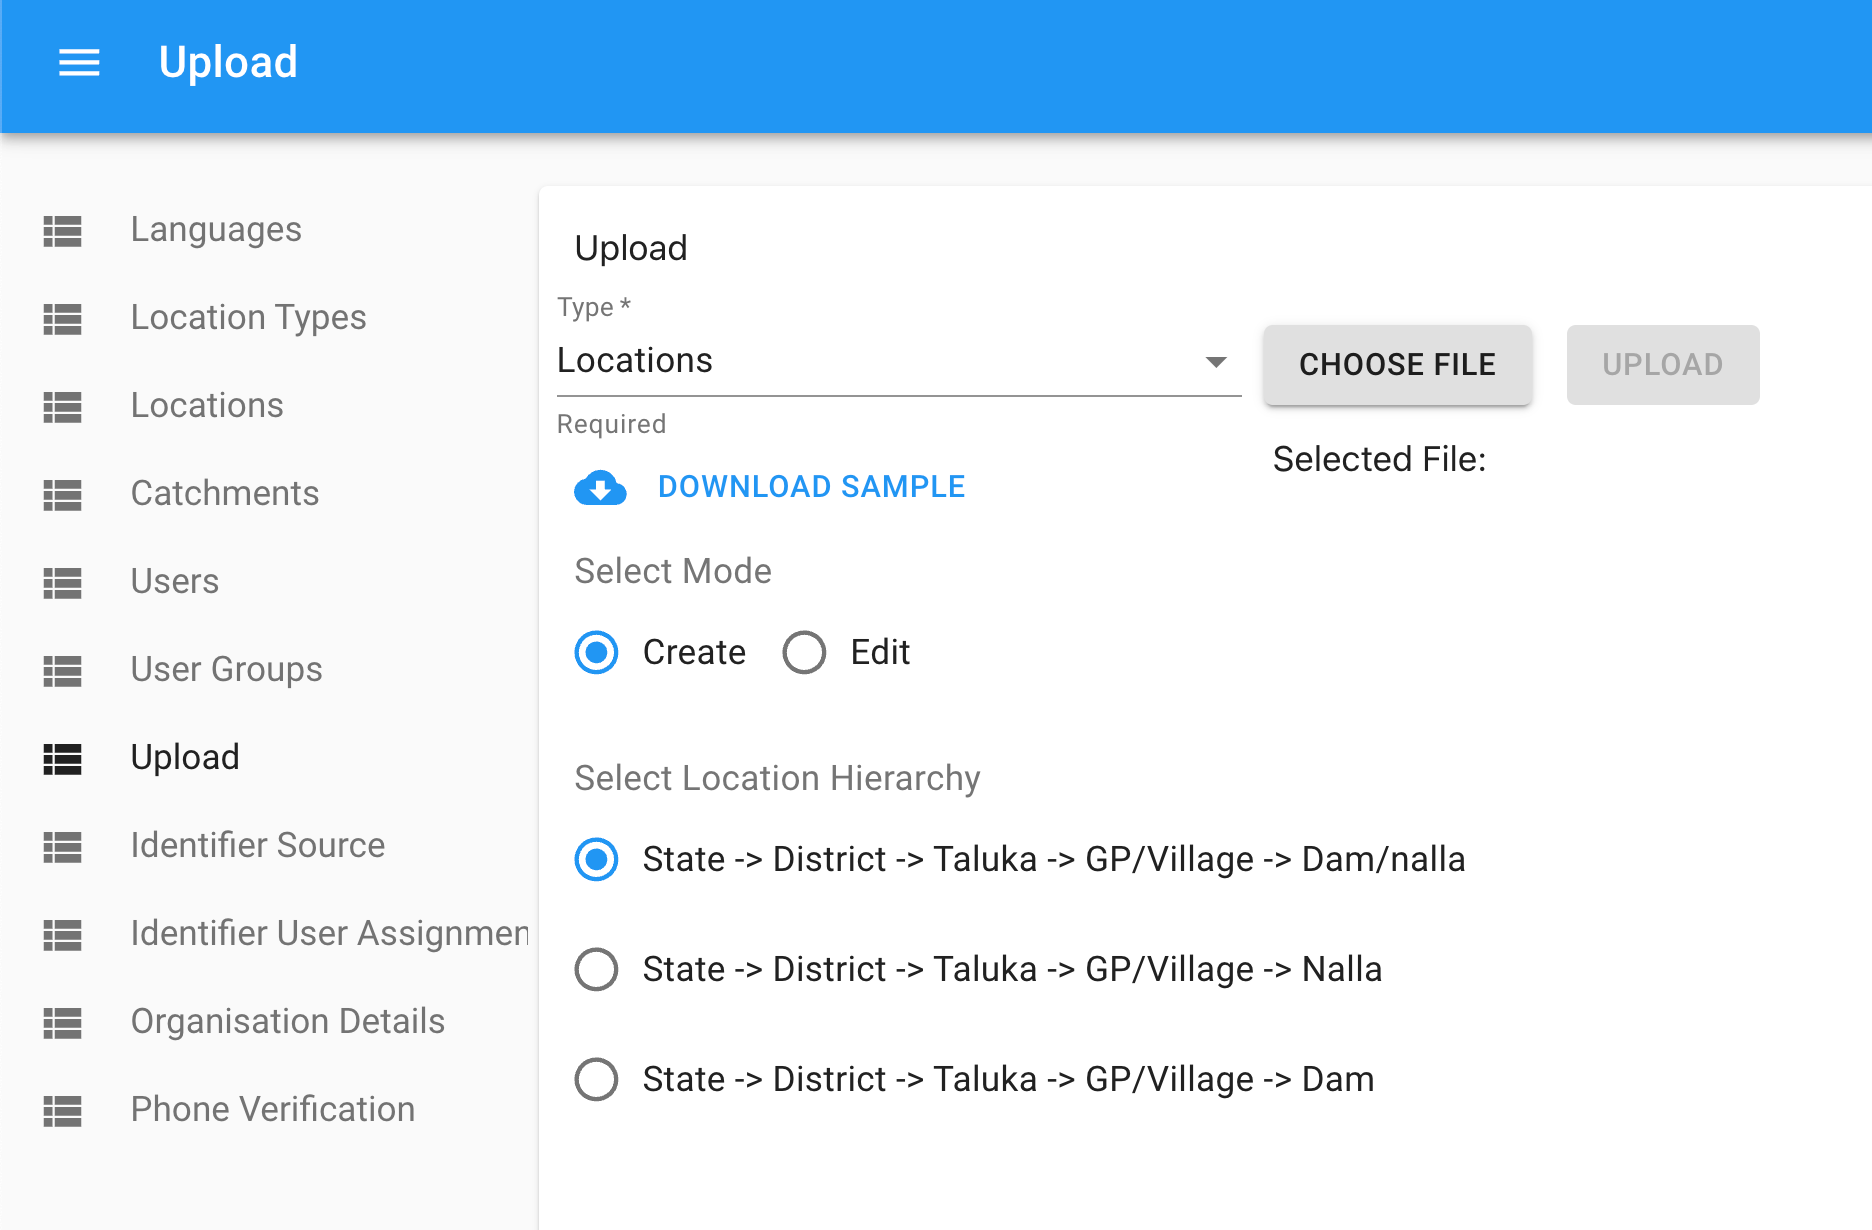
If your organization has multiple Location hierarchies, then you would have to select the specific location hierarchy for which you need the sample file. This is applicable only for “Create” mode.
Finally, click on the “Download Sample” button, to get the sample file.
Sample Locations upload csv file screenshot
As part of the sample Locations csv file downloaded, you’ll have following information available to you for quick reference:
- All Headers configurable for the selected Mode and Location hierarchy
- Descriptor row with guidance and examples on what values should be specified for each of the columns
-
Create mode

-
Edit mode

Compose Locations upload CSV file
Headers Row
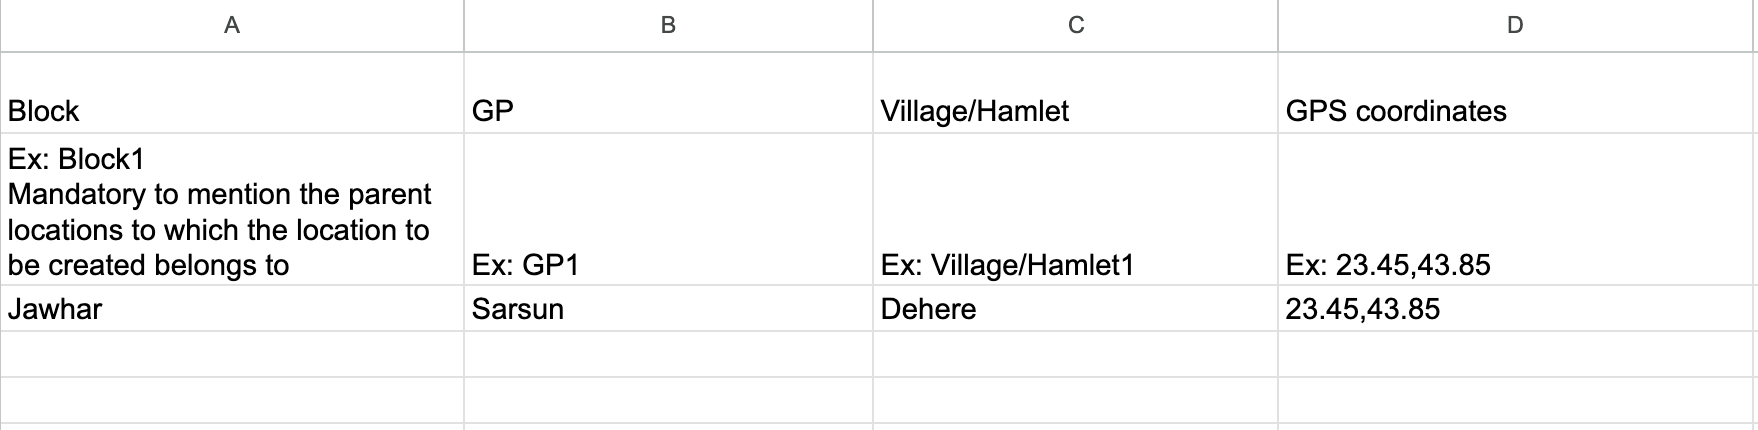
The first row of your upload file should contain Location types, arranged in descending order of their Level, in the selected Location Hierarchy from Left to Right, as comma-separated values.
Refer Sample Locations Upload documents available here for Location Hierarchy of: Block(3) -> GP(2) -> Village/Hamlet(1). This is followed by “GPS Coordinates” and other Location properties name as column names.
Descriptor Row
The second row of your upload file can optionally be a descriptor row, retained as is from the sample location upload file downloaded earlier. Avni would ignore the row, if its starting text matches the Sample file Descriptor row content’s starting text.
Data Rows
Entries provided in each of the address-level-type columns would be created as individual locations. (For example, the “Jawhar” block, “Sarsun” GP, and “Dehere” village will be created as a unique location with the appropriate location lineage, as specified during upload.)
If the Parent locations already exists during a new location creation, then they are not re-created and are just used as is to build the location lineage.
GPS Coordinates
In-case, user would like to set the GPS Coordinates for locations during upload, then they would need to additionally specify values in the "GPS coordinates" column. The value for this column should be of the Format “<Decimal number>,<Decimal number>”.
Ex: “123.456789,234.567890”, “12.34,45.67”, “13,77”
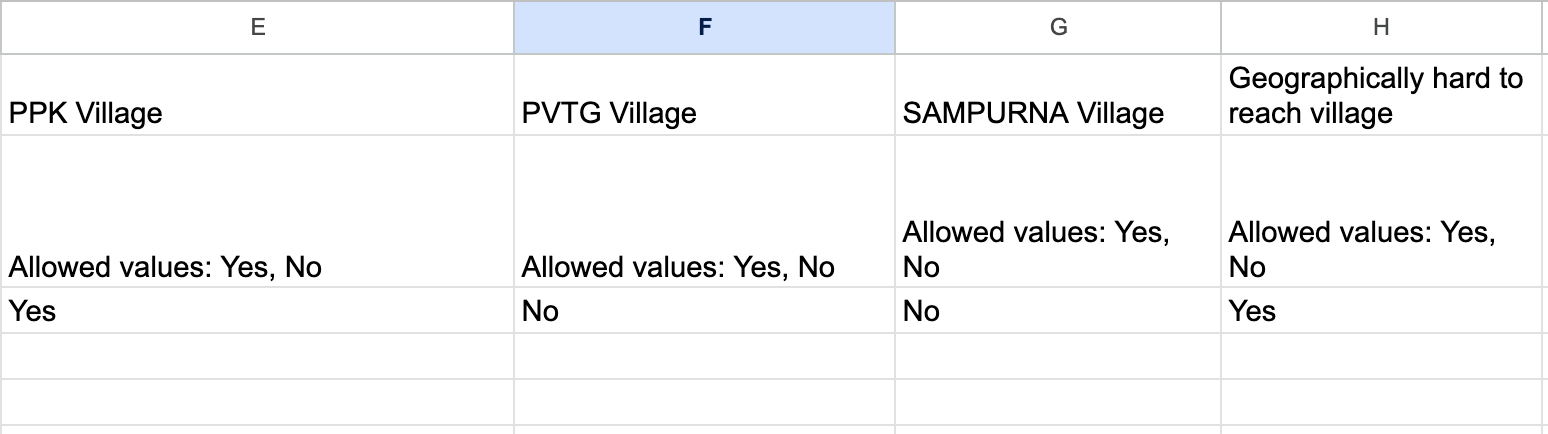
Additional Location Properties
Avni allows an organisation to configure Forms of Type “FormType.Location” for enabling inclusion of additional properties for each Location. These Forms are made up of the same building blocks of Pages and Questions like Forms of other types.
In-order to configure Location properties, you would need to specify the Concept “name” as the Column Header and specify the value for each of the locations in the corresponding columnar position.
This mode is to be used to perform bulk updates to locations. The type of updates allowed are as follows:
- Update name of existing locations
- Update GPS coordinates and other properties for existing locations
- Modify the parent location for an existing location and there-after reflect the change in lineage for it and all its children
Headers Row
The first row of your upload file, would usually contain following data as columns headers:
- Location with full hierarchy
- New location name
- Parent location with full hierarchy
- GPS coordinates
- Multiple Location Properties name
Refer Sample Locations Upload documents available here.

Data Rows
Entries provided for the columns listed below would be used as specified here:
- Location with full hierarchy (Mandatory): Used to identify the specific location to be modified
- New location name (Optional): Used to specify the new title value for a location
- Parent location with full hierarchy (Optional): Used to identify the new parent location to move this location to. Ex: Move “Vil B” to “PHC C, Sub C” from “PHC B, Sub B”
- GPS coordinates (Optional): Used to update the GPS coordinates. Format: “<Double>,<Double>”. Ex: “123.456789,234.567890”
- Values for multiple Location Properties columns that are part of the Form of type “FormType.Location”. These again are optional.
Edit Row validations
- If the “Location with full hierarchy” does not exist during location updation, then the update operation fails for that row.
- Atleast one among the following columns should have a valid value for the updation operation to be performed successfully for that row:
- New location name
- Parent location with full hierarchy
- GPS coordinates
Upload the CSV file
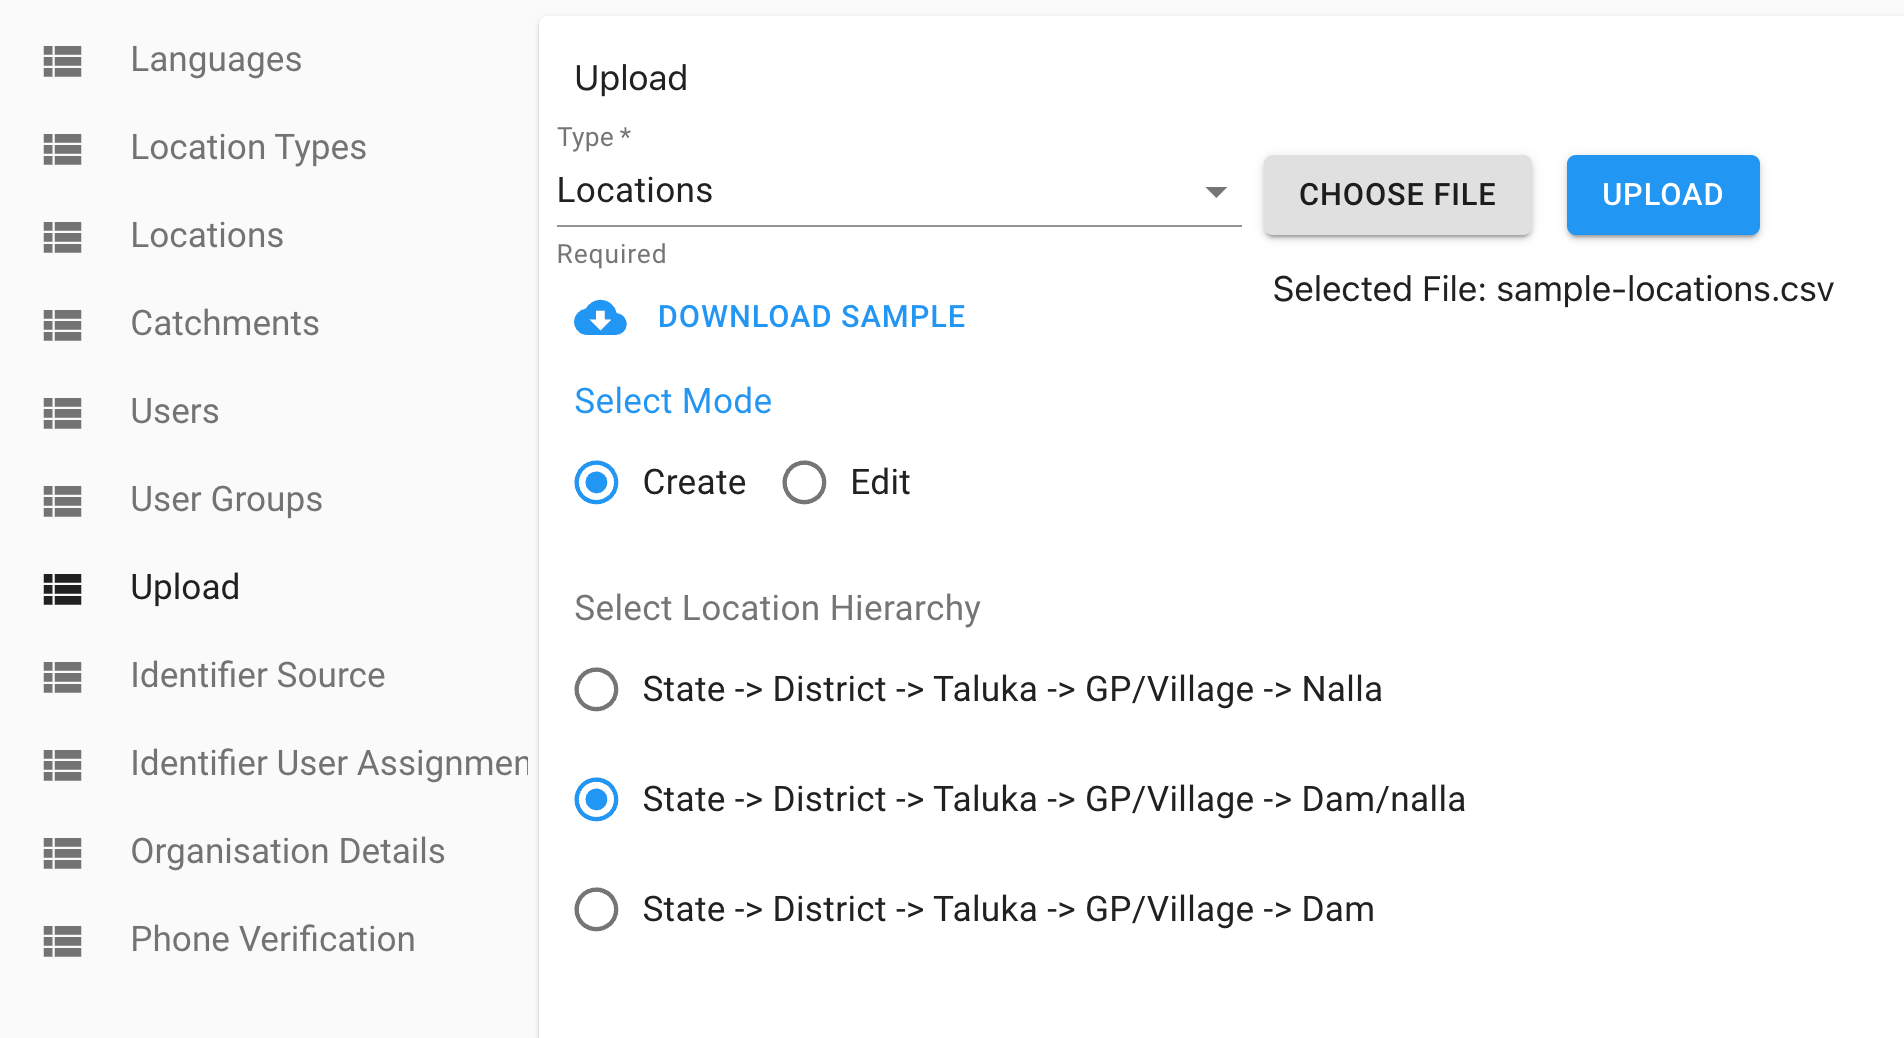
Project team then downloads the sheet in the CSV format. Navigate to the “Upload” tab of the Admin section, and perform the following steps to upload the file:
- Select the “Type” to be “Locations”
- Specify the file to be uploaded using the “CHOOSE FILE” option
- Select the appropriate “Mode” of CSV Upload
- Create: For creating new locations
- Edit: For updating existing location’s Name, Parent, GPS coordinates or other properties
- Choose appropriate “Location Hierarchy” (Applicable only for “Create” mode)
- Click on the “Upload” button
Monitoring Progress of the Upload
Avni provides users with an easy way to monitor the progress of the CSV file uploads. In the same “Upload” tab of the Admin section, the bottom-half contains a list of all uploads triggered by users of the organization.
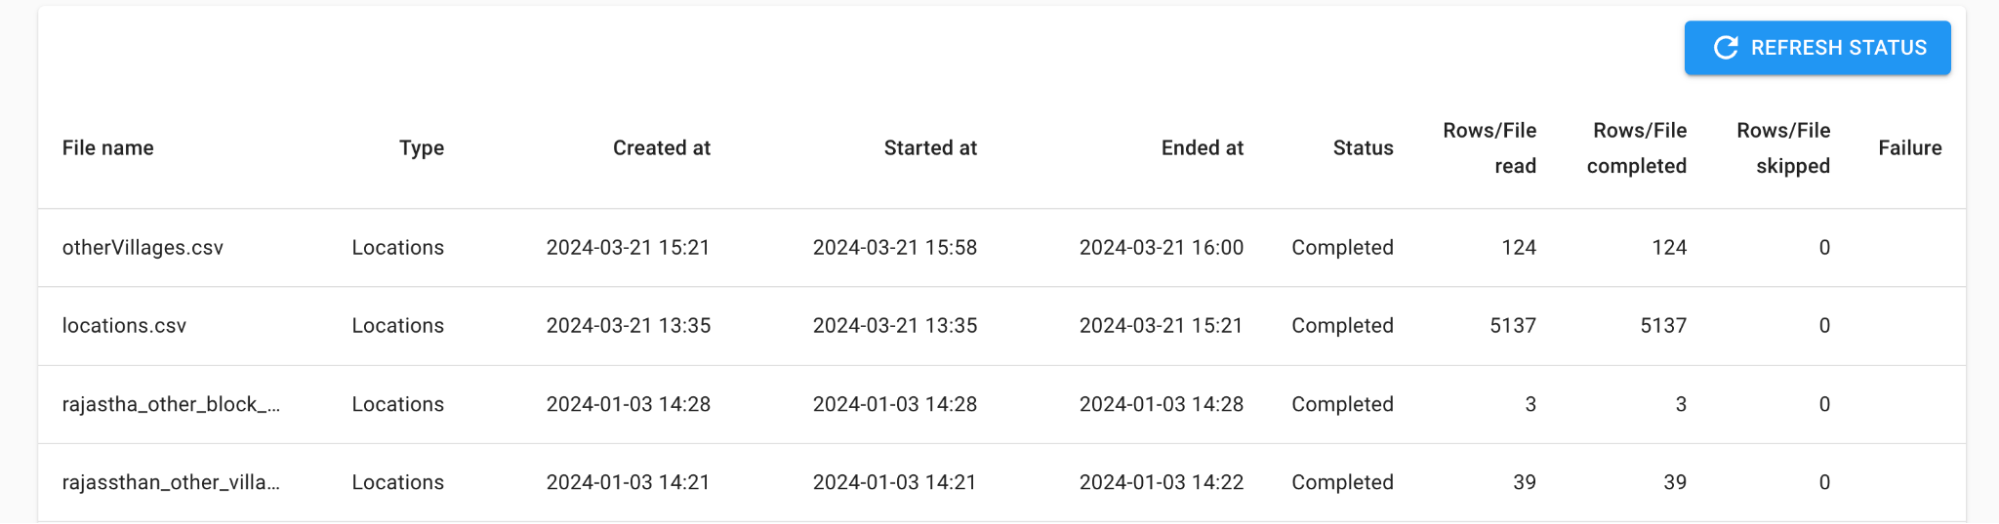 The “Status” column will indicate the overall status of the specific upload activity. With other columns like “Rows/File read” , “Rows/File completed” and “Rows/File skipped” indicating the Granular row-level progress of the file processing.
The final “Failure” column, will consist of Hyperlinks to Download an Error Information file, which would be present, only upon Erroneous completion of the upload activity.

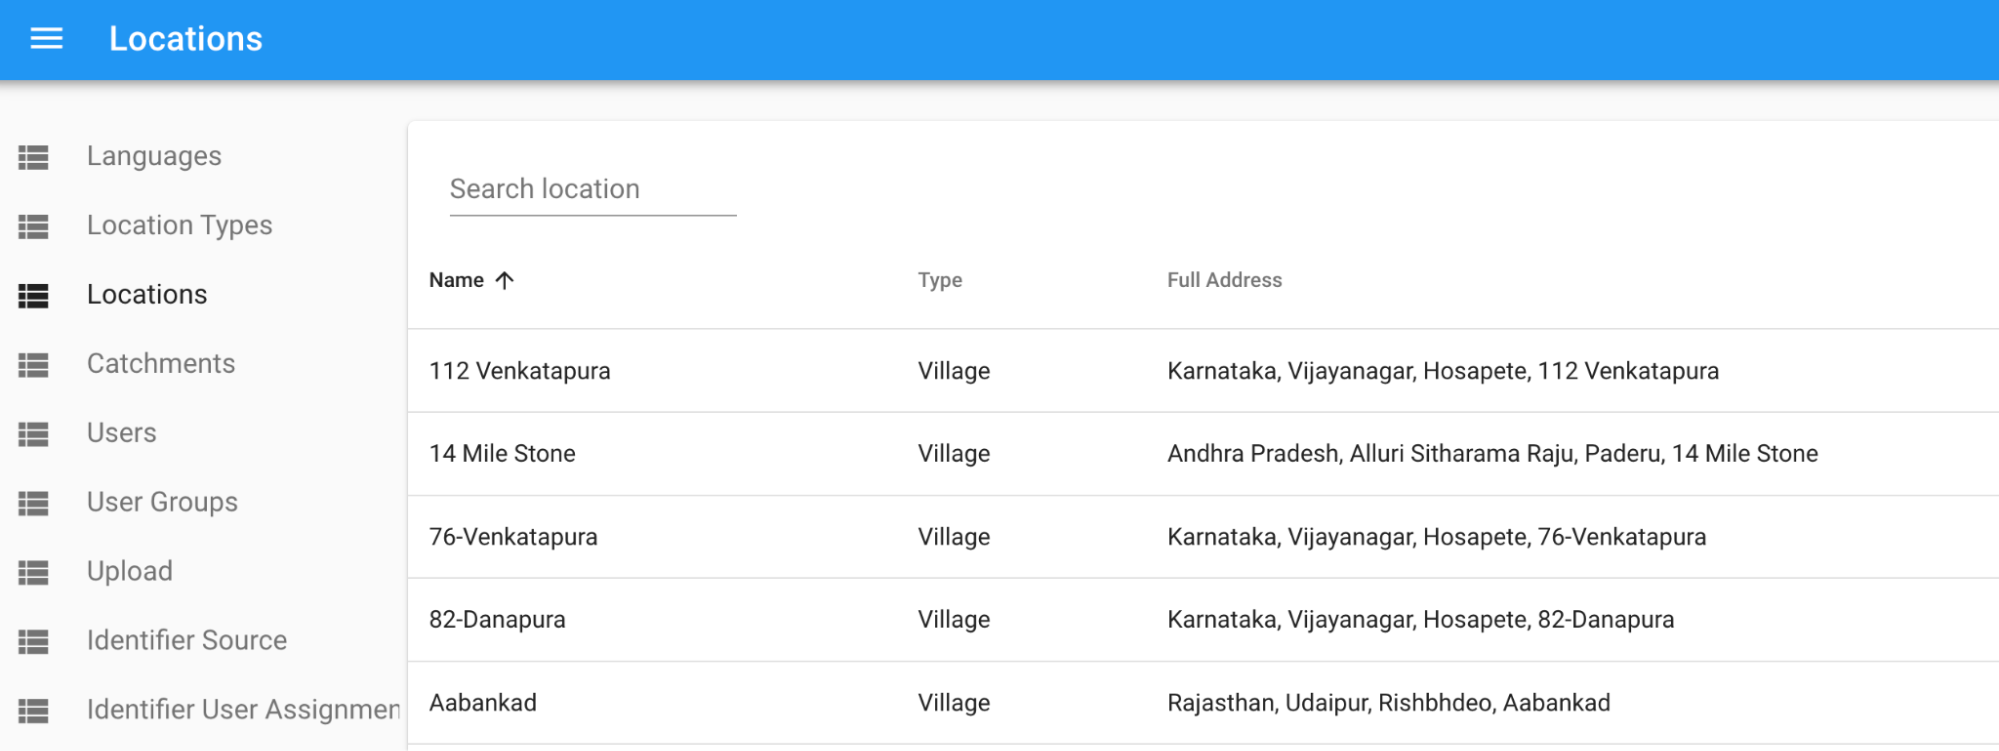
Verification of Uploaded content
On successful upload of a file, the Project team can verify from the Locations tab in the “Admin” application, whether the uploaded content was indeed processed successfully as per requirement. Search for the newly created Locations and click on the same to view its details, to confirm that its created with exact configuration as intended.
Updated 7 months ago